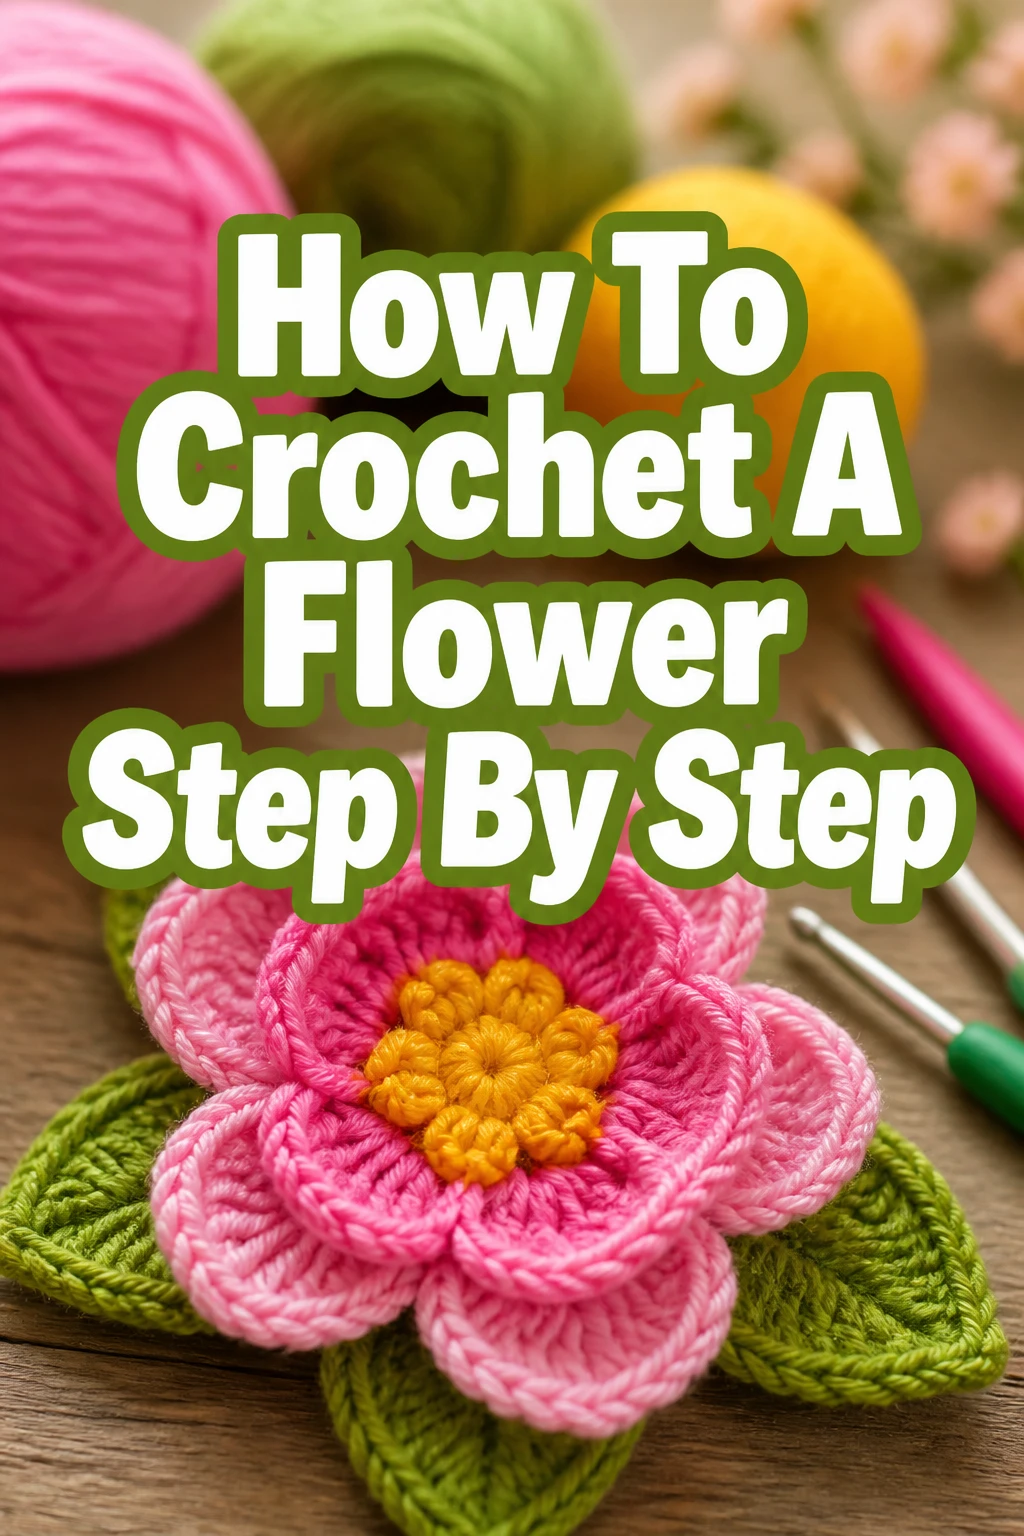
How To Crochet A Flower Step By Step
Crocheting a flower is a wonderful way to add a touch of handmade beauty to any project or space.
I remember the joy of creating my very first bloom; it felt like magic transforming simple yarn into something so delicate.
This guide will walk you through each stitch, ensuring you can confidently create your own lovely floral designs.
Quick Overview
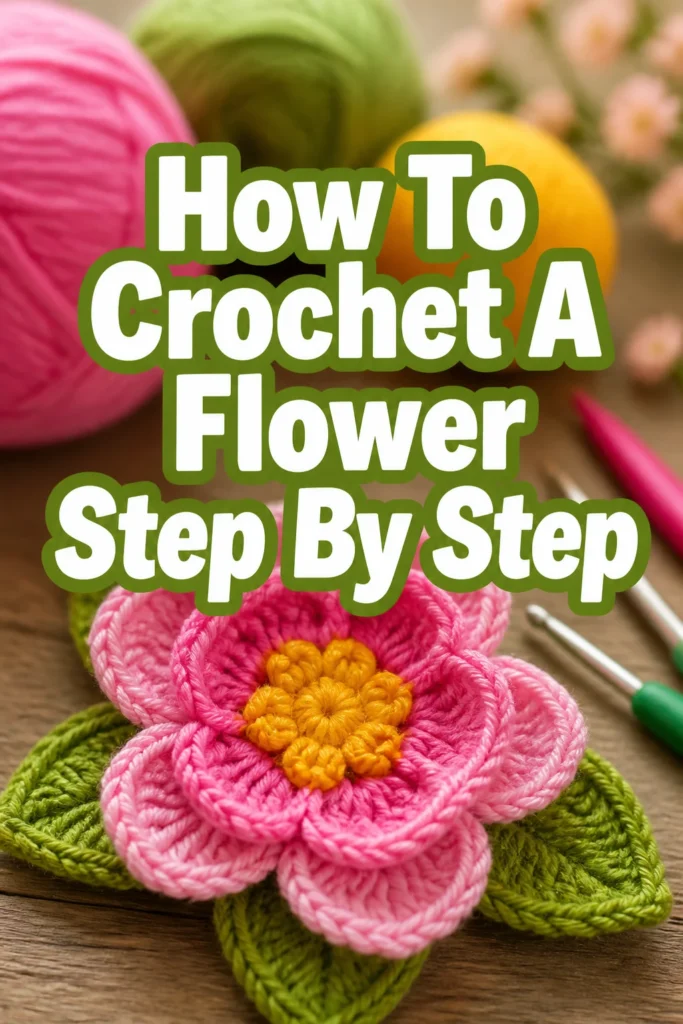
You’re about to create a charming, versatile crochet flower, perfect for embellishing hats, bags, or even as a standalone decoration.
- Time needed: 30-60 minutes
- Difficulty: Beginner
- What you’ll need: Yarn, crochet hook, scissors, yarn needle
Step-by-Step Instructions
Step 1: Gather Your Materials
Before you begin, make sure you have all your tools ready. A little preparation makes the entire process smoother.
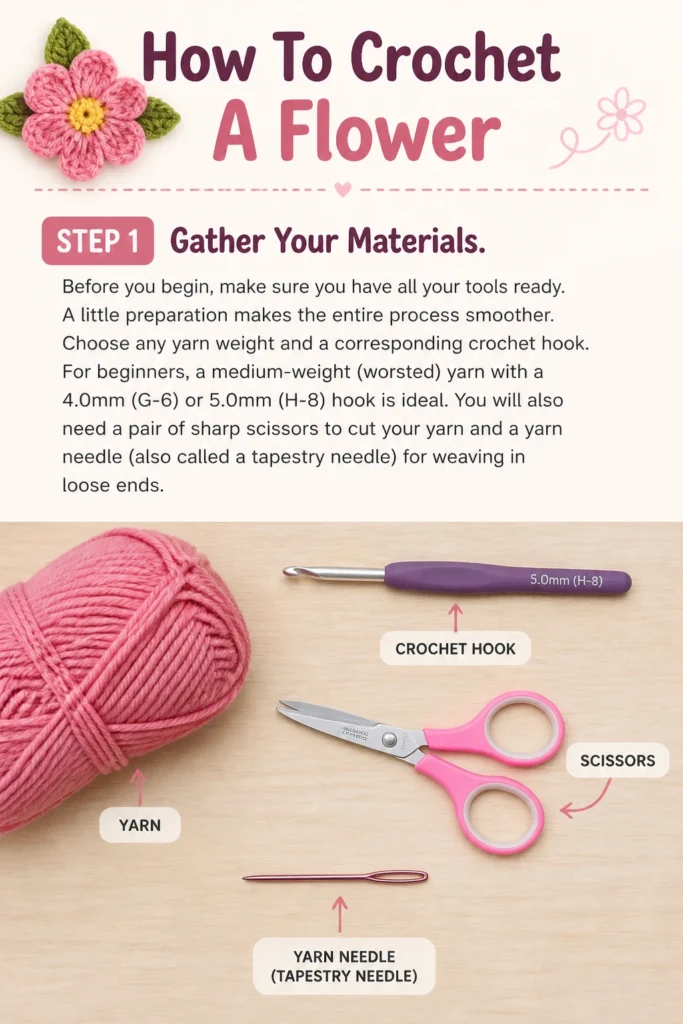
Choose any yarn weight and a corresponding crochet hook. For beginners, a medium-weight (worsted) yarn with a 4.0mm (G-6) or 5.0mm (H-8) hook is ideal.
You will also need a pair of sharp scissors to cut your yarn and a yarn needle (also called a tapestry needle) for weaving in loose ends.
Step 2: Create a Slip Knot and Chain
Begin by making a slip knot on your crochet hook. This is the foundation for your first stitch.
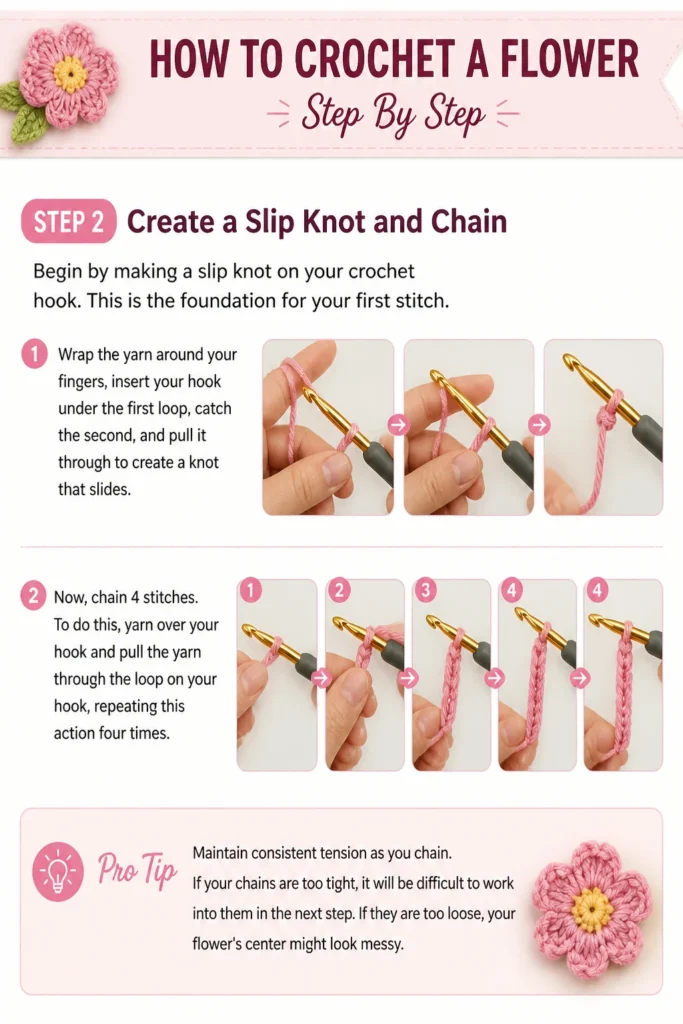
Wrap the yarn around your fingers, insert your hook under the first loop, catch the second, and pull it through to create a knot that slides.
Now, chain 4 stitches. To do this, yarn over your hook and pull the yarn through the loop on your hook, repeating this action four times.
Pro Tip: Maintain consistent tension as you chain. If your chains are too tight, it will be difficult to work into them in the next step. If they are too loose, your flower’s center might look messy.
Step 3: Form the Center Ring
We need to create a small ring to work our petals into. This forms the very center of your flower.
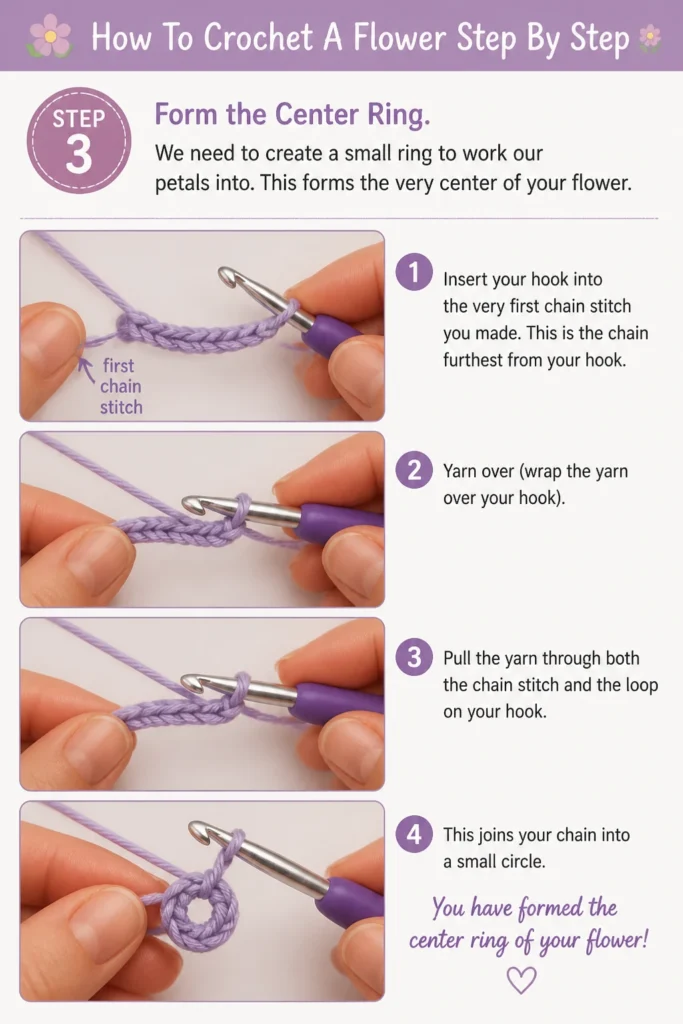
Insert your hook into the very first chain stitch you made. This is the chain furthest from your hook.
Complete a slip stitch by yarning over and pulling the yarn through both the chain stitch and the loop on your hook. This joins your chain into a small circle.
Step 4: Crochet the First Petal
Now we begin building the first petal of your flower. We will use a combination of simple stitches to create a lovely shape.
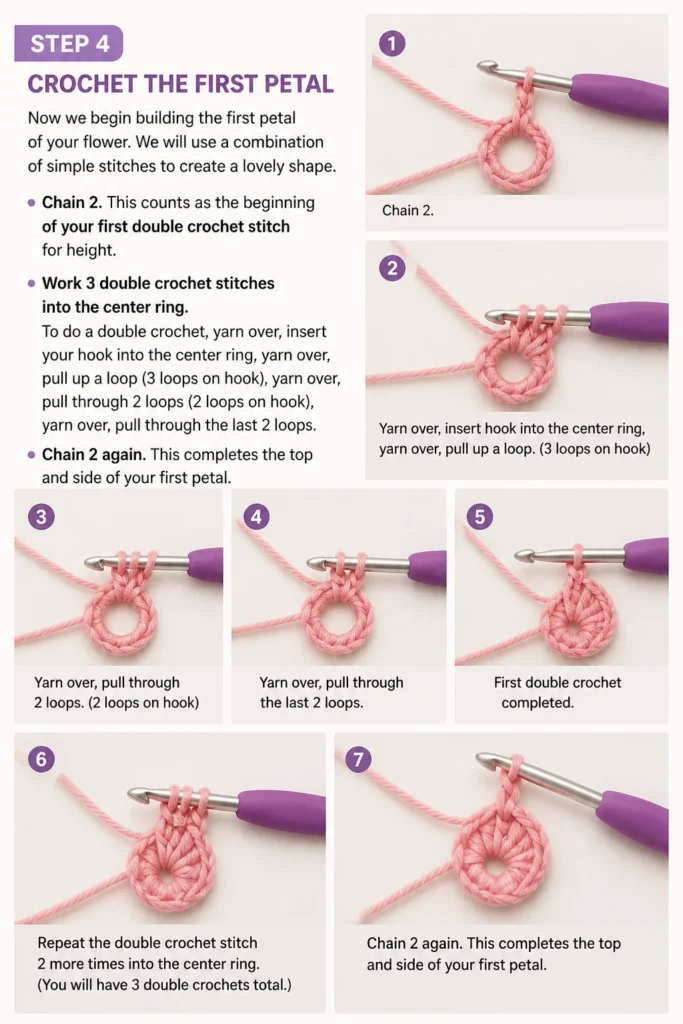
Chain 2. This counts as the beginning of your first double crochet stitch for height.
Work 3 double crochet stitches into the center ring. To do a double crochet, yarn over, insert your hook into the center ring, yarn over, pull up a loop (3 loops on hook), yarn over, pull through 2 loops (2 loops on hook), yarn over, pull through the last 2 loops.
Chain 2 again. This completes the top and side of your first petal.
Step 5: Finish the First Petal and Start the Next
To give your petal its distinct shape, we will anchor it back into the center.
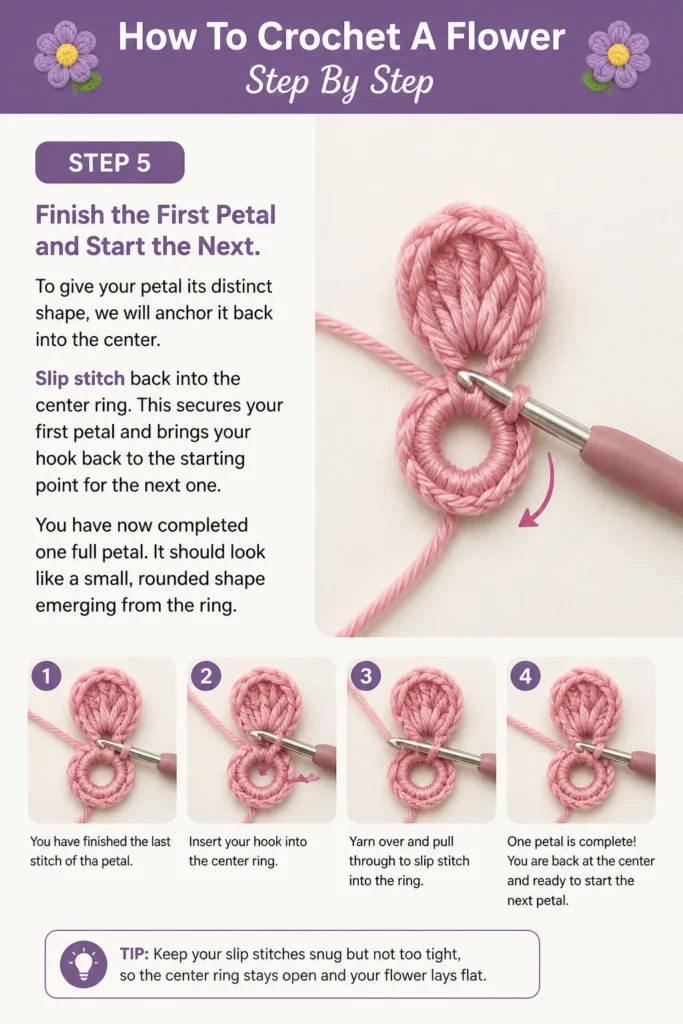
Slip stitch back into the center ring. This secures your first petal and brings your hook back to the starting point for the next one.
You have now completed one full petal. It should look like a small, rounded shape emerging from the ring.
Step 6: Repeat for Remaining Petals
To create a full flower, you will repeat the petal-making sequence several times.
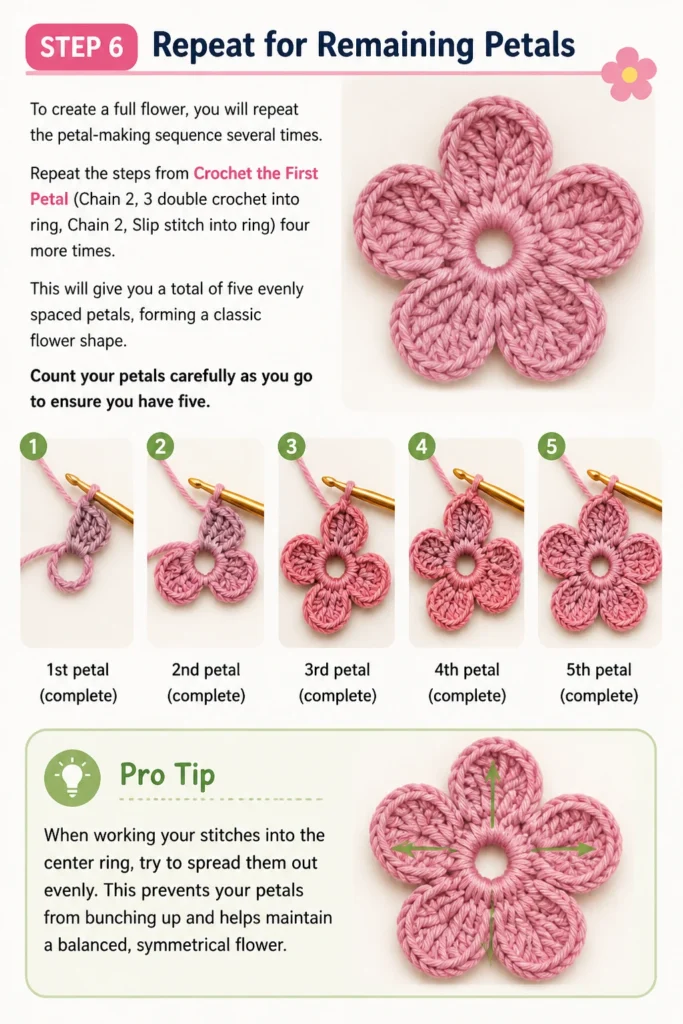
Repeat the steps from “Crochet the First Petal” (Chain 2, 3 double crochet into ring, Chain 2, Slip stitch into ring) four more times.
This will give you a total of five evenly spaced petals, forming a classic flower shape. Count your petals carefully as you go to ensure you have five.
Pro Tip: When working your stitches into the center ring, try to spread them out evenly. This prevents your petals from bunching up and helps maintain a balanced, symmetrical flower.
Step 7: Finish Off Your Work
Once you have completed all five petals, it’s time to secure your work so it doesn’t unravel.
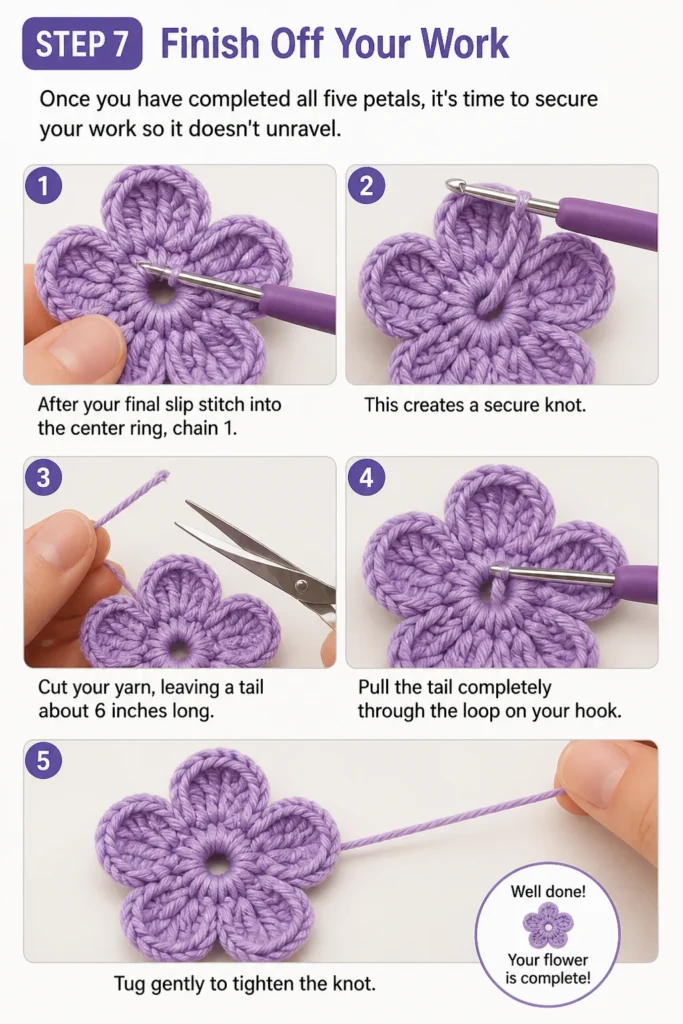
After your final slip stitch into the center ring, chain 1. This creates a secure knot.
Cut your yarn, leaving a tail about 6 inches long. Pull the tail completely through the loop on your hook and tug gently to tighten the knot.
Step 8: Weave in the Ends
The final step for a polished look is to hide any loose yarn tails. This makes your flower look professional and prevents fraying.
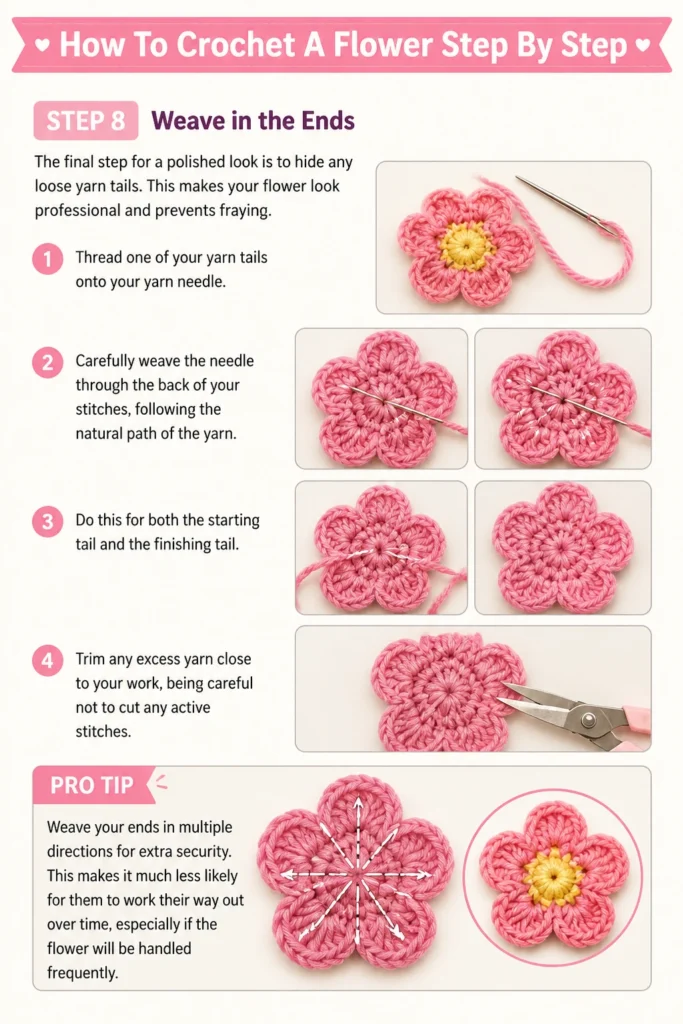
Thread one of your yarn tails onto your yarn needle. Carefully weave the needle through the back of your stitches, following the natural path of the yarn.
Do this for both the starting tail and the finishing tail. Trim any excess yarn close to your work, being careful not to cut any active stitches.
Pro Tip: Weave your ends in multiple directions for extra security. This makes it much less likely for them to work their way out over time, especially if the flower will be handled frequently.
Common Mistakes to Avoid
Incorrect Yarn and Hook Size
Using a hook that is too large for your yarn can result in a loose, floppy flower with noticeable gaps between stitches. Conversely, a hook that is too small can make your stitches incredibly tight and difficult to work, leading to a stiff and sometimes distorted flower.
Always check your yarn label for recommended hook sizes, or choose a hook that feels comfortable and produces an even fabric for your chosen yarn weight. Experimentation helps you find the perfect match.
Too Tight or Too Loose Tension
Inconsistent tension is a common pitfall for beginners. If your tension is too tight, your flower might curl or be difficult to manipulate, and your stitches will be hard to see. If it’s too loose, your flower might lack structure and appear flimsy.
Practice holding your yarn and hook in a way that allows for smooth, even feeding of the yarn. Consistency is key; aim for a relaxed grip that produces uniform stitches throughout your project.
Forgetting to Count Stitches
Skipping stitch counts can lead to an uneven number of petals or petals that are not symmetrical. A flower with four petals on one side and five on the other will look lopsided.
Take a moment to count your chain stitches, double crochets, and slip stitches for each petal. This small habit ensures your flower grows evenly and maintains its intended shape and design.
Skipping the Finishing Touches
Neglecting to weave in your ends properly is a mistake that can compromise the durability and appearance of your flower. Loose ends can unravel, causing your beautiful work to fall apart over time.
Always take the time to thread your yarn tails through several stitches on the back of your work. This secures them invisibly and ensures your flower remains intact and beautiful for a long time.
Troubleshooting
My Flower Looks Uneven or Lopsided
If your flower appears uneven, the most common culprits are inconsistent tension or an inaccurate stitch count. Some petals might be larger or smaller than others, or they might be bunched together.
Carefully review your last few petals. Ensure you are working the same number of double crochet stitches and chain stitches for each one. Also, try to maintain a consistent grip on your yarn to keep your tension even.
The Center Hole is Too Big
A large center hole often occurs when the initial chain ring is not pulled tight enough or if you’ve used too many chain stitches for the ring. For this simple flower, a chain of 4 stitches joined with a slip stitch usually creates a small, neat center.
When you slip stitch to join your initial chain, pull it snugly. If you find the hole is still too large, consider starting with a chain of 3 instead of 4, or try using a magic ring technique on future projects for an even tighter center.
My Petals are Curling or Not Lying Flat
Petals that curl can be caused by either too many stitches within each petal or overly tight tension. If there are too many stitches, the yarn has nowhere to go but to curl upwards. Tight tension can also pull the fabric into itself.
First, check your stitch count per petal against the instructions. If it’s correct, try loosening your grip slightly to ease your tension. Sometimes, gently flattening the flower with your hands or “blocking” it (lightly dampening and pinning it flat to dry) can also help.
Key Takeaways
- Choosing the right yarn and hook size is fundamental for a well-proportioned flower.
- Mastering basic stitches like chain, slip stitch, and double crochet forms the core of this project.
- Maintaining consistent tension throughout your work ensures a uniform and attractive finished piece.
- Accurately counting your stitches for each petal is crucial for achieving a symmetrical flower.
- Properly weaving in your yarn ends provides a clean, professional finish and prevents unraveling.
- Practice is essential; each flower you make will improve your technique and confidence.
Frequently Asked Questions
What kind of yarn is best for crocheting flowers?
For beginners, acrylic yarn is an excellent choice due to its affordability, wide color range, and ease of use. Cotton yarn also works wonderfully, offering crisp stitch definition and a slightly stiffer finish, which can be great for flowers that need to hold their shape.
Can I make bigger or smaller flowers using this pattern?
Absolutely! You can easily adjust the size of your flower. To make a larger flower, use a thicker yarn and a larger hook. To make it smaller, use thinner yarn and a smaller hook. You can also add more double crochet stitches within each petal or add more chain stitches for a puffier look.
How can I attach my crochet flower to other items?
There are several ways to attach your finished flower. You can use your yarn needle and a length of matching yarn to carefully sew it onto fabric, hats, or bags. For a quicker attachment, a hot glue gun works well for non-wearable items. You can also sew a pin back onto the flower to create a brooch.
Are there different types of crochet flowers I can learn?
Yes, the world of crochet flowers is vast and beautiful! Once you master this basic pattern, you can explore patterns for roses, sunflowers, daisies, and many other floral varieties. Many patterns incorporate different stitch combinations and layering techniques to create intricate, realistic blooms.
Our Top Recommended Finds
- Ergonomic Crochet Hook Set: These hooks are designed for comfort, reducing hand strain during longer crocheting sessions and offering a variety of sizes.
- Soft Acrylic Yarn Pack: A multi-color pack provides a great selection for experimenting with different flower hues without having to buy full skeins of each color.
- Yarn Needle Set with Scissors: Essential for finishing your projects neatly, a set ensures you have the right size needle for any yarn weight and sharp scissors for clean cuts.
Your Floral Journey Begins Now
You’ve taken the first exciting step into the world of crocheting beautiful flowers. Each stitch you make is a testament to your growing skill and creativity.
Don’t stop here; let this simple flower be the beginning of many delightful projects. Consider trying different yarn colors, adding a small bead to the center, or even combining several flowers into a bouquet.
Embrace the process, enjoy the meditative rhythm of the hook and yarn, and watch as your imagination blossoms. Pick up your hook and yarn today and start creating your own garden of handmade beauty.