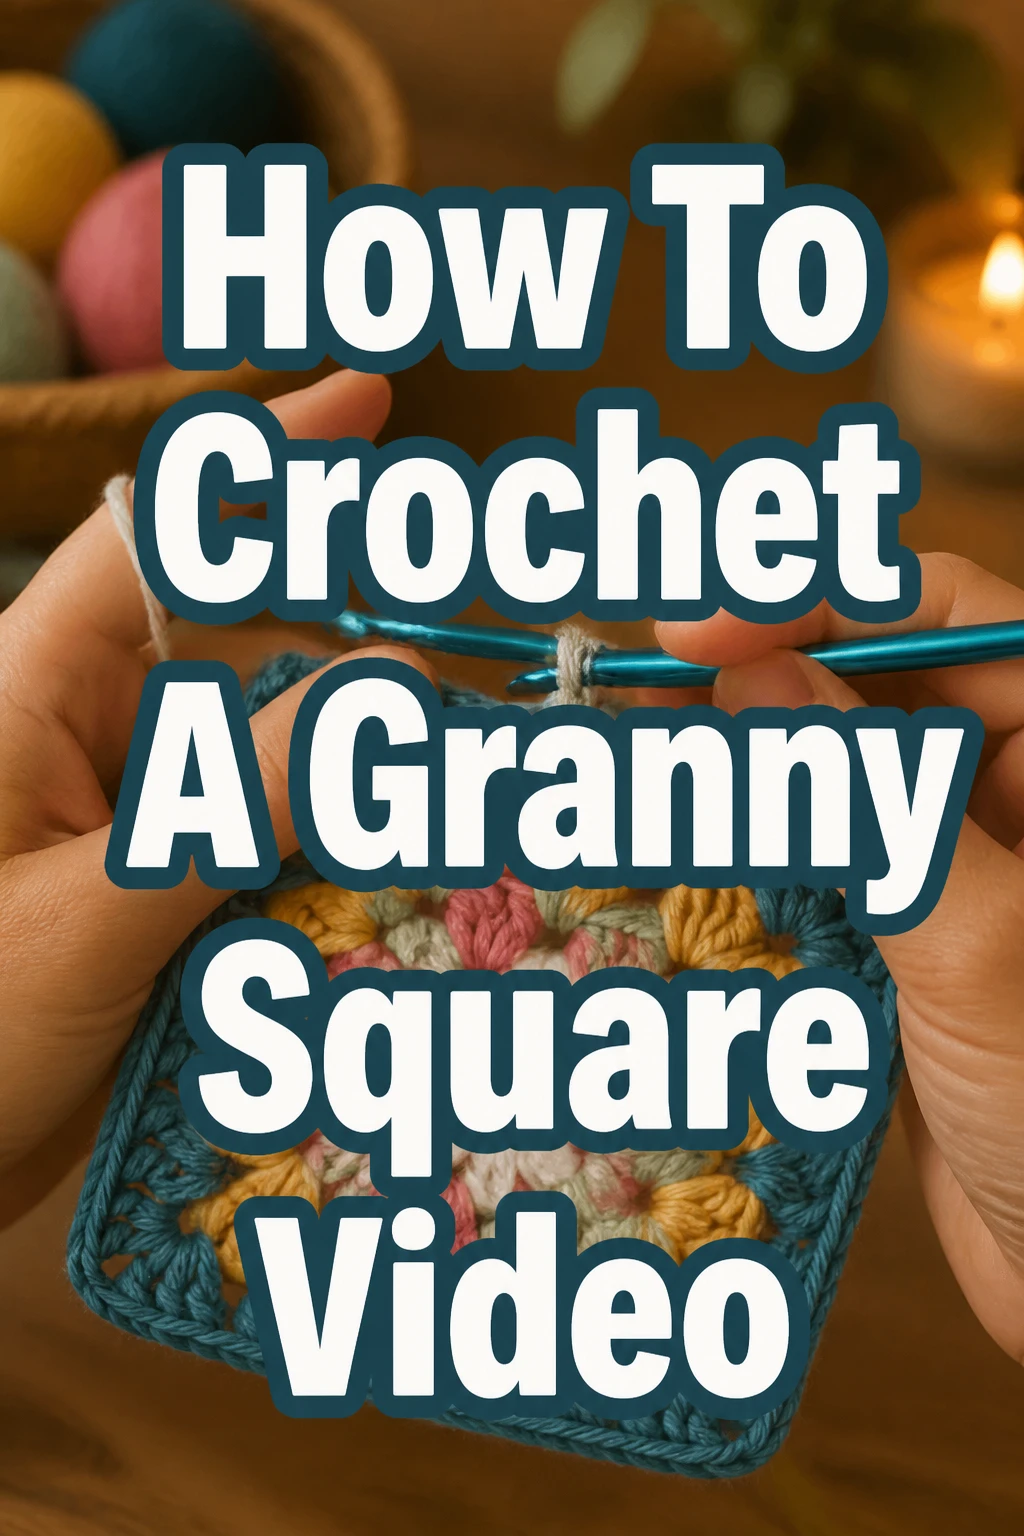
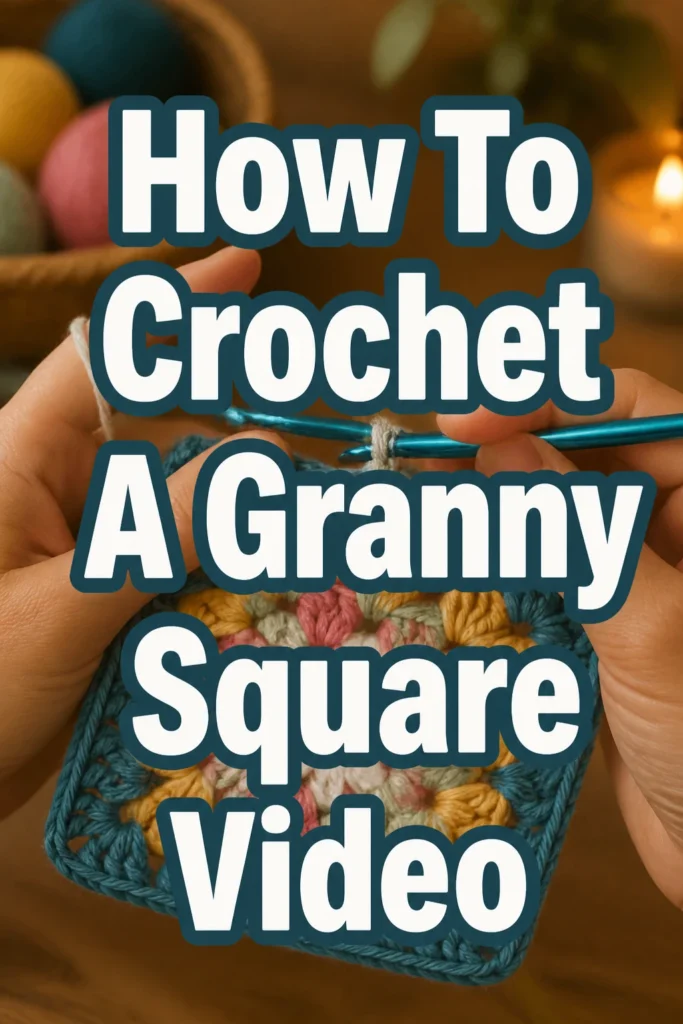
How To Crochet A Granny Square Video
Learning to crochet a granny square opens up a world of creative projects.
I remember my first wobbly square, full of dropped stitches and uneven edges, but it was a start.
This guide shares all the practical tips I’ve gathered over years of crocheting, helping you master this classic stitch with confidence.
Quick Overview
You are about to learn the foundational steps to create a beautiful granny square.
This essential crochet pattern forms the basis for blankets, garments, and many other charming items.
- Time needed: 30-60 minutes for your first square, much faster with practice
- Difficulty: Beginner
- What you’ll need: Yarn, a crochet hook, scissors, and a tapestry needle
Step-by-Step Instructions
Step 1: Gather Your Tools and Materials
Select your yarn. For beginners, a medium-weight (worsted weight, size 4) acrylic yarn is ideal.
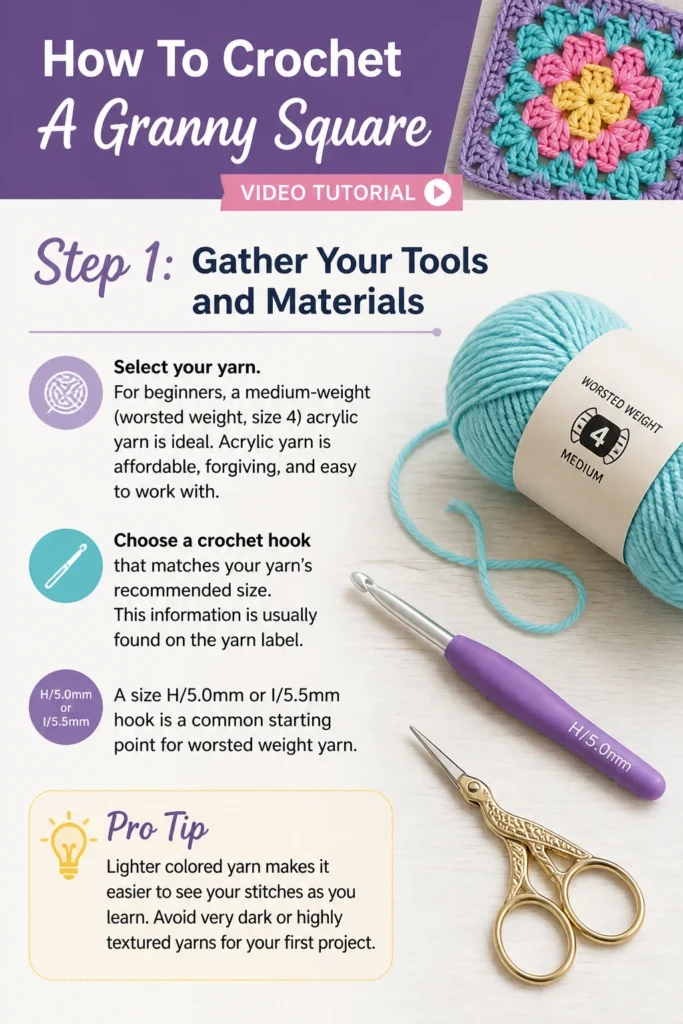
Acrylic yarn is affordable, forgiving, and easy to work with.
Choose a crochet hook that matches your yarn’s recommended size. This information is usually found on the yarn label.
A size H/5.0mm or I/5.5mm hook is a common starting point for worsted weight yarn.
Pro Tip: Lighter colored yarn makes it easier to see your stitches as you learn. Avoid very dark or highly textured yarns for your first project.
Step 2: Create a Slip Knot
Form a loop with your yarn, ensuring the tail end crosses over the working yarn.
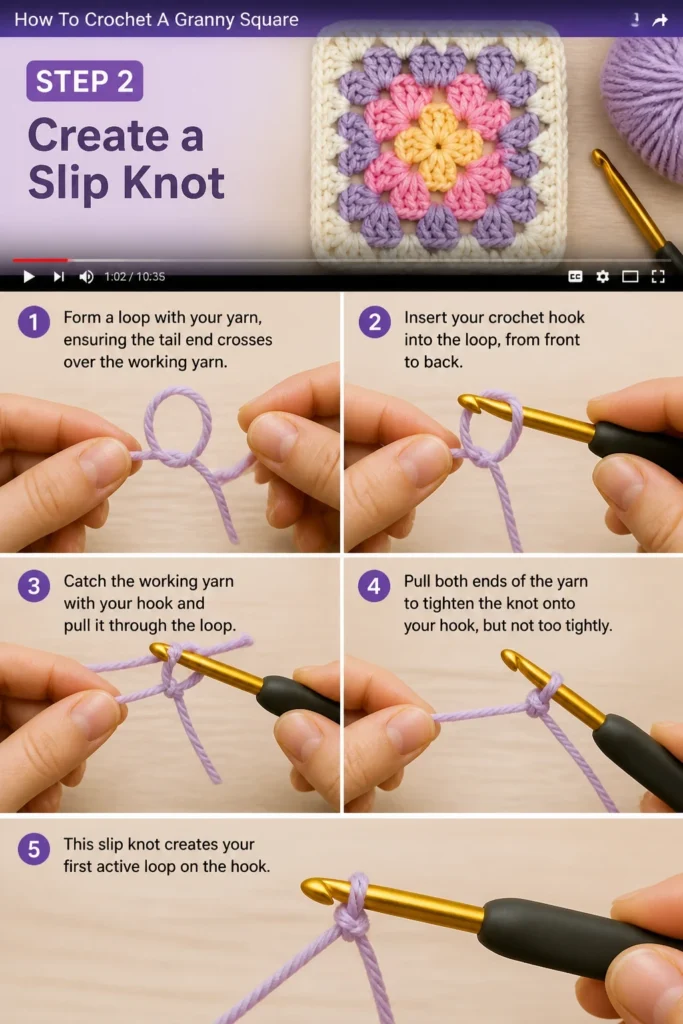
Insert your crochet hook into the loop, from front to back.
Catch the working yarn with your hook and pull it through the loop.
Pull both ends of the yarn to tighten the knot onto your hook, but not too tightly.
This slip knot creates your first active loop on the hook.
Step 3: Chain Four Stitches
Wrap the working yarn over your hook from back to front. This is called “yarn over” (YO).
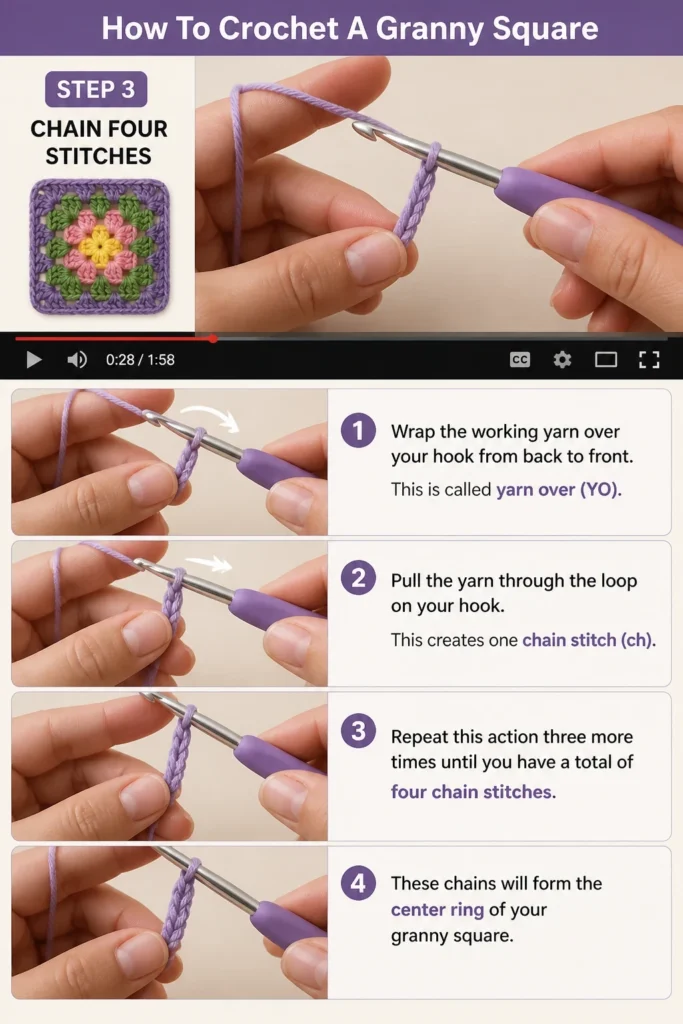
Pull the yarn through the loop on your hook. This creates one chain stitch (ch).
Repeat this action three more times until you have a total of four chain stitches.
These chains will form the center ring of your granny square.
Step 4: Join to Form a Ring
Insert your hook into the very first chain stitch you made.
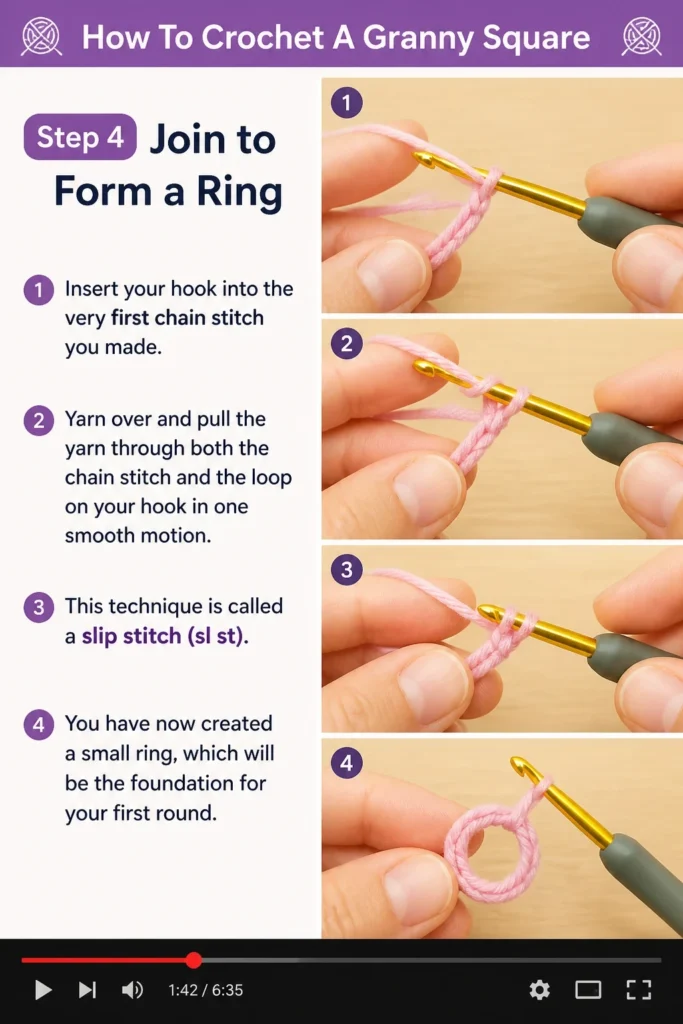
Yarn over and pull the yarn through both the chain stitch and the loop on your hook in one smooth motion.
This technique is called a “slip stitch” (sl st).
You have now created a small ring, which will be the foundation for your first round.
Step 5: Begin Round 1
Chain three stitches (ch 3). This chain acts as your first double crochet (dc) stitch for this round.
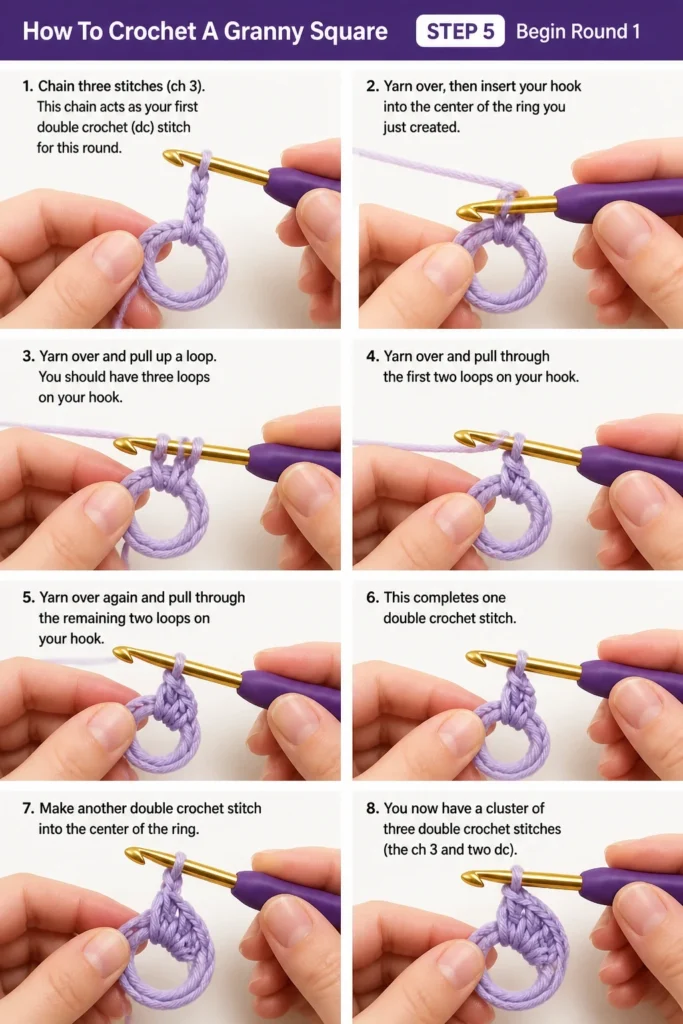
Yarn over, then insert your hook into the center of the ring you just created.
Yarn over and pull up a loop. You should have three loops on your hook.
Yarn over and pull through the first two loops on your hook.
Yarn over again and pull through the remaining two loops on your hook. This completes one double crochet stitch.
Make another double crochet stitch into the center of the ring.
You now have a cluster of three double crochet stitches (the ch 3 and two dc).
Step 6: Create Your First Corner
Chain two stitches (ch 2).
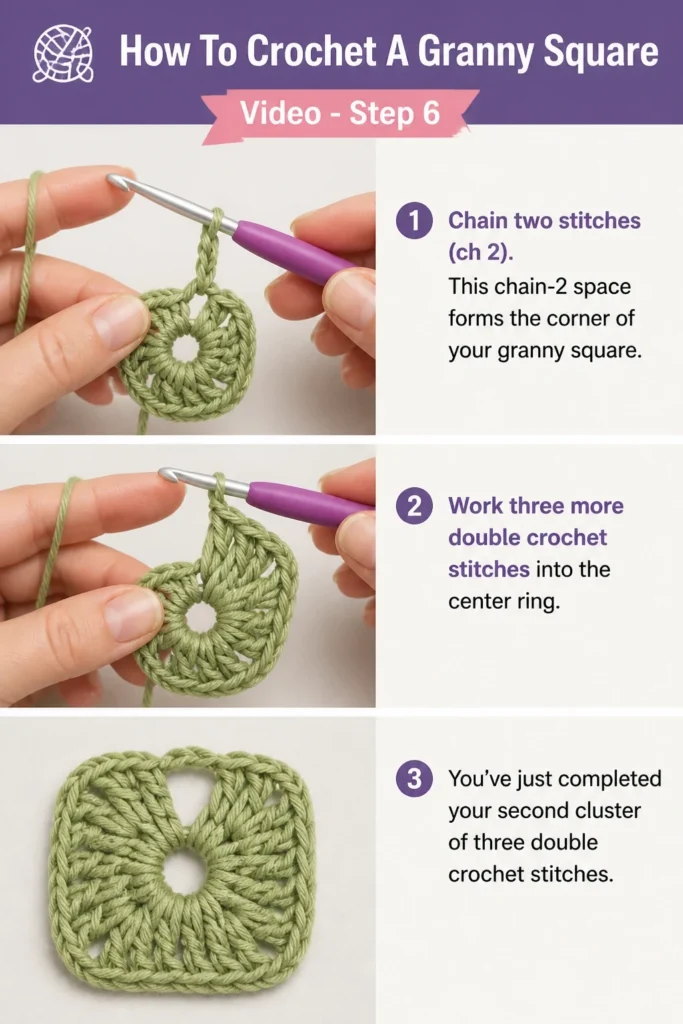
This chain-2 space forms the corner of your granny square.
Work three more double crochet stitches into the center ring.
You’ve just completed your second cluster of three double crochet stitches.
Step 7: Complete Round 1
Repeat the sequence: chain two, then three double crochet stitches into the ring.
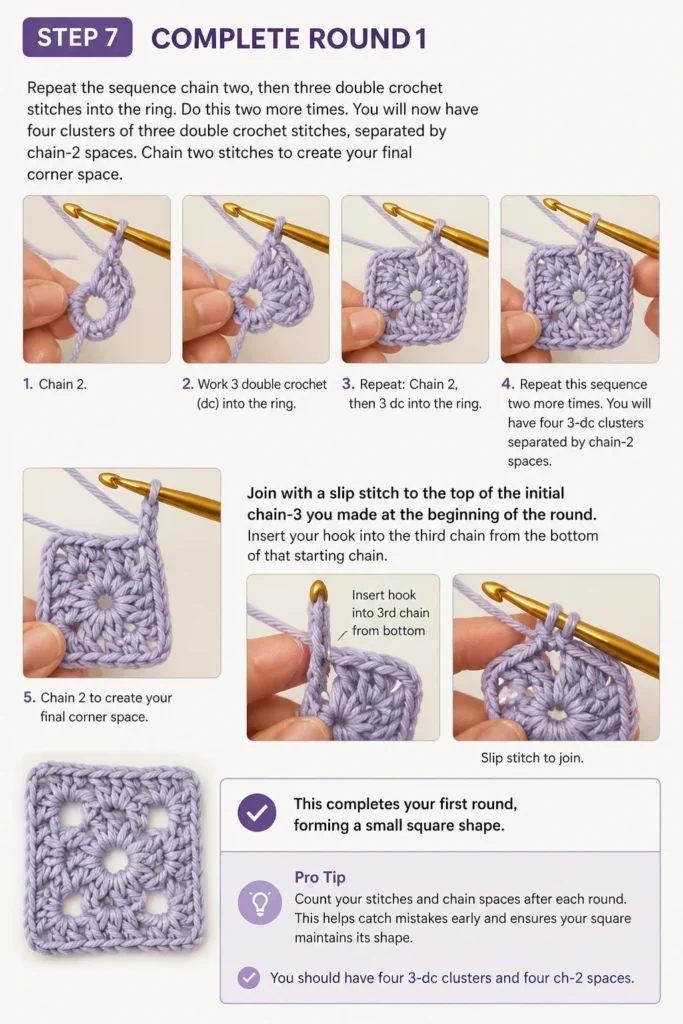
Do this two more times.
You will now have four clusters of three double crochet stitches, separated by chain-2 spaces.
Chain two stitches to create your final corner space.
Join with a slip stitch to the top of the initial chain-3 you made at the beginning of the round.
Insert your hook into the third chain from the bottom of that starting chain.
This completes your first round, forming a small square shape.
Pro Tip: Count your stitches and chain spaces after each round. This helps catch mistakes early and ensures your square maintains its shape. You should have four 3-dc clusters and four ch-2 spaces.
Step 8: Begin Round 2
Slip stitch into the first chain-2 space of the previous round.
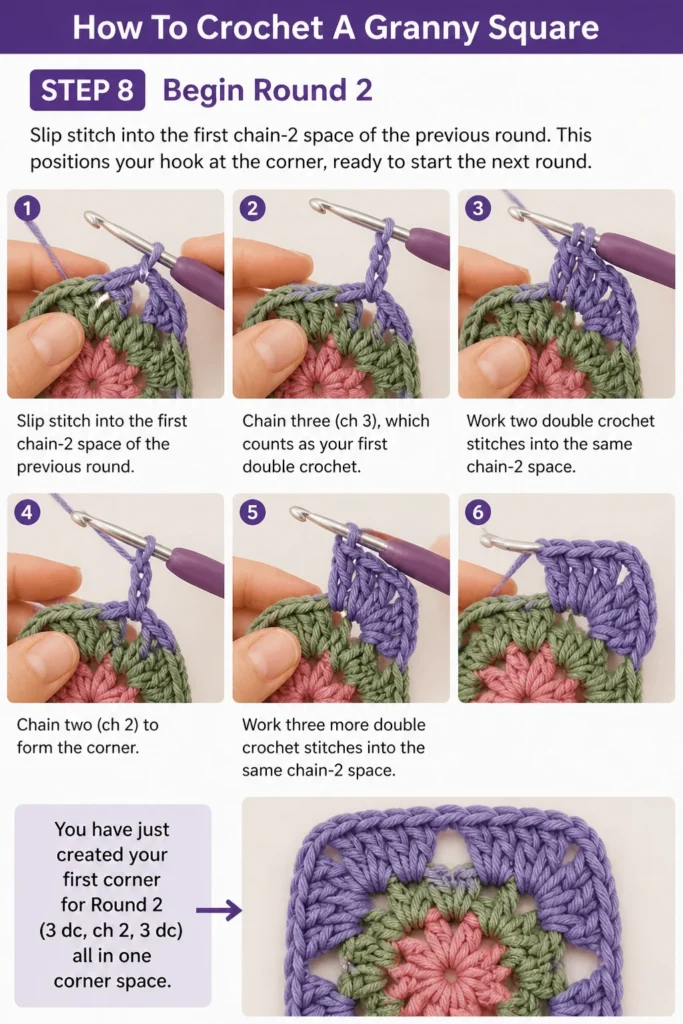
This positions your hook at the corner, ready to start the next round.
Chain three (ch 3), which counts as your first double crochet.
Work two double crochet stitches into the same chain-2 space.
Chain two (ch 2) to form the corner.
Work three more double crochet stitches into the same chain-2 space.
You have just created your first corner for Round 2: (3 dc, ch 2, 3 dc) all in one corner space.
Step 9: Continue Round 2
Chain one (ch 1) to create a small space between your corner and the next cluster.
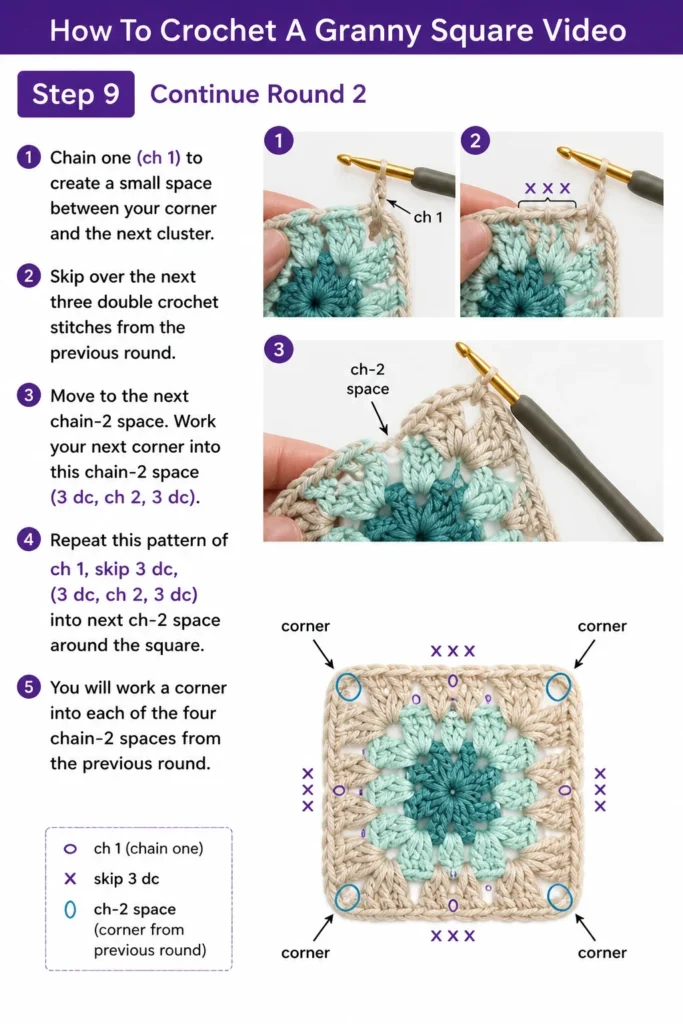
Skip over the next three double crochet stitches from the previous round.
Move to the next chain-2 space.
Work your next corner into this chain-2 space: (3 dc, ch 2, 3 dc).
Repeat this pattern of “ch 1, skip 3 dc, (3 dc, ch 2, 3 dc) into next ch-2 space” around the square.
You will work a corner into each of the four chain-2 spaces from the previous round.
Step 10: Finish Round 2 and Beyond
Complete the last corner for Round 2.
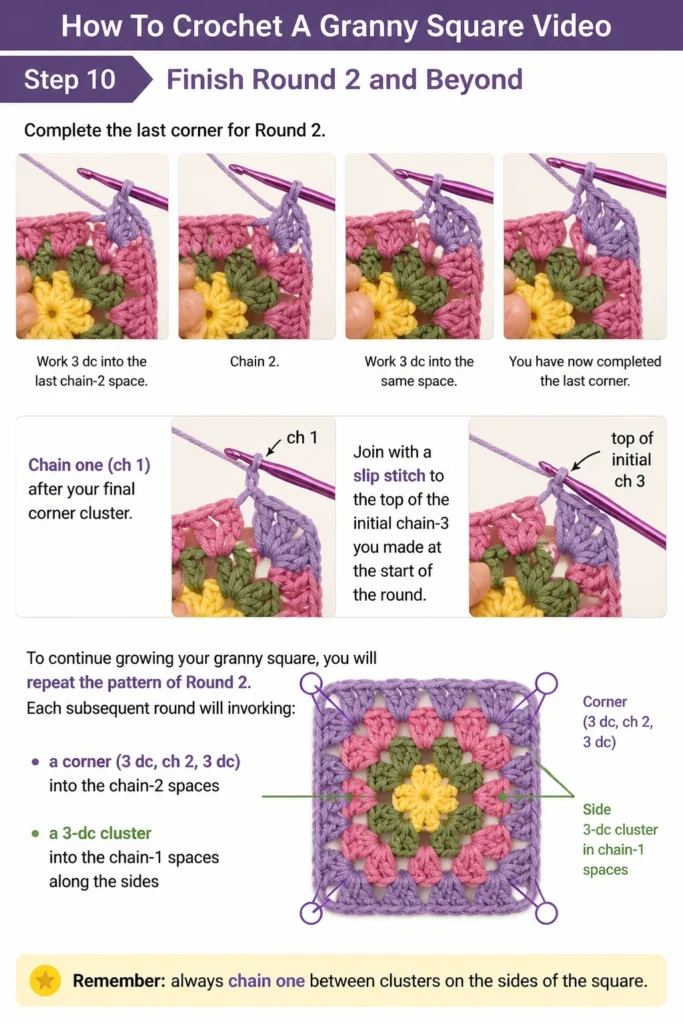
Chain one (ch 1) after your final corner cluster.
Join with a slip stitch to the top of the initial chain-3 you made at the start of the round.
To continue growing your granny square, you will repeat the pattern of Round 2.
Each subsequent round will involve working a corner (3 dc, ch 2, 3 dc) into the chain-2 spaces and a 3-dc cluster into the chain-1 spaces along the sides.
Remember to always chain one between clusters on the sides of the square.
Common Mistakes to Avoid
Skipping Chain Stitches
Forgetting to chain between clusters on the sides, or chaining the wrong number in corners, can distort your granny square.
This often results in a square that pulls in too tightly or flares out excessively.
Always double-check your pattern for the correct number of chains, especially the chain-1 spaces between side clusters and the chain-2 spaces for corners.
Incorrect Hook Size
Using a hook that is too large or too small for your chosen yarn can lead to a fabric that is either too loose and floppy or too stiff and dense.
Refer to your yarn label for the recommended hook size as a starting point, and adjust if necessary to achieve a comfortable tension.
Uneven Tension
Your stitches might look inconsistent, with some being tight and others loose, making the square irregular.
Uneven tension is very common for beginners as you learn to hold the yarn and hook.
Practice helps immensely; try to maintain a consistent grip and gentle pull on your yarn as you work each stitch.
Joining in the Wrong Spot
Improperly joining your rounds can create a noticeable seam or an uneven edge to your square.
Always join with a slip stitch to the top of the starting chain-3 of the previous round, not into the chain-3 space itself.
Look for the third chain from the bottom to ensure a neat finish.
Troubleshooting
My Square is Curling or Cupping
This usually indicates your tension is too tight, or you might be missing some chain stitches in your corners or sides.
Try using a slightly larger hook size to loosen your stitches, or consciously relax your grip on the yarn.
Double-check that you are making two chains in each corner and one chain between side clusters.
My Square is Ruffling or Wavy
A wavy edge often means your tension is too loose, or you are adding too many stitches or chains.
Try using a smaller hook size to tighten up your stitches.
Ensure you are only making two chains in each corner and one chain between the 3-dc clusters on the sides.
I Can’t See My Stitches Clearly
Dark yarn colors or highly textured yarn can make it very difficult to distinguish individual stitches, especially for beginners.
Switch to a lighter, smooth yarn for practice.
Using a bright light source or even a headlamp can also significantly improve visibility.
Key Takeaways
- Always start with a slip knot and four chain stitches to form your central ring.
- Round 1 establishes the four corners with (3 double crochet, chain 2) repeated four times.
- Subsequent rounds involve working (3 double crochet, chain 2, 3 double crochet) into corner spaces.
- Remember to chain one between the 3-dc clusters along the sides of your square in Rounds 2 and beyond.
- Consistent tension and accurate stitch counting are crucial for a well-shaped granny square.
- Don’t be afraid to unravel (frog) your work if you spot a mistake; it’s part of the learning process.
Frequently Asked Questions
Can I use any type of yarn for a granny square?
You can use almost any yarn for a granny square, but beginners often find medium-weight acrylic or cotton easiest to work with.
Different yarn weights and fibers will affect the drape and size of your finished square.
How do I change colors in a granny square?
To change colors, complete the last stitch of your round or cluster with the old color, but stop before the final yarn over.
Instead of yarning over with the old color, yarn over with the new color and pull it through the remaining loops to finish the stitch.
Then, continue crocheting with the new color.
What projects can I make with granny squares?
Granny squares are incredibly versatile! You can join them to create blankets, scarves, bags, sweaters, coasters, or even use them as decorative appliqués.
The possibilities are endless once you master the basic square.
Our Top Recommended Finds
- Ergonomic Crochet Hook Set: A comfortable set of hooks reduces hand fatigue, making long crafting sessions more enjoyable.
- Yarn Ball Winder: This tool transforms skeins into neat cakes, preventing tangles and making yarn easier to work with.
- Stitch Markers: Small plastic markers help you keep track of your first stitch, corners, or specific pattern repeats, especially useful for beginners.
Your Next Stitching Adventure Awaits
You’ve taken the essential first step in your crochet journey by learning the granny square.
This timeless pattern is more than just a square; it’s a building block for countless creative expressions.
Don’t stop here; practice makes perfect, and every square you make will be better than the last.
Consider exploring different granny square variations, learning how to join squares, or even trying out other basic crochet stitches like single crochet or half double crochet.
Grab your hook and yarn today, and let your creativity flow one stitch at a time!