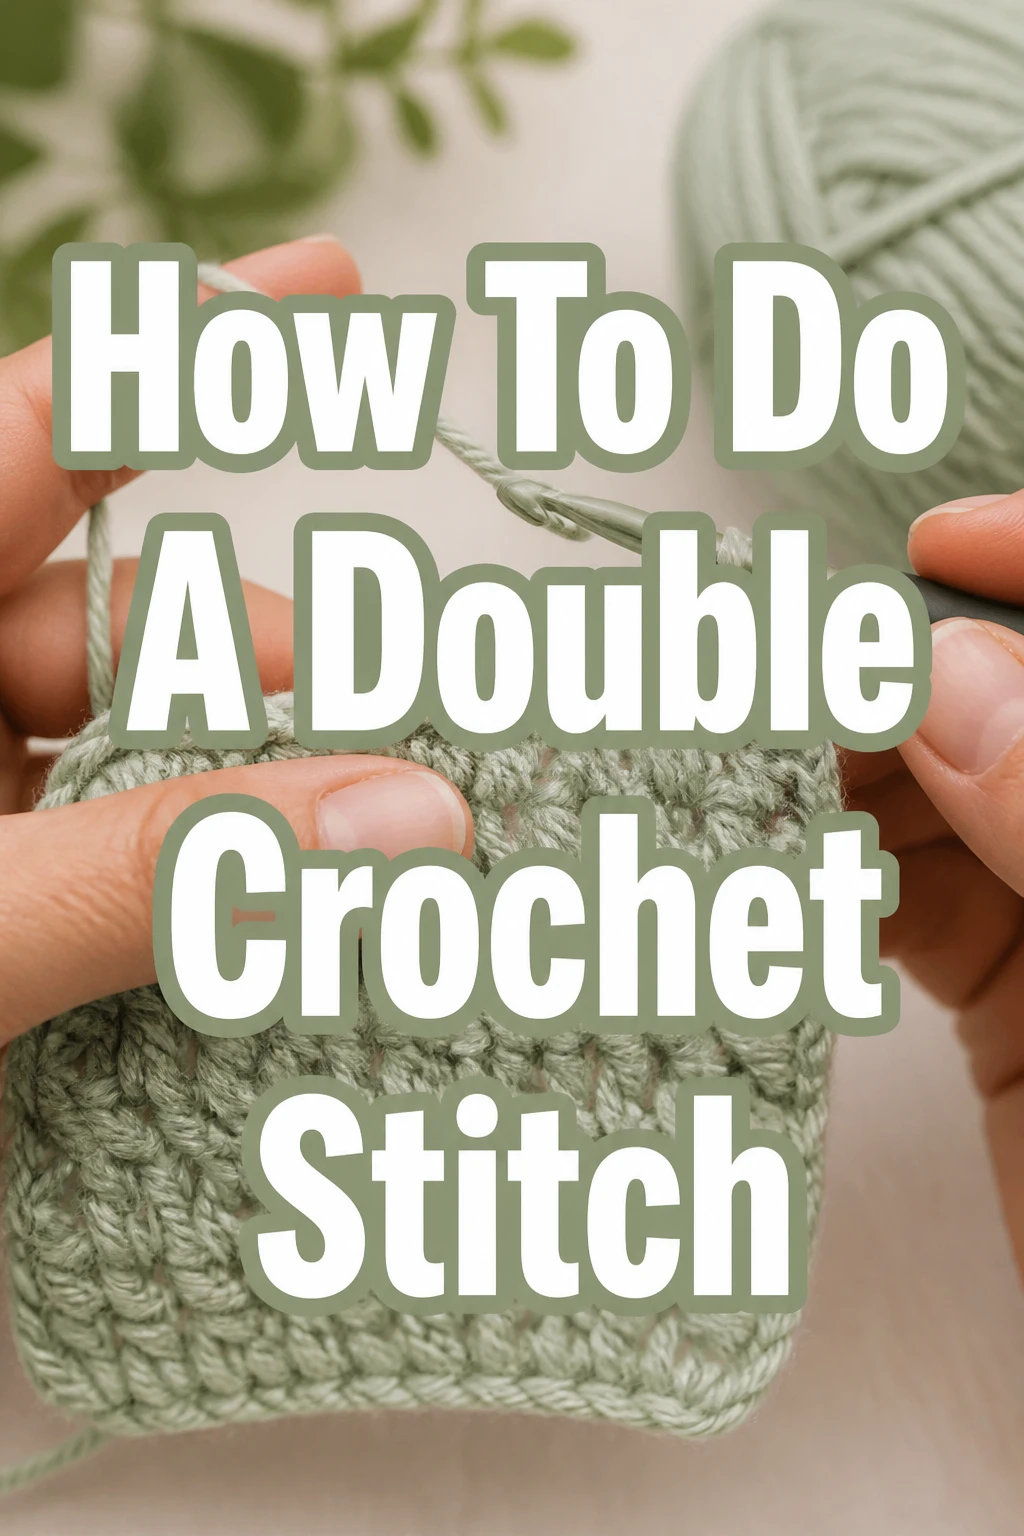
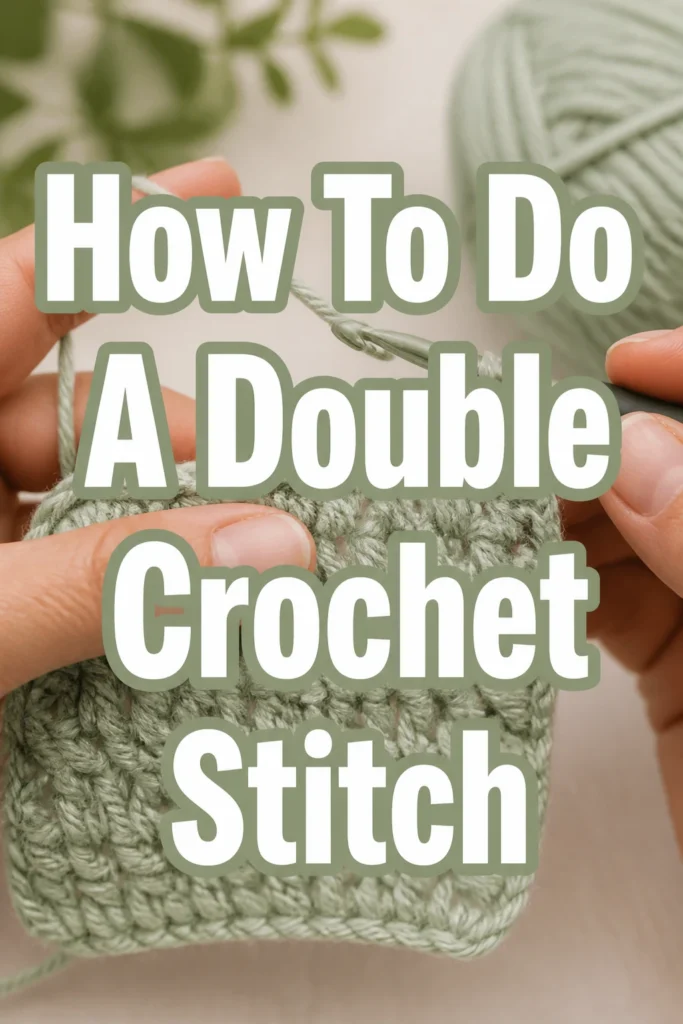
How To Do A Double Crochet Stitch
I remember sitting on my grandmother’s porch with a tangled mess of acrylic yarn and a plastic hook, trying to make sense of the loops.
The double crochet was the first stitch that actually made me feel like I was building something substantial, rather than just a tight knot of string.
I have spent over a decade refining my tension and teaching others how to master this foundational technique with ease and confidence.
Quick Overview
The double crochet stitch is a staple of the craft, known for its height and its ability to create a soft, flexible fabric.
You will learn how to coordinate your hook and yarn to produce consistent, beautiful stitches that can be used for blankets, sweaters, and scarves.
- Time needed: 15 to 20 minutes for basic practice
- Difficulty: Beginner
- What you’ll need: Medium weight yarn, a 5.0mm crochet hook, and a pair of scissors
Step 1: Select Your Materials
Choose a smooth, light-colored yarn for your first attempt at this stitch.
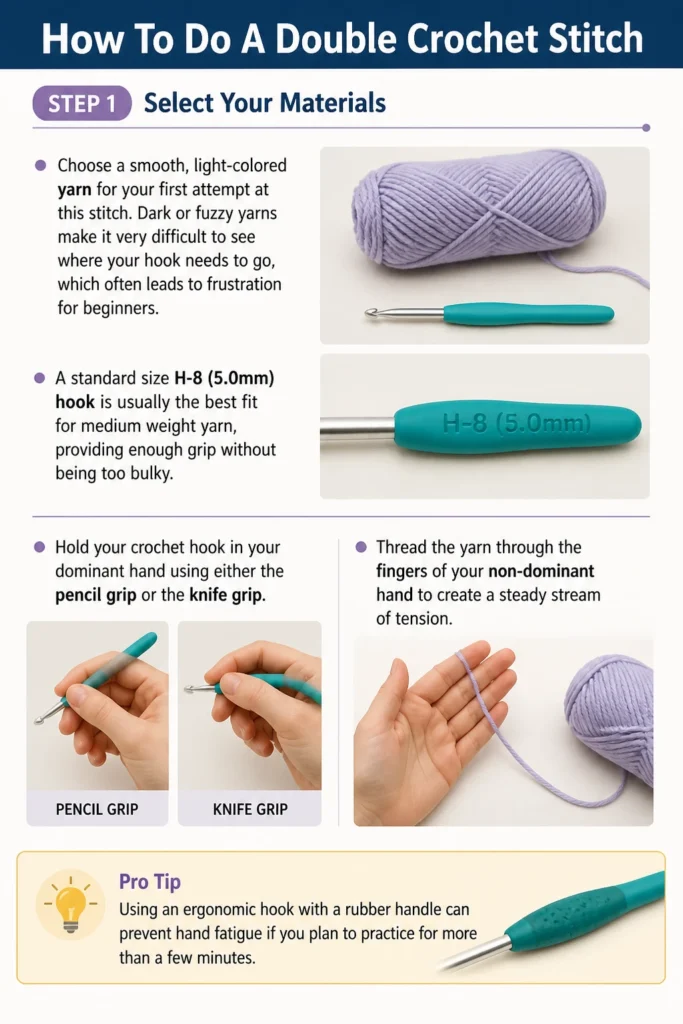
Dark or fuzzy yarns make it very difficult to see where your hook needs to go, which often leads to frustration for beginners.
A standard size H-8 (5.0mm) hook is usually the best fit for medium weight yarn, providing enough grip without being too bulky.
Hold your crochet hook in your dominant hand using either the pencil grip or the knife grip.
Thread the yarn through the fingers of your non-dominant hand to create a steady stream of tension.
Pro Tip: Using an ergonomic hook with a rubber handle can prevent hand fatigue if you plan to practice for more than a few minutes.
Step 2: Create Your Foundation Chain
Start by making a slip knot and placing it firmly onto your hook.
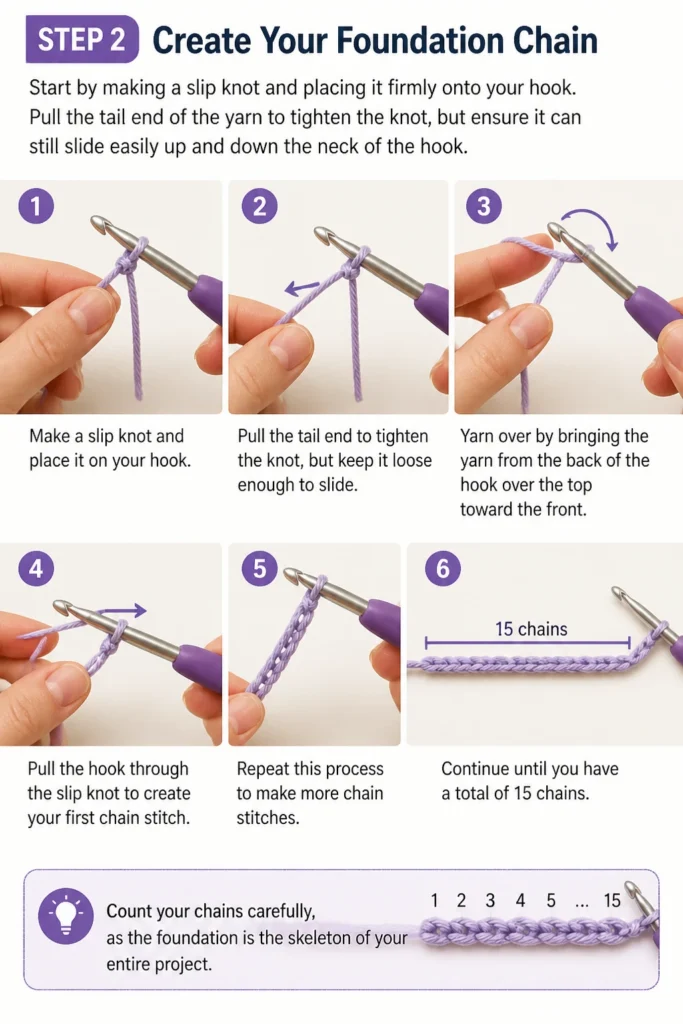
Pull the tail end of the yarn to tighten the knot, but ensure it can still slide easily up and down the neck of the hook.
Yarn over by bringing the yarn from the back of the hook over the top toward the front.
Pull the hook through the slip knot to create your first chain stitch.
Repeat this process until you have a total of 15 chains, which will give you enough space to see the stitches clearly.
Count your chains carefully, as the foundation is the skeleton of your entire project.
Step 3: Prepare the First Double Crochet
When working with double crochet, you do not start in the first chain next to the hook.
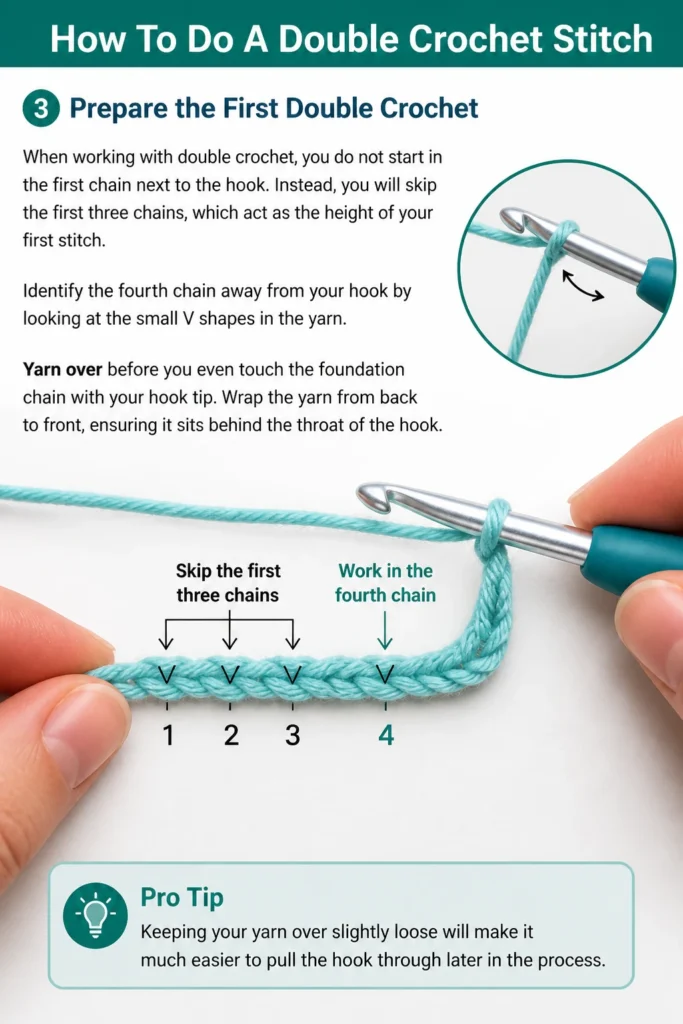
Instead, you will skip the first three chains, which act as the height of your first stitch.
Identify the fourth chain away from your hook by looking at the small V shapes in the yarn.
Yarn over before you even touch the foundation chain with your hook tip.
Wrap the yarn from back to front, ensuring it sits behind the throat of the hook.
Pro Tip: Keeping your yarn over slightly loose will make it much easier to pull the hook through later in the process.
Step 4: Insert the Hook and Draw Up a Loop
Push the tip of the hook into the center of that fourth chain from the hook.
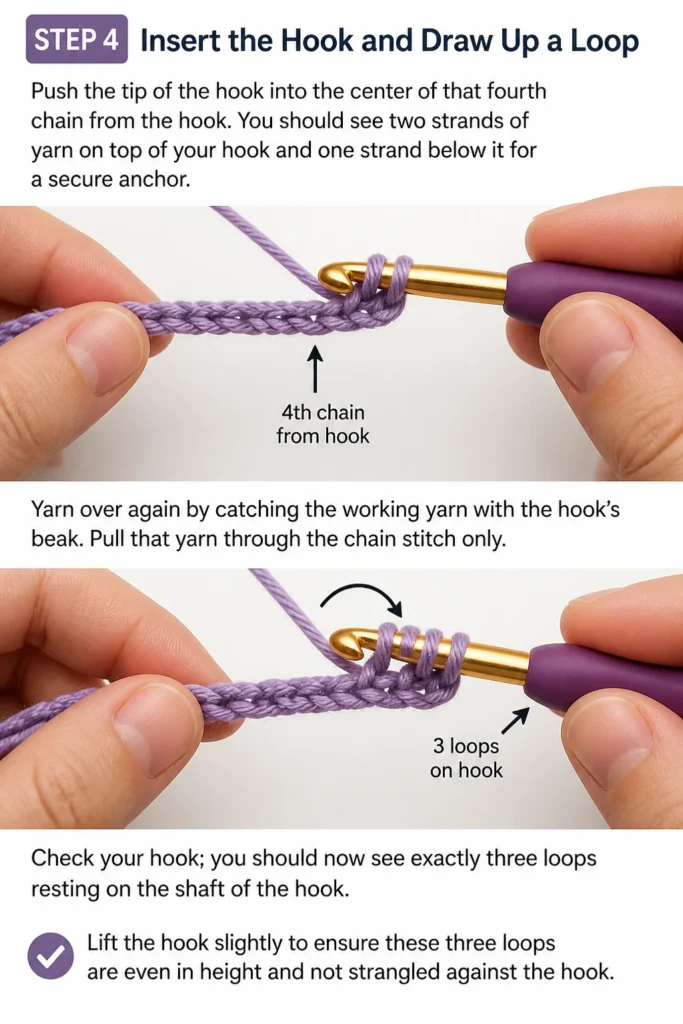
You should see two strands of yarn on top of your hook and one strand below it for a secure anchor.
Yarn over again by catching the working yarn with the hook’s beak.
Pull that yarn through the chain stitch only.
Check your hook; you should now see exactly three loops resting on the shaft of the hook.
Lift the hook slightly to ensure these three loops are even in height and not strangled against the hook.
Step 5: Process the First Two Loops
This is where the double crochet begins to take its distinctive shape and height.
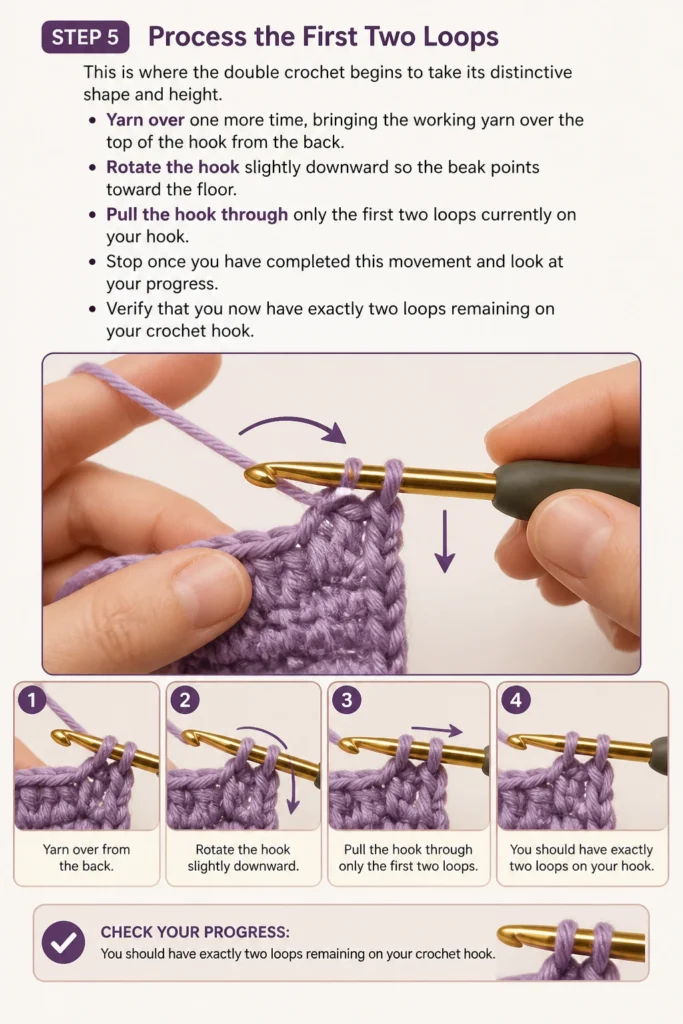
Yarn over one more time, bringing the working yarn over the top of the hook from the back.
Rotate the hook slightly downward so the beak points toward the floor.
Pull the hook through only the first two loops currently on your hook.
Stop once you have completed this movement and look at your progress.
Verify that you now have exactly two loops remaining on your crochet hook.
Step 6: Complete the Stitch
You are now ready to finish the final stage of the double crochet movement.
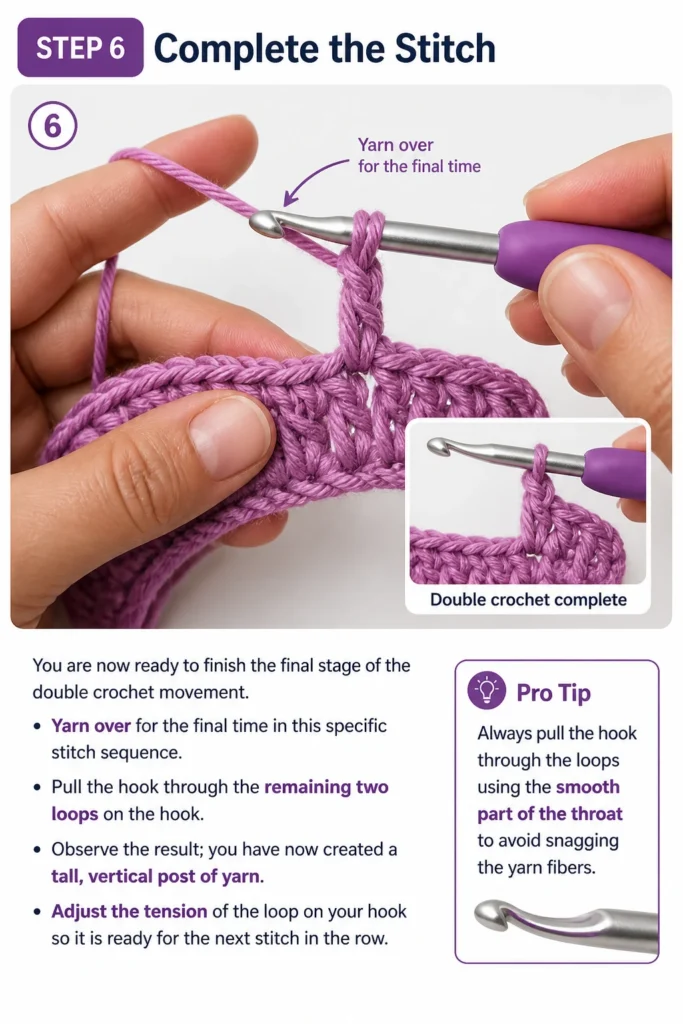
Yarn over for the final time in this specific stitch sequence.
Pull the hook through the remaining two loops on the hook.
Observe the result; you have now created a tall, vertical post of yarn.
Adjust the tension of the loop on your hook so it is ready for the next stitch in the row.
Pro Tip: Always pull the hook through the loops using the smooth part of the throat to avoid snagging the yarn fibers.
Step 7: Continue Across the Row
Now that the first stitch is finished, you will repeat the process in every remaining chain.
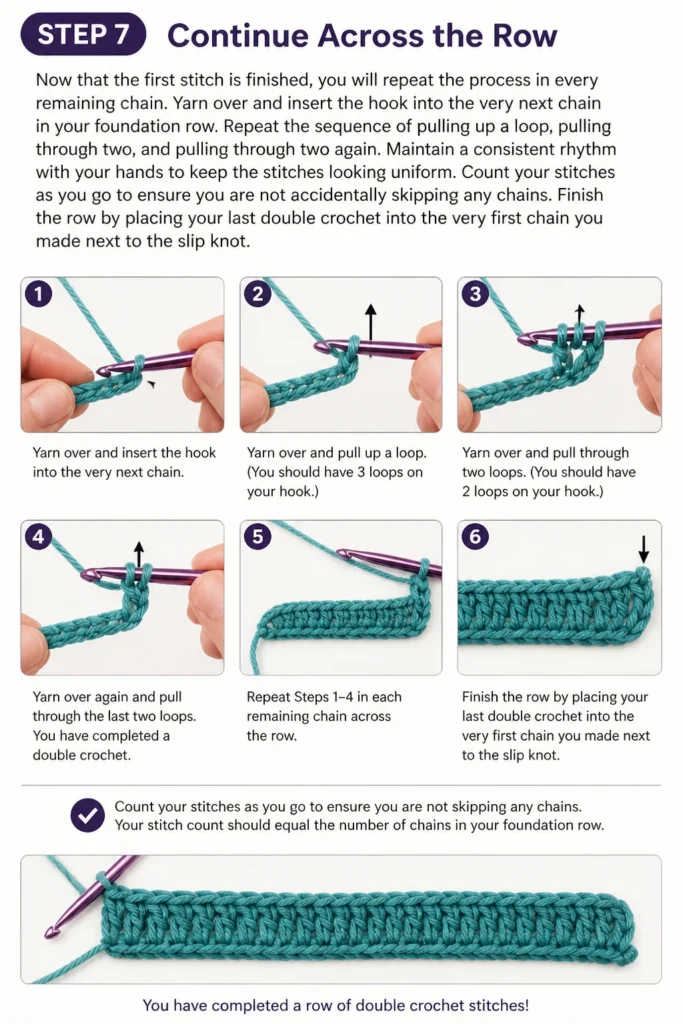
Yarn over and insert the hook into the very next chain in your foundation row.
Repeat the sequence of pulling up a loop, pulling through two, and pulling through two again.
Maintain a consistent rhythm with your hands to keep the stitches looking uniform.
Count your stitches as you go to ensure you are not accidentally skipping any chains.
Finish the row by placing your last double crochet into the very first chain you made next to the slip knot.
Step 8: Turn and Start a New Row
To keep the project growing upward, you must turn your work over like a page in a book.
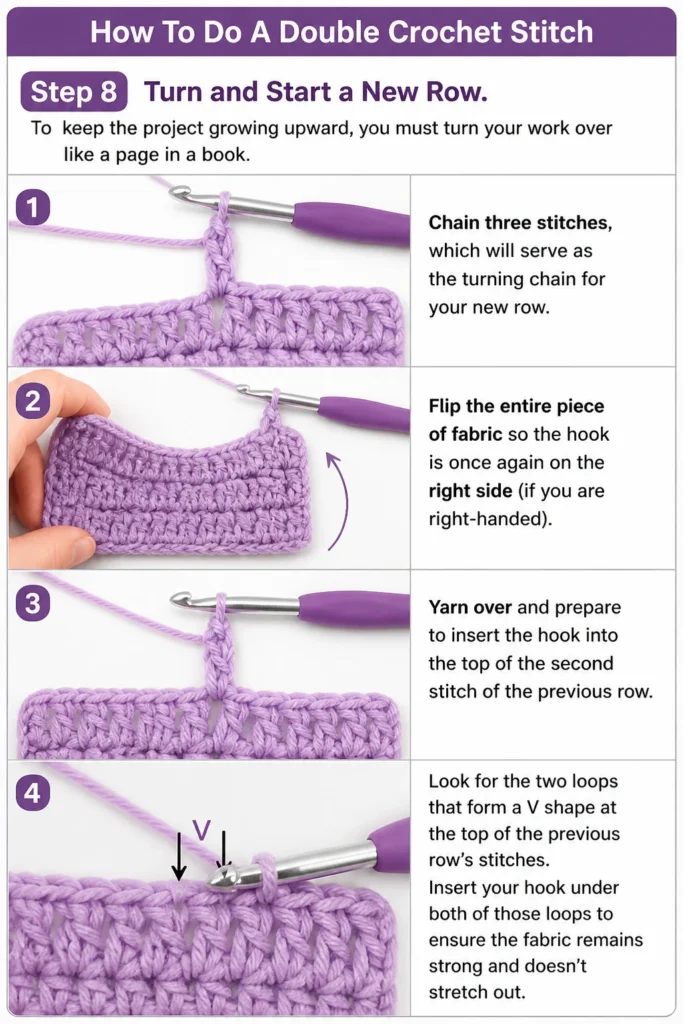
Chain three stitches, which will serve as the turning chain for your new row.
Flip the entire piece of fabric so the hook is once again on the right side (if you are right-handed).
Yarn over and prepare to insert the hook into the top of the second stitch of the previous row.
Look for the two loops that form a V shape at the top of the previous row’s stitches.
Insert your hook under both of those loops to ensure the fabric remains strong and doesn’t stretch out.
Common Mistakes to Avoid
Skipping the Yarn Over Before Inserting
Many beginners forget to wrap the yarn around the hook before they push it into the stitch. If you forget this step, you are actually performing a single crochet instead of a double crochet. This results in a much shorter stitch and will make your rows look uneven and messy. Always check that you have three loops on your hook after you pull the yarn through the fabric.
Missing the Last Stitch of the Row
The very last stitch of a row can be hard to see because it often leans slightly to the side. If you miss this stitch, your project will start to look like a triangle rather than a square. You must place your final stitch into the top of the turning chain from the row below. Using a stitch marker in the first and last stitch of every row can help you identify exactly where to stop.
Inconsistent Stitch Height
If you pull the yarn too tightly when drawing up a loop, your stitches will be short and stiff. Conversely, if you leave the loops too loose, the fabric will look floppy and have large, unattractive gaps. Try to pull your loops up to a consistent height every time you yarn over. The hook should stay parallel to the top of your work to keep the tension even across the entire row.
Troubleshooting
The Edges Are Wavy or Uneven
Wavy edges usually happen when you are accidentally adding or subtracting stitches at the ends of your rows. This is often caused by confusion about whether the turning chain counts as a stitch or not. In most patterns, the turning chain three counts as your first double crochet. This means you should skip the very first hole at the base of the chain and start in the second hole.
The Fabric Is Curling Upward
If your crochet work is curling into a tight circle, your foundation chain is likely too tight. The foundation chain needs to be slightly looser than the rest of your stitches to allow the fabric to lay flat. You can solve this by using a hook that is one size larger just for the foundation chain. Once you start the first row of double crochet, switch back to your regular hook size.
There Are Large Holes Between Stitches
Large gaps often occur if you are only inserting your hook into one loop of the stitch below. Make sure you are going under both the front and back loops of the V shape at the top of the previous row. If the gaps are still too large, try using a slightly smaller hook or a thicker yarn. Some people also find that their yarn over is too loose, which can be fixed by holding the yarn more firmly.
Key Takeaways
- The double crochet stitch requires a yarn over before you insert the hook into the work.
- You must skip three chains when starting your first row to account for the stitch height.
- A completed double crochet is formed by pulling through two loops twice.
- The turning chain for a double crochet row is typically three chains long.
- Consistency in tension is the secret to making your stitches look professional and neat.
- Counting your stitches at the end of every row prevents your project from changing shape.
Frequently Asked Questions
What is the difference between US and UK double crochet?
In US terminology, a double crochet is the stitch described in this guide, which involves one yarn over. In UK terminology, this same stitch is called a treble crochet. A UK double crochet is actually equivalent to a US single crochet. Always check which terminology your pattern is using before you begin your project.
Do I always have to chain three to turn?
While three chains is the standard for double crochet, some people prefer to chain only two if they have loose tension. A chain of two can create a tighter, straighter edge for some crafters. Experiment with both to see which one makes your edges look the cleanest. The goal is to match the height of your turning chain to the height of your stitches.
Can I double crochet into the front loop only?
Yes, you can work into the front loop only or the back loop only to create different textures. Working into the back loop only creates a ribbed effect that is very popular for hats and sweater cuffs. However, for a standard, flat fabric, you should always go through both loops. Only use one loop if the pattern specifically tells you to do so.
How do I count my double crochet stitches?
The easiest way to count is by looking at the vertical posts created by each stitch. Each post represents one double crochet. You can also count the V shapes along the top edge of your work. Remember to count your turning chain as a stitch if your pattern specifies that it counts as the first double crochet of the row.
Our Top Recommended Finds
- Ergonomic Aluminum Hook Set: These hooks feature soft, color-coded handles that reduce strain on your joints during long sessions.
- Locking Stitch Markers: These small plastic clips are essential for marking the beginning and end of your rows so you never lose your place.
- Cotton Blend Yarn: A cotton and acrylic blend is perfect for beginners because it has great stitch definition and does not split easily.
Expand Your Crochet Skills Today
Mastering the double crochet stitch is a major milestone that allows you to tackle thousands of different patterns.
Once you feel comfortable with the basic movement, try making a simple dishcloth or a striped scarf to practice your color changes.
You can also explore the half-double crochet or the treble crochet to see how varying the height changes the look of your fabric.
The best way to improve is to pick up your hook and start a new row right now.
With every stitch you make, your muscle memory will grow stronger and your tension will become more refined.