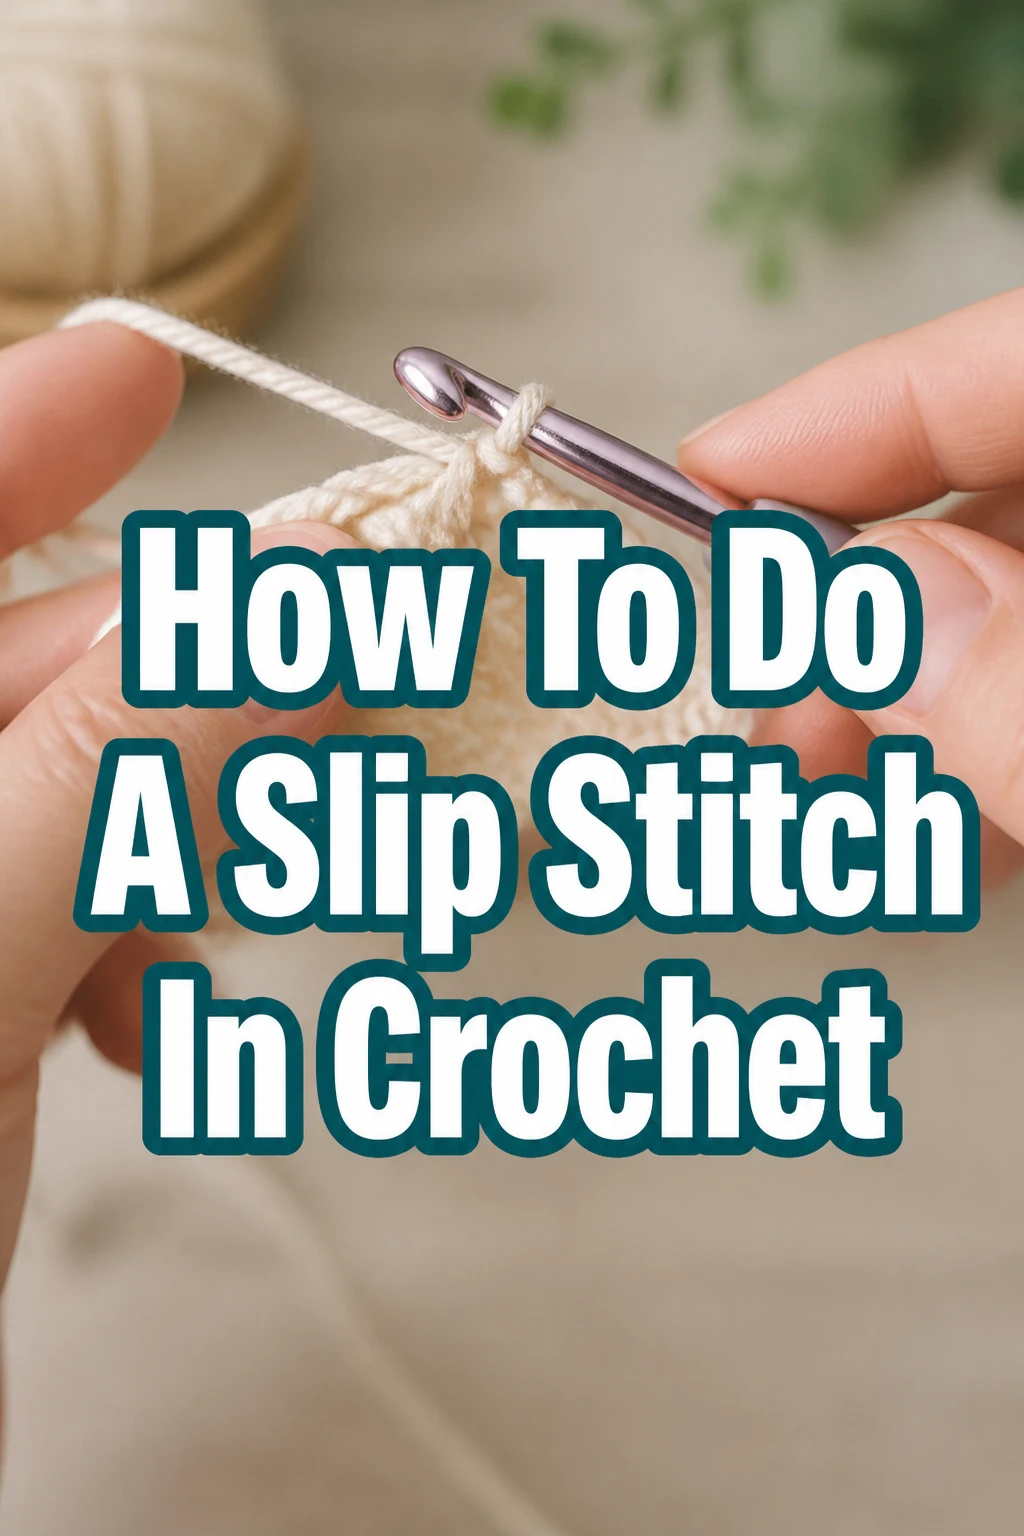
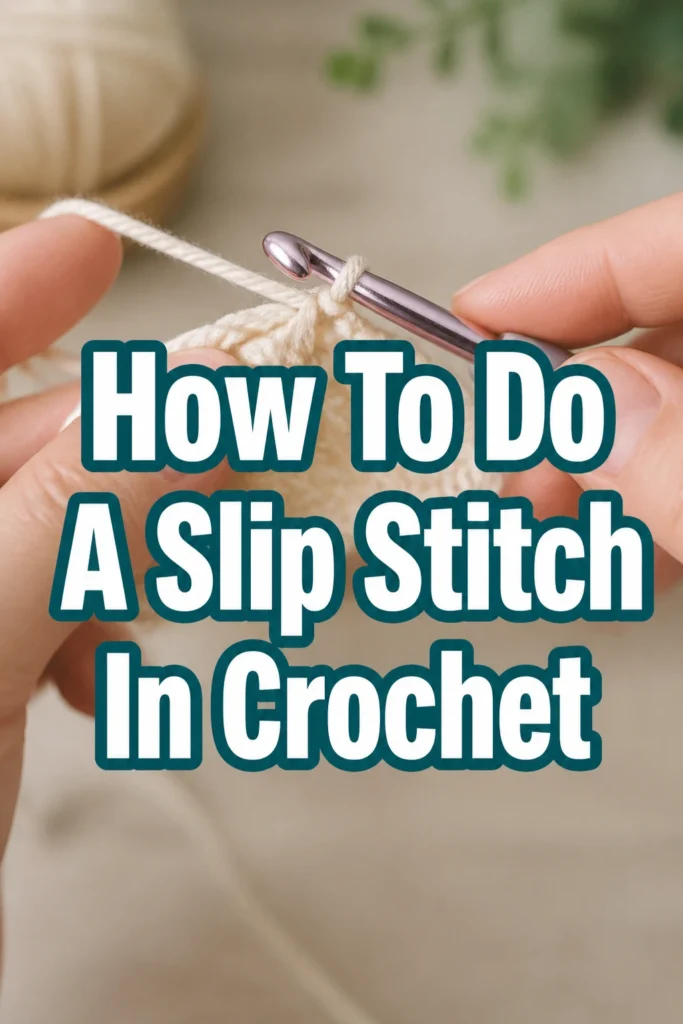
How To Do A Slip Stitch In Crochet
Learning new crochet stitches can feel a little daunting at first.
But mastering the slip stitch is a fundamental skill that opens up a world of possibilities in your projects.
I remember feeling so proud the first time I seamlessly joined a round, and I’m here to guide you through every detail with practical, hands-on advice.
Quick Overview
The slip stitch is incredibly versatile, used for joining pieces, moving yarn across a row invisibly, or finishing off your work. By the end of this guide, you will confidently execute a perfect slip stitch.
- Time needed: 10-20 minutes for initial practice
- Difficulty: Beginner
- What you’ll need: Yarn, crochet hook, scissors
Step-by-Step Instructions
Step 1: Get Ready to Stitch
Before you begin, ensure you have a foundation of stitches to work into. This could be a chain, a previous row of single crochet, or any other basic stitch.
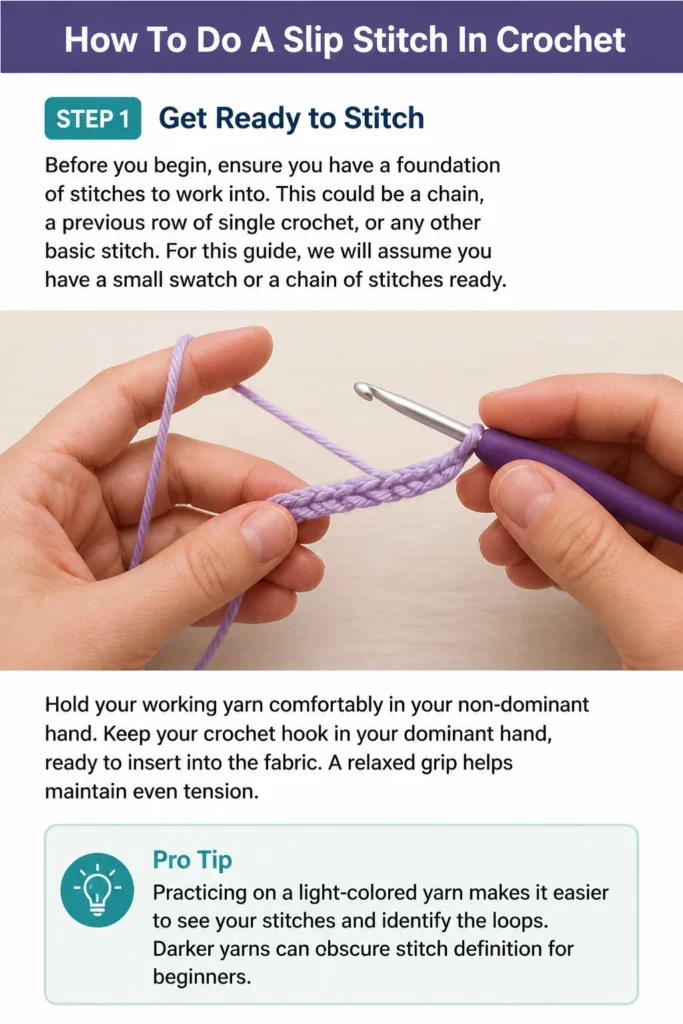
For this guide, we will assume you have a small swatch or a chain of stitches ready. Hold your working yarn comfortably in your non-dominant hand.
Keep your crochet hook in your dominant hand, ready to insert into the fabric. A relaxed grip helps maintain even tension.
Pro Tip: Practicing on a light-colored yarn makes it easier to see your stitches and identify the loops. Darker yarns can obscure stitch definition for beginners.
Step 2: Locate Your Insertion Point
Identify the stitch where you want your slip stitch to begin. This is typically the top two loops of a stitch from the previous row or a specific chain in your foundation.
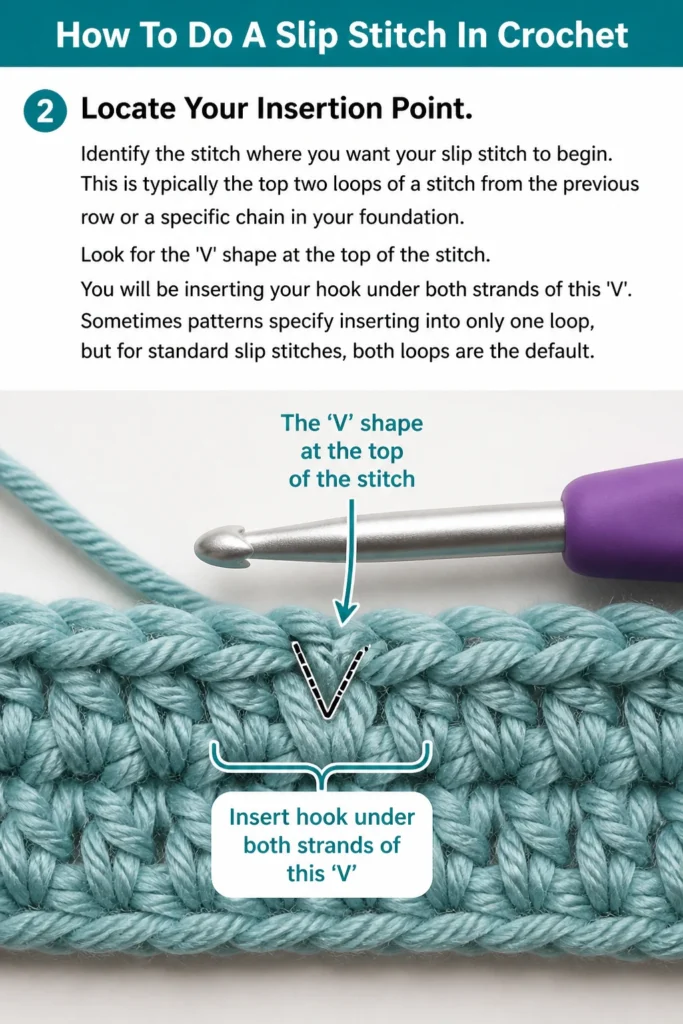
Look for the ‘V’ shape at the top of the stitch. You will be inserting your hook under both strands of this ‘V’.
Sometimes patterns specify inserting into only one loop, but for standard slip stitches, both loops are the default.
Step 3: Insert Your Hook
Carefully insert your crochet hook into the center of the chosen stitch. Push it through so that the hook emerges on the back side of your work.
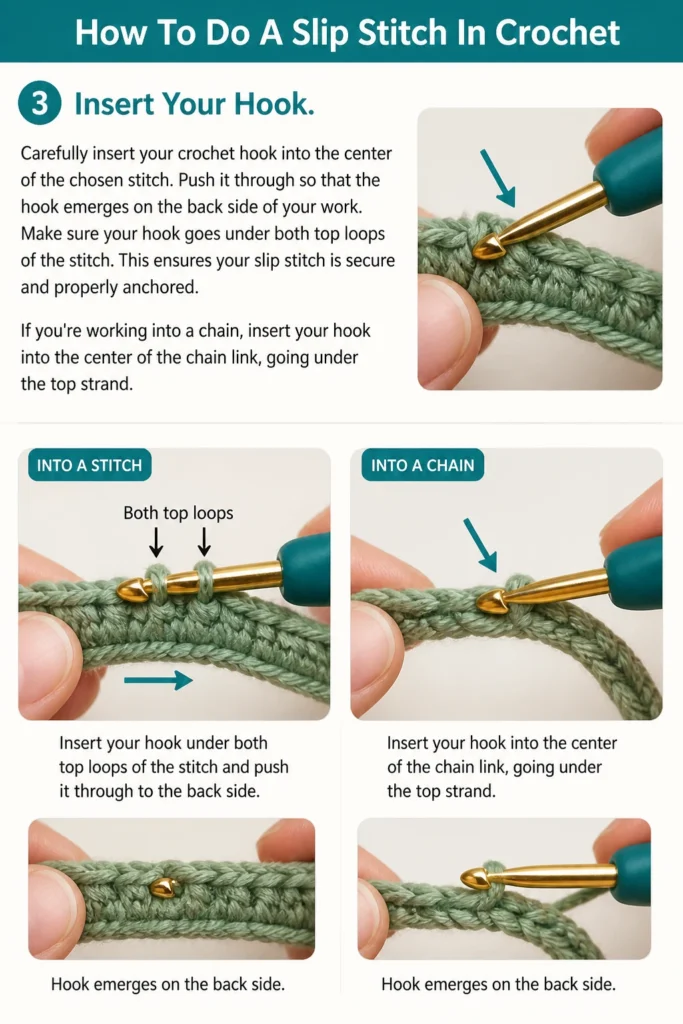
Make sure your hook goes under both top loops of the stitch. This ensures your slip stitch is secure and properly anchored.
If you’re working into a chain, insert your hook into the center of the chain link, going under the top strand.
Step 4: Yarn Over Your Hook
With your hook now inserted into the fabric, bring the working yarn over the shaft of your hook. This is called “yarning over” or “yo”.
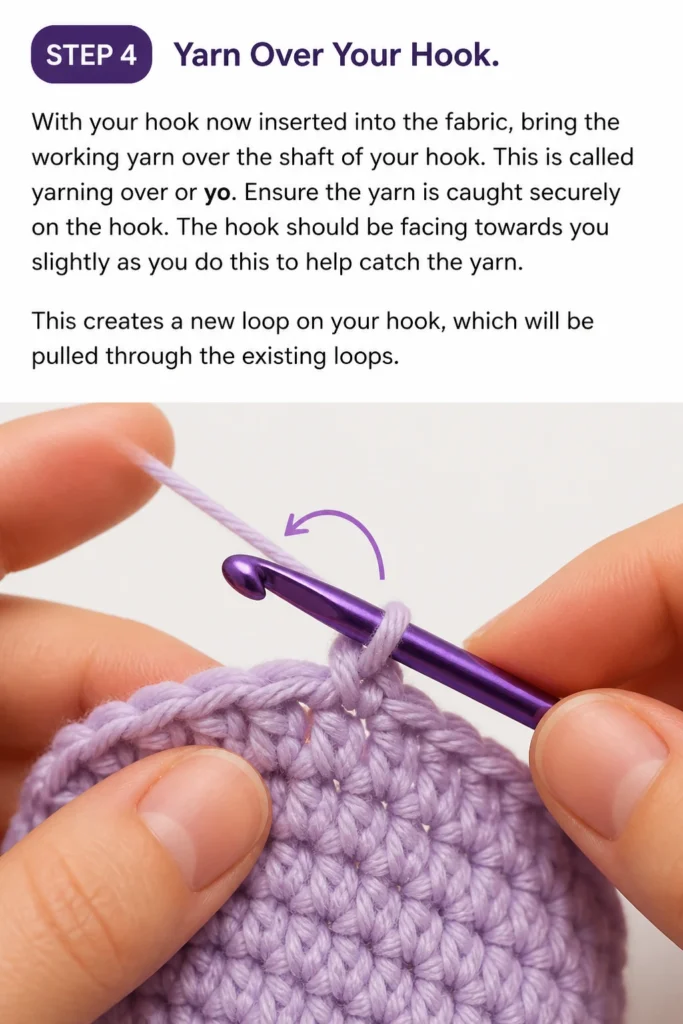
Ensure the yarn is caught securely on the hook. The hook should be facing towards you slightly as you do this to help catch the yarn.
This creates a new loop on your hook, which will be pulled through the existing loops.
Step 5: Pull Yarn Through the Stitch
Gently pull the yarn that you just “yarned over” back through the stitch you inserted your hook into. Guide your hook carefully to avoid snagging the yarn.
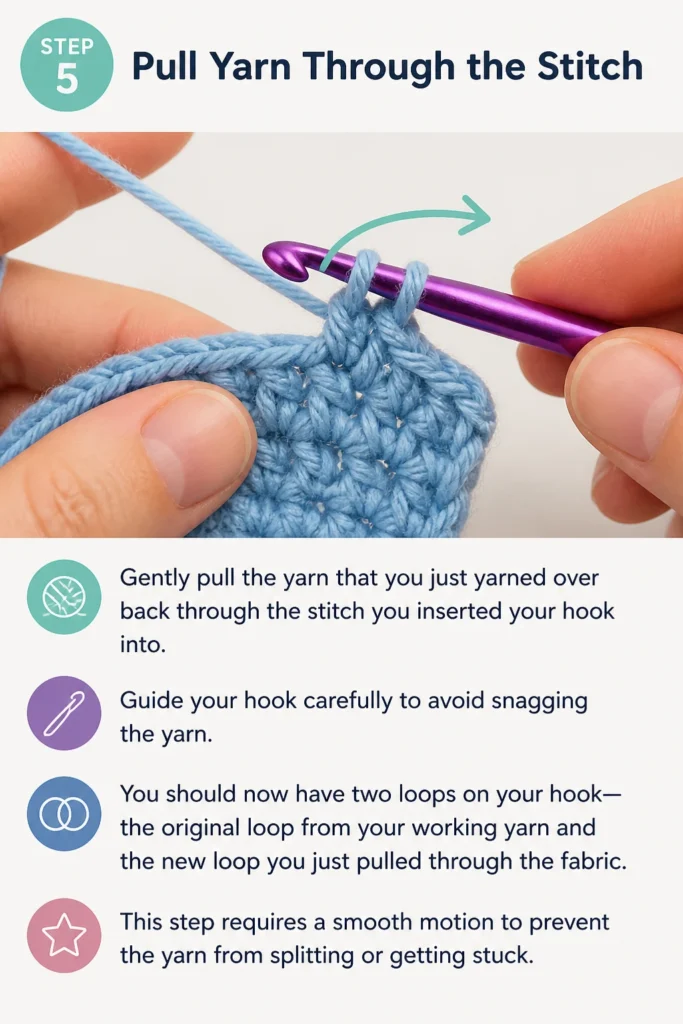
You should now have two loops on your hook: the original loop from your working yarn and the new loop you just pulled through the fabric.
This step requires a smooth motion to prevent the yarn from splitting or getting stuck.
Step 6: Complete the Slip Stitch
Now, with the two loops on your hook, continue to pull the newly formed loop directly through the original loop that was already on your hook.
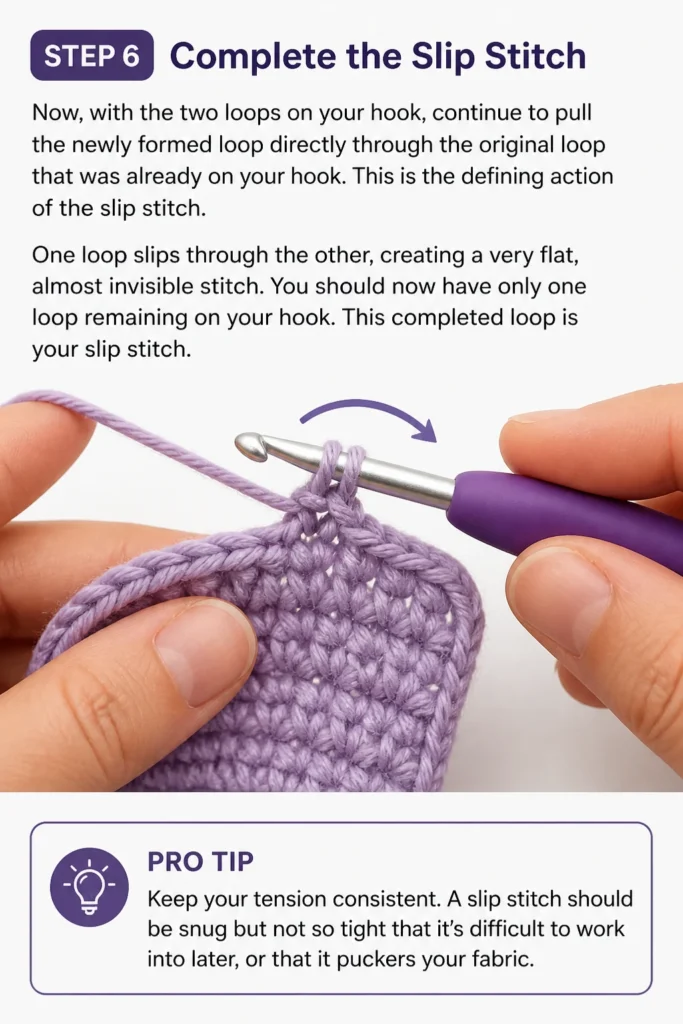
This is the defining action of the slip stitch. One loop slips through the other, creating a very flat, almost invisible stitch.
You should now have only one loop remaining on your hook. This completed loop is your slip stitch.
Pro Tip: Keep your tension consistent. A slip stitch should be snug but not so tight that it’s difficult to work into later, or that it puckers your fabric.
Step 7: Practice and Repeat
To continue making a series of slip stitches, simply repeat steps 2-6 in the next stitch along your row or around your work.
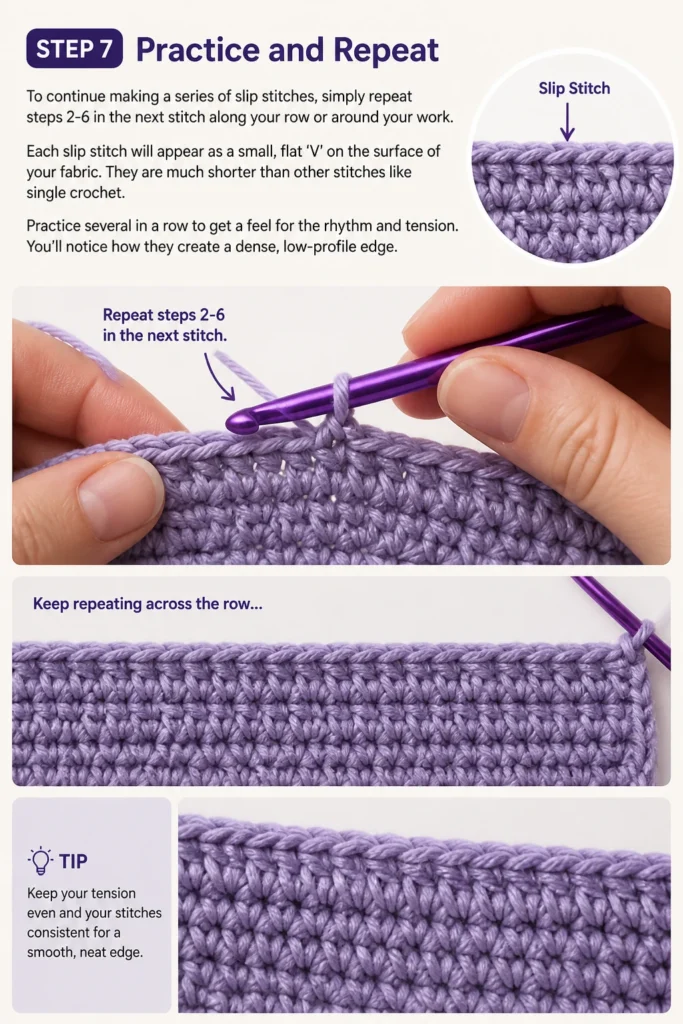
Each slip stitch will appear as a small, flat ‘V’ on the surface of your fabric. They are much shorter than other stitches like single crochet.
Practice several in a row to get a feel for the rhythm and tension. You’ll notice how they create a dense, low-profile edge.
Common Mistakes to Avoid
Too Tight Tension
A common pitfall for beginners is making slip stitches too tightly. This can make your fabric pucker, distort the shape of your project, and make it incredibly difficult to work into those stitches in subsequent rows.
To correct this, try using a hook one size larger than recommended for your yarn, or consciously relax your grip on the yarn and hook. Practice making your stitches with a little more slack.
Missing the Second Loop
Sometimes, especially when working quickly, you might insert your hook under only one of the two top loops of the stitch. This results in a less stable stitch and can create a gap or a weaker edge in your work.
Always double-check that your hook is going under both strands of the ‘V’ at the top of the stitch. Take your time during insertion to ensure proper placement.
Yarn Splitting
When pulling the yarn through the loops, sometimes the hook catches only a few plies of your yarn, causing it to split. This creates a messy-looking stitch and can weaken the yarn.
Ensure your hook is sharp enough to glide through the yarn without catching individual strands. Also, make sure your hook is facing slightly upwards as you pull through, guiding the yarn smoothly.
Troubleshooting
My Slip Stitches are Invisible
If your slip stitches seem to disappear into your work, it’s likely due to very tight tension. Slip stitches are inherently small and flat, but they shouldn’t be completely indistinguishable.
Try loosening your grip and using a slightly larger hook. You should still be able to see the distinct ‘V’ shape of each slip stitch when you look closely at your work.
My Fabric is Curling
If your project starts to curl or pucker where you’ve made slip stitches, it’s a clear sign of tension issues. The slip stitch is much shorter than most other stitches, and if pulled too tight, it will pull the fabric inwards.
Consciously try to make your slip stitches looser. Sometimes, simply being aware of the problem helps. You might also consider if the pattern intended for a different stitch or if your gauge is off.
I Keep Dropping Loops
If the loops keep falling off your hook as you try to complete the slip stitch, it usually means your grip on the yarn or hook is inconsistent, or your hook is too small for the yarn.
Ensure you have a firm but not overly tight grip on your yarn. When pulling through, keep the hook pointed slightly towards you to secure the loops. A hook with a deeper throat might also help prevent loops from slipping off.
Key Takeaways
- The slip stitch is a foundational crochet technique used for joining, shaping, and finishing.
- It involves inserting your hook, yarning over, pulling through the stitch, and then pulling through the loop already on your hook.
- Maintaining consistent, relaxed tension is crucial to avoid tight, puckered fabric and make future stitches easier to work into.
- Always ensure you insert your hook under both top loops of the stitch for a secure and even result.
- Practice is key; the more you make slip stitches, the more natural and consistent your movements will become.
Frequently Asked Questions
When should I use a slip stitch?
Slip stitches are incredibly versatile. They are primarily used to join work in the round, create a neat, low-profile edge, move your yarn across a row without adding height, or create subtle shaping in designs. They can also be used for very dense, sturdy fabric.
Is a slip stitch the same as a single crochet?
No, they are different stitches. A single crochet creates a short, distinct stitch with some height. A slip stitch, on the other hand, creates a very flat, almost invisible stitch with no significant height, essentially just connecting two points.
Can I make an entire project with slip stitches?
Yes, you absolutely can! While not as common as projects made with taller stitches, entire pieces can be crocheted using only slip stitches. This technique creates a very dense, sturdy, and often beautifully textured fabric, sometimes resembling knitting. It’s often called “Bosnian Crochet” or “slip stitch crochet.”
How do I make a turning chain for slip stitches?
Since slip stitches have virtually no height, you typically do not make a turning chain when working in rows of slip stitches. You simply turn your work and begin working into the first stitch of the new row. If a pattern specifies, it’s usually just a chain 1, but it’s often omitted.
Our Top Recommended Finds
- Ergonomic Crochet Hook Set: A good set with comfortable handles reduces hand fatigue, making long practice sessions more enjoyable.
- Light-Colored Worsted Weight Yarn: This yarn weight is easy to handle, and a light color helps you see your stitches clearly as you learn.
- Stitch Markers: Essential for marking the beginning of rounds or specific stitches, helping you keep track of your progress and avoid mistakes.
Embracing Your Crochet Journey
You’ve taken a significant step in your crochet journey by mastering the slip stitch. This small but mighty technique is a cornerstone for countless patterns and projects.
Now that you’re comfortable with the slip stitch, consider exploring how it integrates with other basic stitches like single crochet and double crochet. Try joining rounds, creating seamless edgings, or even experimenting with slip stitch fabric.
Grab your hook and yarn today and apply what you’ve learned. The more you practice, the more confident and creative you’ll become in your crafting endeavors.