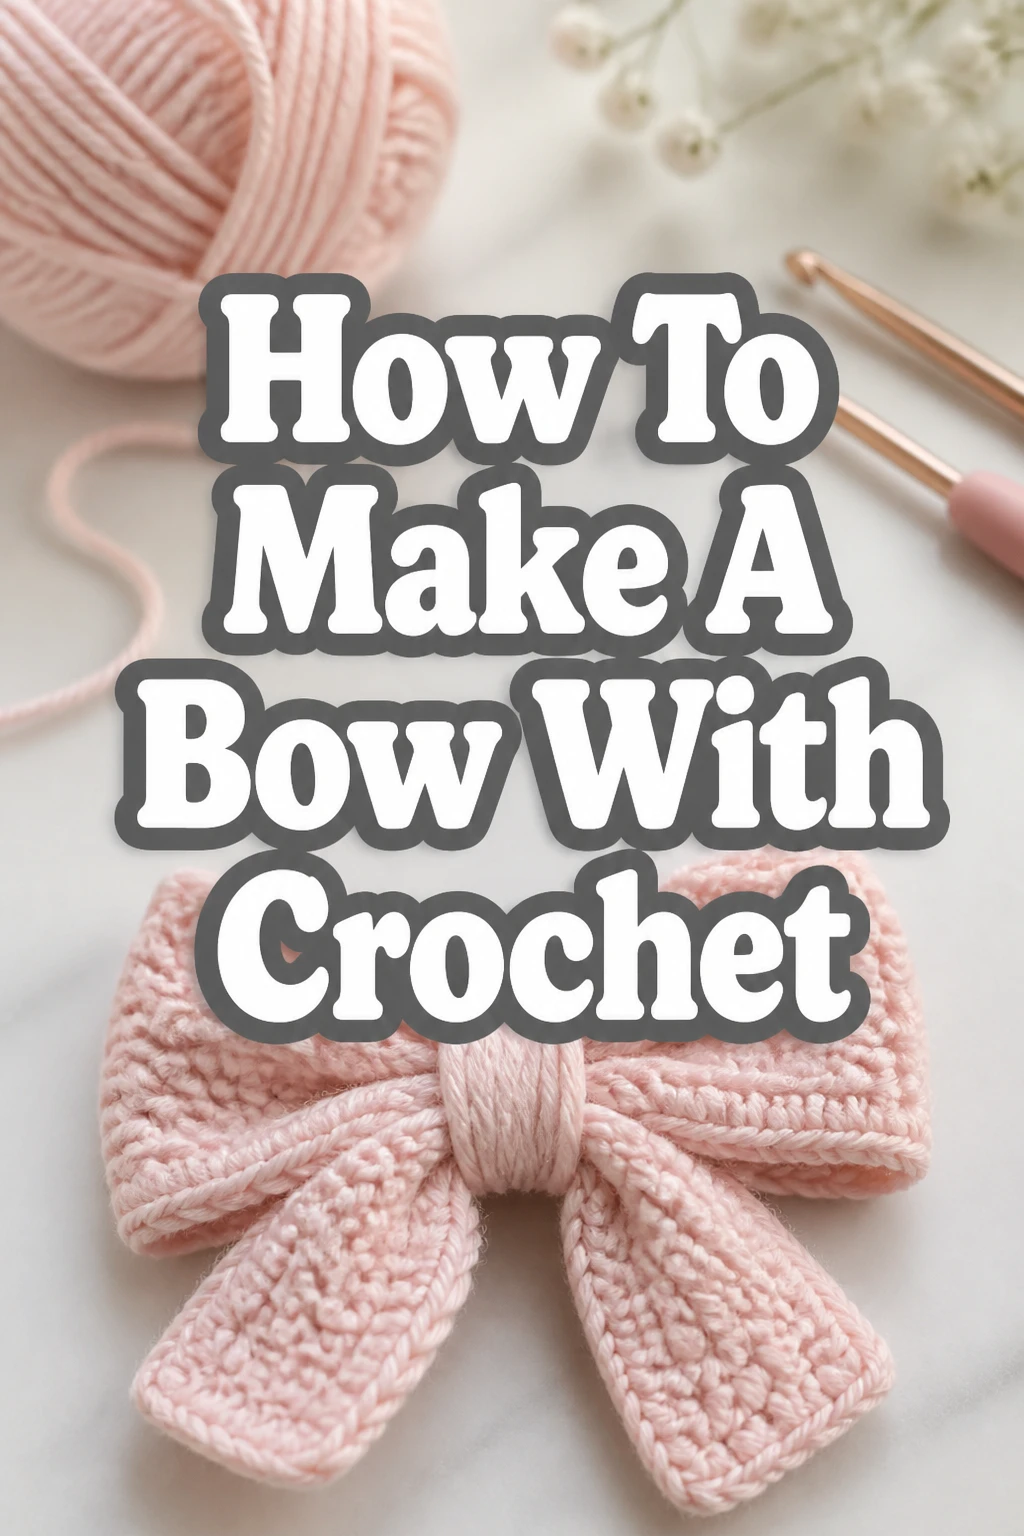
How To Make A Bow With Crochet
Creating beautiful crochet bows is a truly satisfying experience.
These small, charming embellishments can add a touch of handmade elegance to countless projects, from hair accessories to gift wrapping.
I’ve personally used these bows to personalize baby blankets and headbands, and I know you’ll find them just as versatile and enjoyable to create.
Quick Overview
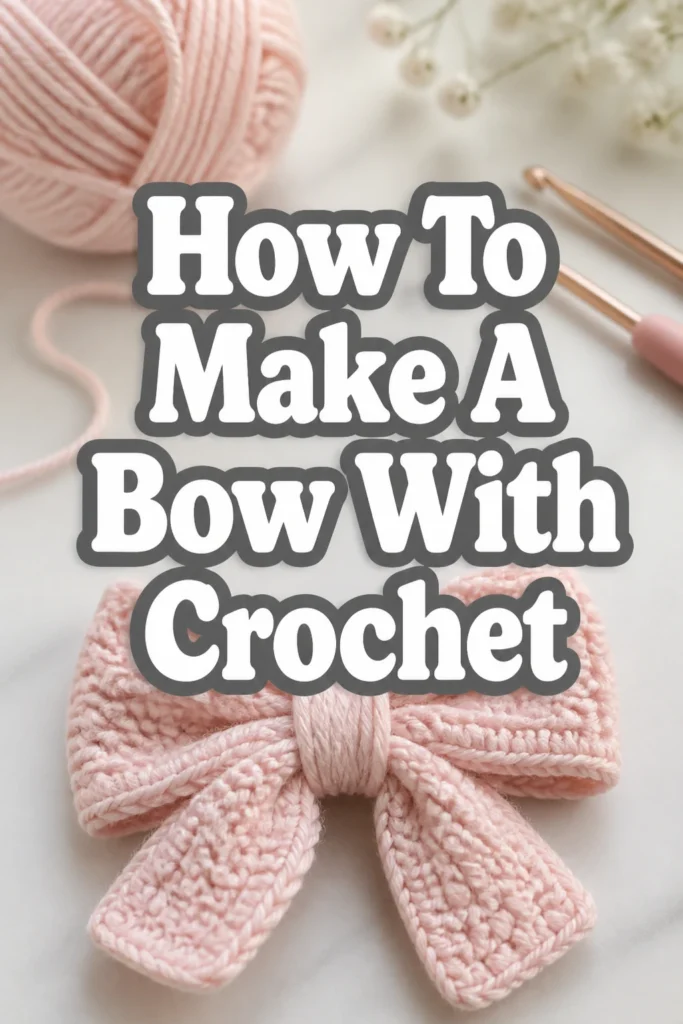
This guide will walk you through crafting a simple yet elegant crochet bow. It’s a perfect project for using up scrap yarn and practicing basic stitches.
- Time needed: 30-60 minutes
- Difficulty: Beginner
- What you’ll need: Yarn, crochet hook, scissors, yarn needle
Step-by-Step Instructions
Step 1: Gather Your Materials
Before you begin, ensure you have all the necessary supplies within reach. This makes your crocheting process smooth and uninterrupted.
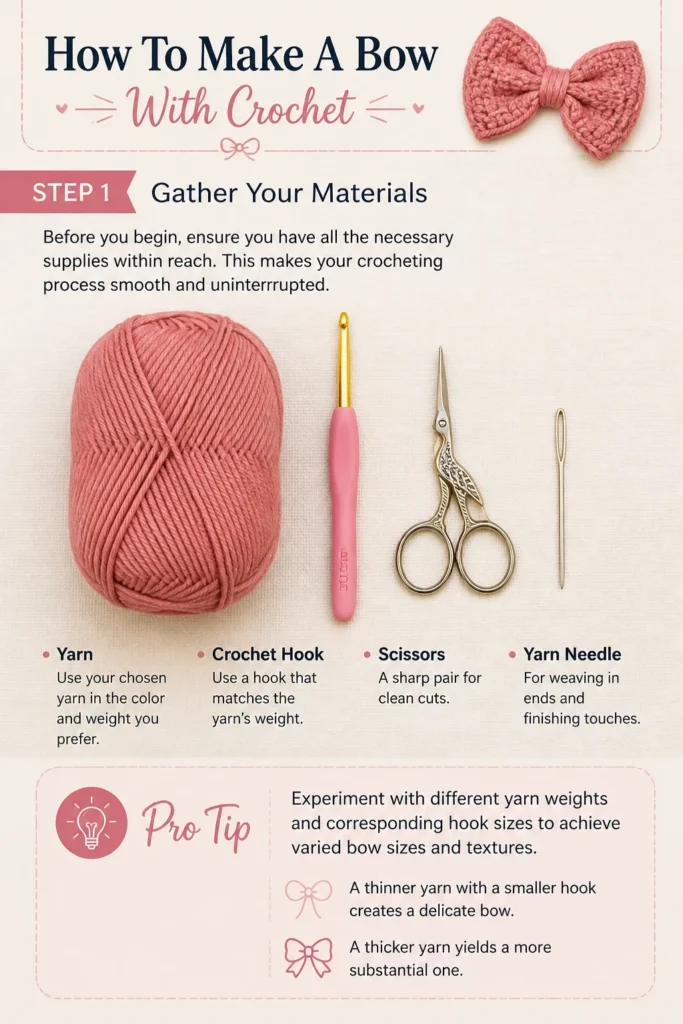
You will need a skein of your chosen yarn, a crochet hook that matches the yarn’s weight, a pair of sharp scissors, and a yarn needle for weaving in ends.
Pro Tip: Experiment with different yarn weights and corresponding hook sizes to achieve varied bow sizes and textures. A thinner yarn with a smaller hook creates a delicate bow, while a thicker yarn yields a more substantial one.
Step 2: Create a Slip Knot and Chain
Begin by making a slip knot on your crochet hook. This forms the foundation for your starting chain.
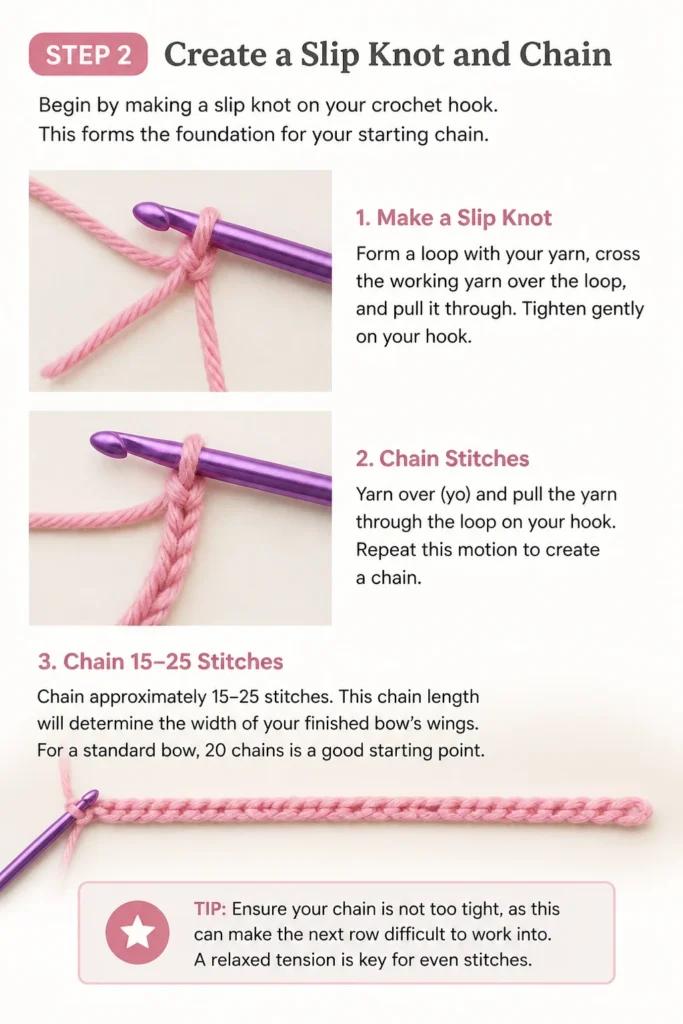
Next, chain approximately 15-25 stitches. This chain length will determine the width of your finished bow’s “wings.” For a standard bow, 20 chains is a good starting point.
Ensure your chain is not too tight, as this can make the next row difficult to work into. A relaxed tension is key for even stitches.
Step 3: Crochet the Main Rectangle
Now, you will create the main rectangular shape of your bow. This rectangle will eventually be folded and cinched to form the bow’s loops.
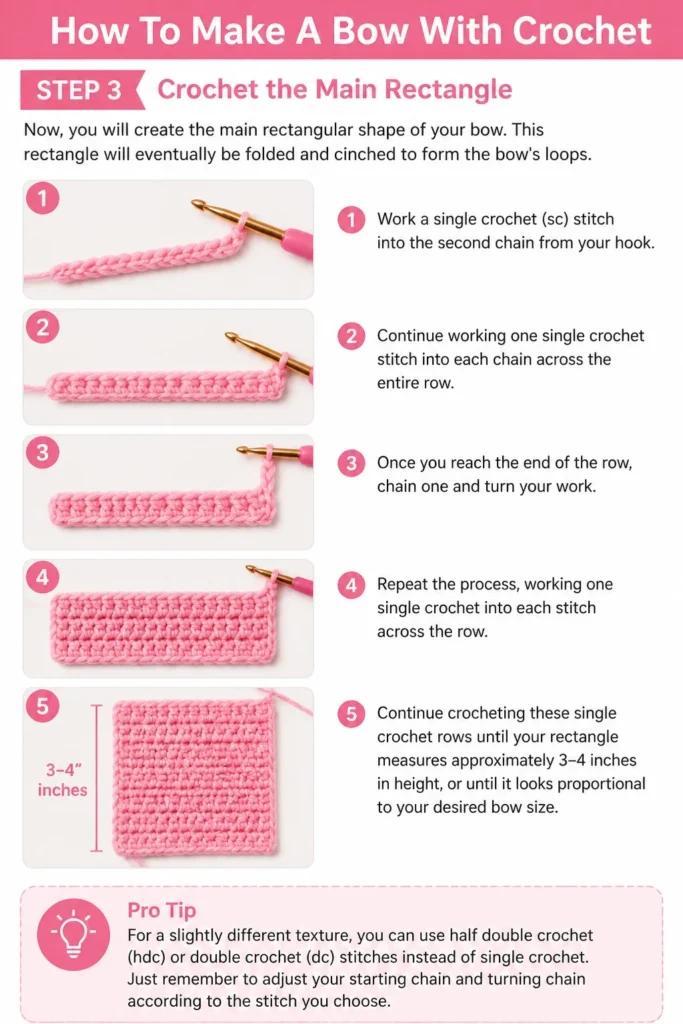
Work a single crochet (sc) stitch into the second chain from your hook. Continue working one single crochet stitch into each chain across the entire row.
Once you reach the end of the row, chain one and turn your work. Repeat the process, working one single crochet into each stitch across the row.
Continue crocheting these single crochet rows until your rectangle measures approximately 3-4 inches in height, or until it looks proportional to your desired bow size.
Pro Tip: For a slightly different texture, you can use half double crochet (hdc) or double crochet (dc) stitches instead of single crochet. Just remember to adjust your starting chain and turning chains accordingly.
Step 4: Fasten Off and Weave Ends
Once your rectangle has reached the desired dimensions, it’s time to secure your work. Cut your yarn, leaving a tail of about 6-8 inches.
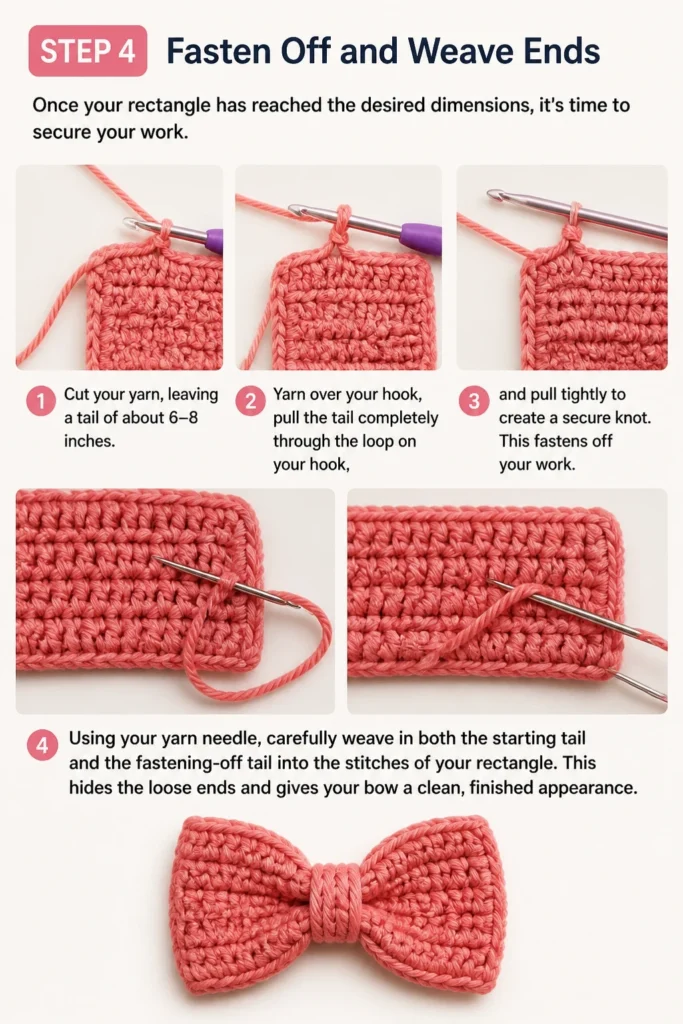
Yarn over your hook, pull the tail completely through the loop on your hook, and pull tightly to create a secure knot. This fastens off your work.
Using your yarn needle, carefully weave in both the starting tail and the fastening-off tail into the stitches of your rectangle. This hides the loose ends and gives your bow a clean, finished appearance.
Step 5: Shape the Bow
Lay your crocheted rectangle flat. Now, gently fold both ends of the rectangle inward, meeting them in the center.
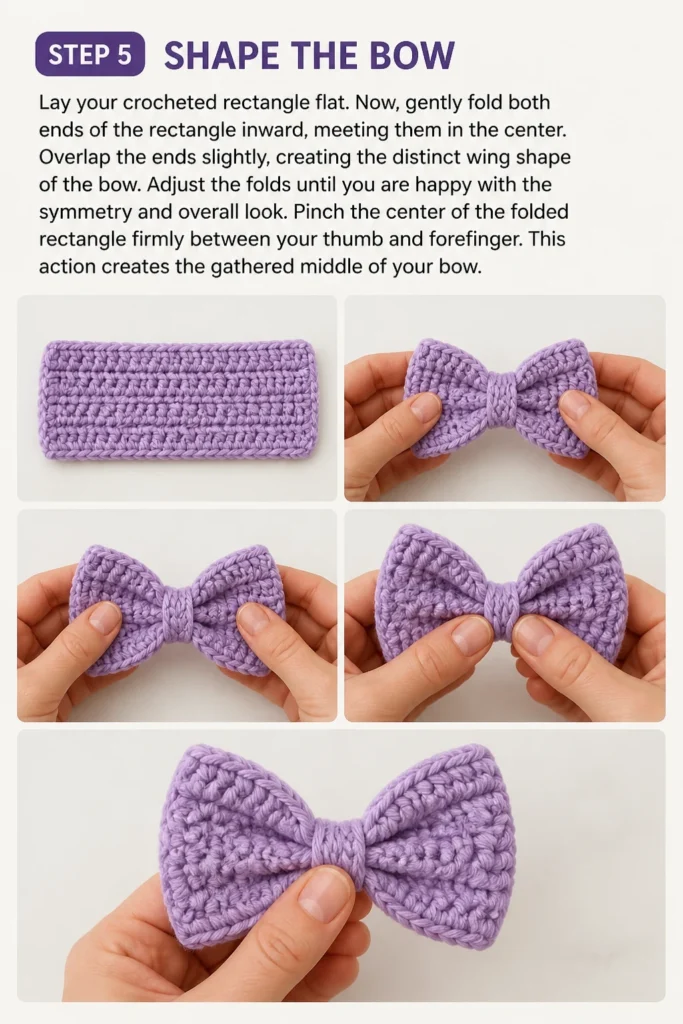
Overlap the ends slightly, creating the distinct “wing” shape of the bow. Adjust the folds until you are happy with the symmetry and overall look.
Pinch the center of the folded rectangle firmly between your thumb and forefinger. This action creates the gathered middle of your bow.
Step 6: Create the Center Wrap
Cut a separate piece of yarn, about 12-18 inches long. This piece will be used to wrap around the pinched center of your bow.
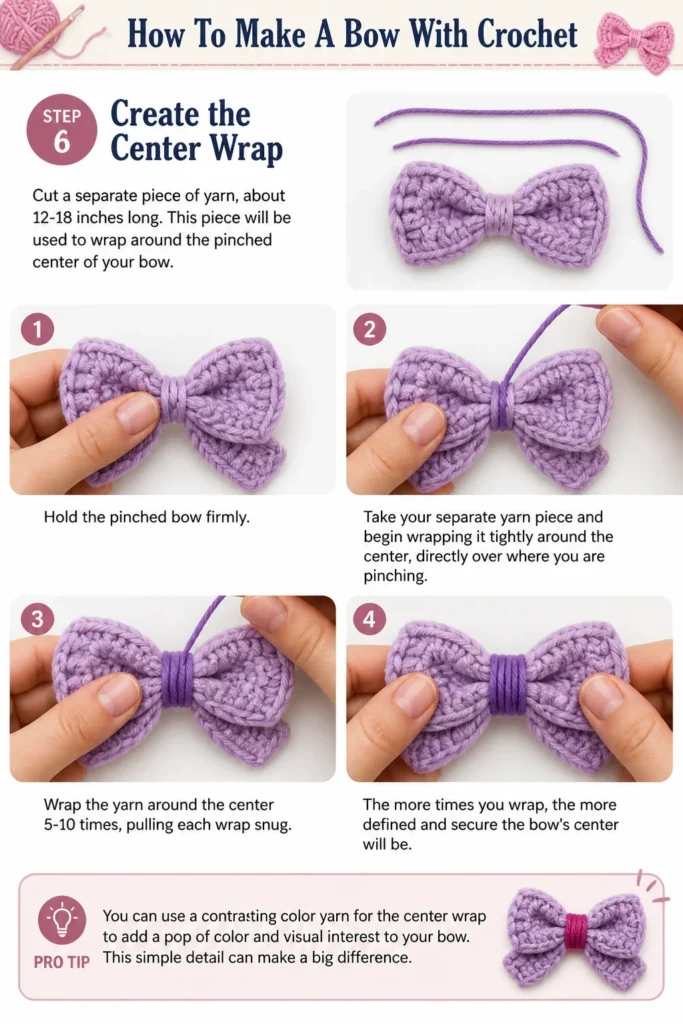
Hold the pinched bow firmly. Take your separate yarn piece and begin wrapping it tightly around the center, directly over where you are pinching.
Wrap the yarn around the center 5-10 times, pulling each wrap snugly. The more times you wrap, the more defined and secure the bow’s center will be.
Pro Tip: You can use a contrasting color yarn for the center wrap to add a pop of color and visual interest to your bow. This simple detail can make a big difference.
Step 7: Secure the Center Wrap
After wrapping the center, you need to secure the wrap so it doesn’t unravel. Thread one end of the wrapping yarn onto your yarn needle.
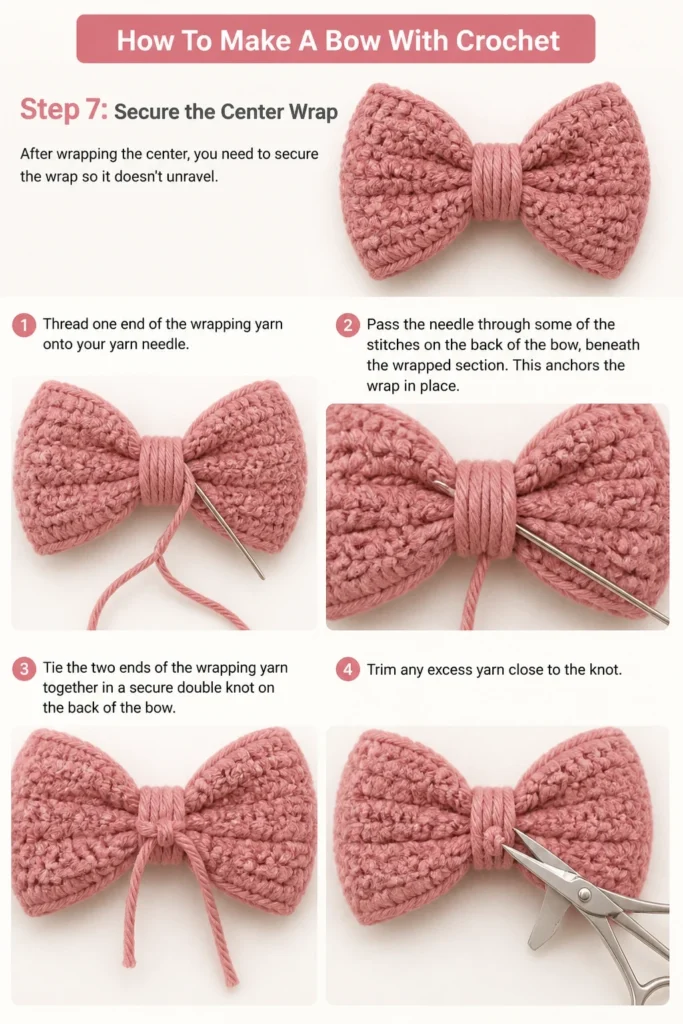
Pass the needle through some of the stitches on the back of the bow, beneath the wrapped section. This anchors the wrap in place.
Tie the two ends of the wrapping yarn together in a secure double knot on the back of the bow. Trim any excess yarn close to the knot.
Step 8: Attach or Embellish
Your crochet bow is now complete and ready for use. You can leave it as is, or attach it to various items.
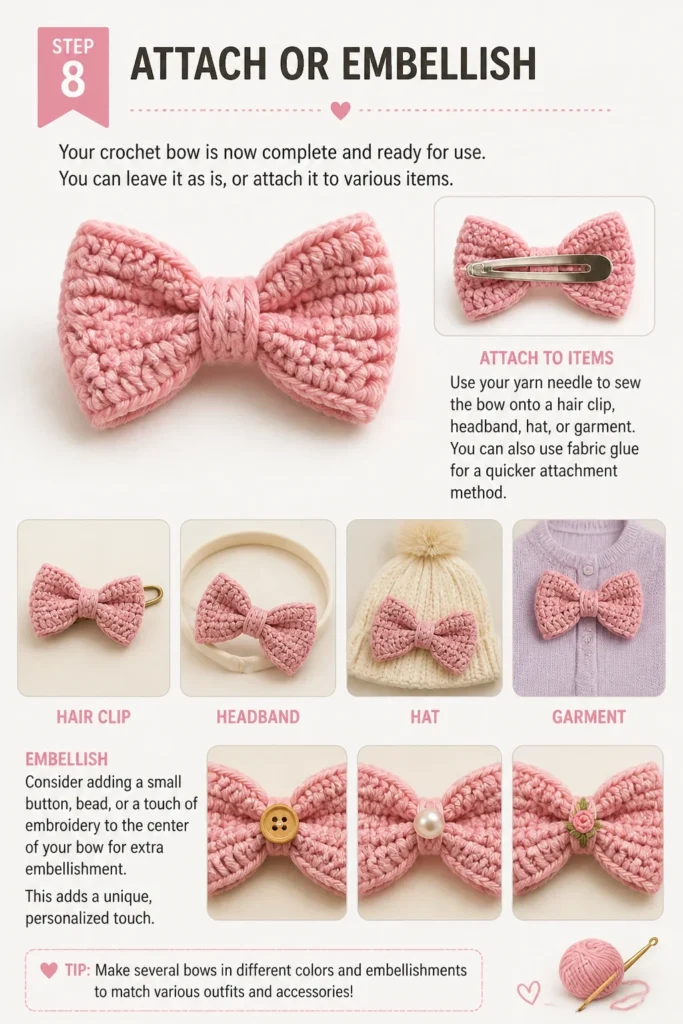
Use your yarn needle to sew the bow onto a hair clip, headband, hat, or garment. You can also use fabric glue for a quicker attachment method.
Consider adding a small button, bead, or a touch of embroidery to the center of your bow for extra embellishment. This adds a unique, personalized touch.
Common Mistakes to Avoid
Inconsistent Tension
When your stitches are not uniform in tightness or looseness, your finished bow can look uneven and lopsided. This often happens when you’re still getting comfortable with the hook and yarn.
Practice maintaining a consistent grip on your yarn and hook throughout the project. Take breaks if your hands start to feel tired, as fatigue can lead to fluctuating tension.
Incorrect Stitch Count
Forgetting to count your stitches in each row can result in your rectangle widening or narrowing unexpectedly. This makes the bow asymmetrical and less appealing.
Always count your stitches at the end of every row, especially when you are starting out. Place a stitch marker in the first and last stitch of the row if you find it helpful.
Loosely Woven Ends
If you don’t weave in your yarn tails securely and deeply enough, they can unravel over time, making your finished bow look messy. Loose ends can also snag on other items.
Use a yarn needle to weave tails through several stitches in different directions, ensuring they are well hidden within the fabric. Trim them closely only after they are thoroughly secured.
Insufficient Center Wrap
A center wrap that is not tight enough or doesn’t have enough wraps will fail to create a defined bow shape. The “wings” might sag, and the bow won’t hold its form well.
When wrapping the center, pull the yarn snugly with each pass. Aim for at least 5-7 wraps to ensure the center is tightly cinched and holds the bow’s shape effectively.
Troubleshooting
Bow Looks Lopsided or Uneven
If your finished bow appears lopsided, it’s usually due to uneven tension or an inconsistent stitch count in your main rectangle. The foundation of your bow needs to be perfectly rectangular.
Carefully recount your stitches on each row in your next project. Also, try to consciously relax your grip if your stitches are too tight, or pull the yarn a little more firmly if they are too loose. Practice helps immensely with achieving consistent tension.
Center Wrap Unravels
An unraveling center wrap indicates that it wasn’t secured properly. This can be frustrating after all your hard work to shape the bow.
Ensure you tie a very secure double knot with the ends of the wrapping yarn on the back of the bow. You can also thread the ends through a few stitches on the back before tying, providing extra grip.
Bow is Too Big or Too Small
The size of your bow is determined by several factors, and if it’s not the size you wanted, adjustments are simple for future projects.
To make a larger bow, use a thicker yarn and a larger hook, and/or increase your starting chain and the number of rows. For a smaller bow, choose a thinner yarn, a smaller hook, and reduce your initial chain and row count.
Key Takeaways
- Mastering a basic crochet bow is an excellent way to practice fundamental stitches and tension control.
- Crochet bows are incredibly versatile and can be customized in size, color, and texture for various uses.
- Consistent stitch count and even tension are crucial for creating a symmetrical and professional-looking bow.
- Properly securing yarn ends and the center wrap prevents unraveling and ensures durability.
- Don’t hesitate to experiment with different yarns, hook sizes, and embellishments to personalize your creations.
- This project is ideal for using up small amounts of leftover yarn, making it a great stash-busting option.
Frequently Asked Questions
What type of yarn is best for making crochet bows?
Almost any yarn type can work for crochet bows, depending on the desired look. Cotton yarns give a crisp, defined bow, while acrylic yarns offer a softer, more pliable finish. Wool blends can create a cozy, rustic feel.
The key is to match your hook size to your chosen yarn weight. For beginners, a worsted weight acrylic yarn is often recommended due to its ease of use and stitch definition.
Can I make this bow without single crochet stitches?
Absolutely. While single crochet creates a firm and dense bow, you can certainly use other basic stitches. Half double crochet or double crochet will result in a slightly looser and more airy bow.
Just remember to adjust your starting chain length and turning chains to achieve a similar overall size. Experiment to see which stitch texture you prefer for your bows.
How can I make my bow stiffer so it holds its shape better?
If you want a stiffer bow, there are a few techniques you can try. Using a smaller hook size than recommended for your yarn will create a denser fabric, naturally making the bow firmer.
Alternatively, you can stiffen the finished bow using a fabric stiffener or a diluted mixture of white glue and water. Simply soak the bow, shape it, and let it dry completely.
What is the best way to attach a crochet bow to a hair clip?
For attaching a bow to a hair clip, sewing is generally the most secure method. Use a matching thread and a sewing needle to stitch the back of the bow directly onto the clip’s base.
You can also use a strong fabric glue or hot glue, applying a small amount to the clip and pressing the bow firmly onto it. Ensure the glue is completely dry before using the clip.
Our Top Recommended Finds
- Ergonomic Crochet Hook Set: A comfortable hook makes a huge difference, especially during longer crafting sessions. Sets offer various sizes for different yarn weights.
- Assorted Yarn Pack: Small packs with multiple colors are perfect for creating a variety of bows and using up small amounts of yarn.
- Large-Eye Yarn Needles: These blunt needles are essential for weaving in ends without splitting your yarn, giving your finished bow a polished look.
Your Next Creative Adventure Awaits
You’ve now mastered the art of crocheting a beautiful bow. This small project opens up a world of possibilities for personalizing your crafts and gifts.
Don’t stop here. Consider exploring other simple crochet appliques like flowers, leaves, or even small hearts. Each new project builds your skills and confidence.
Grab your hook and yarn today, and start adding these charming, handmade bows to everything that needs a touch of your unique creativity.