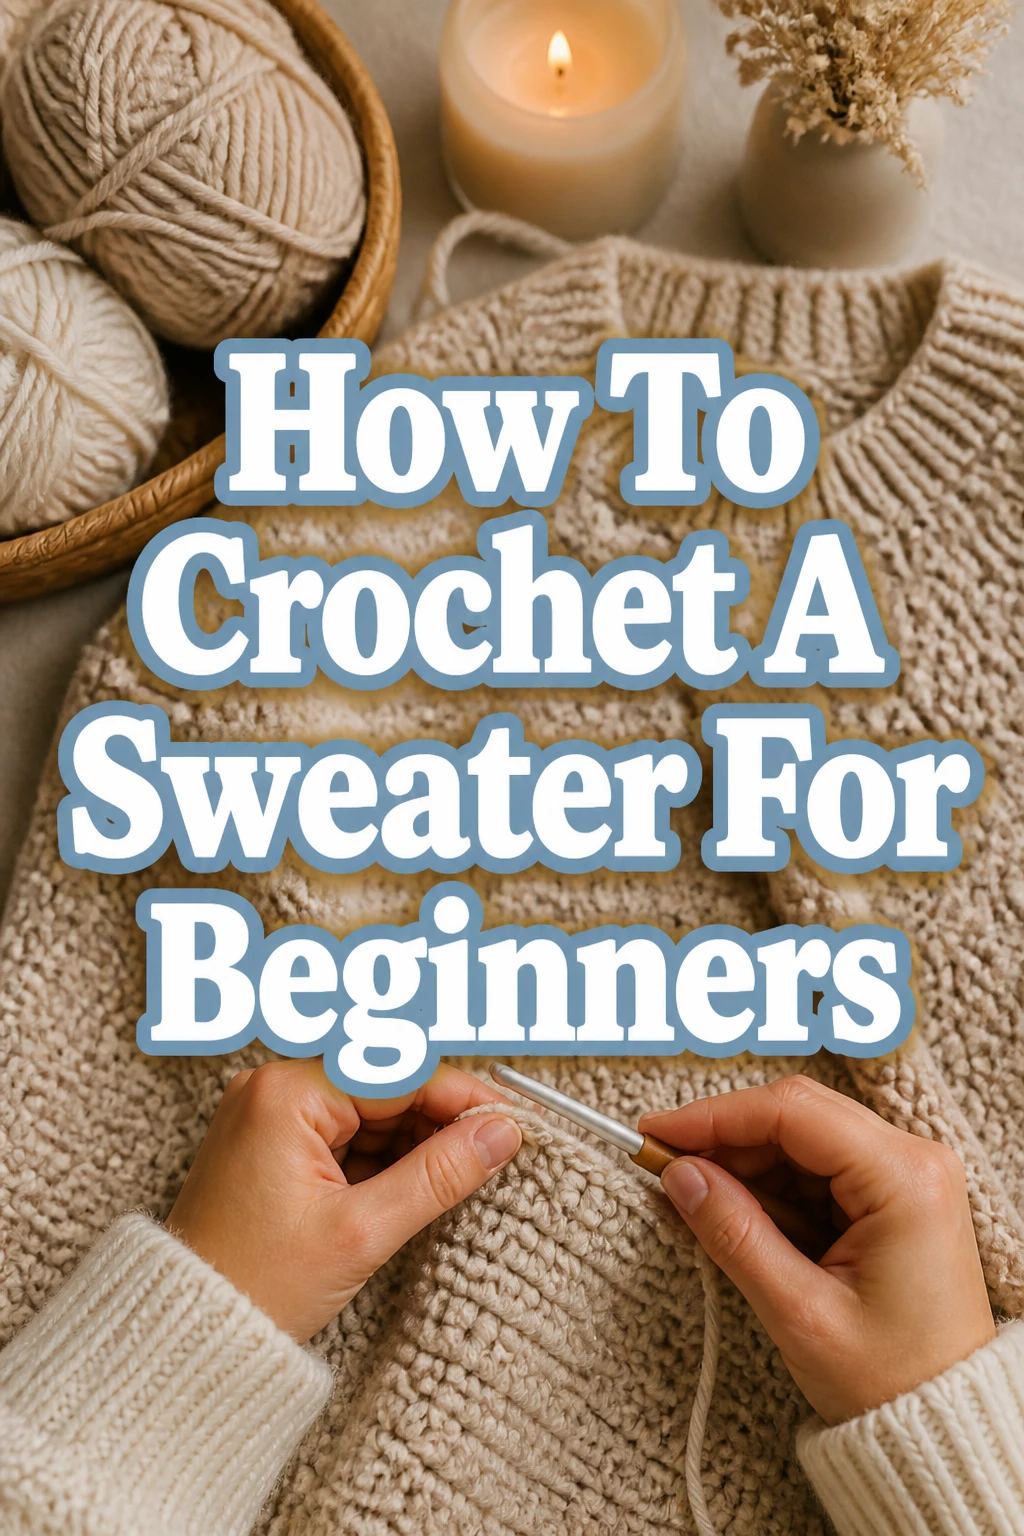
How To Crochet A Sweater For Beginners
Learning to crochet your own sweater can feel like a monumental task at first.
I distinctly remember the satisfaction of wearing my first handmade garment, a cozy cardigan that brought immense pride.
This guide breaks down that journey into simple, manageable steps, sharing the practical insights I gained along the way.
Quick Overview
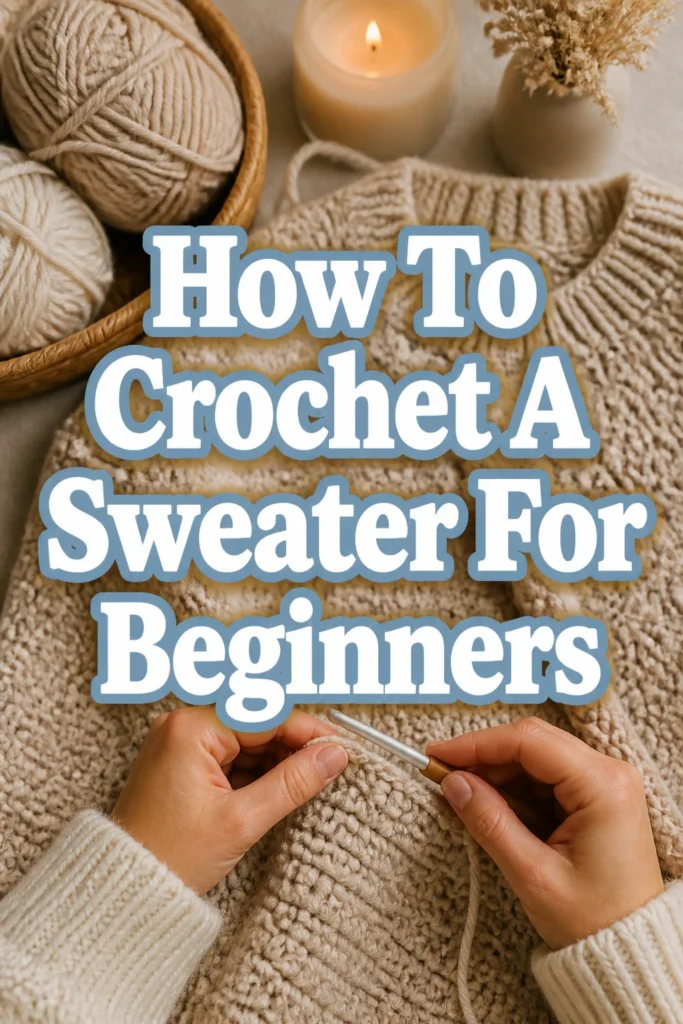
Embarking on your first crochet sweater project is an exciting endeavor. This guide will walk you through everything from selecting your yarn to assembling your finished garment, making the process approachable for absolute beginners.
- Time needed: 40-80 hours (spread over several weeks, depending on pace)
- Difficulty: Beginner
- What you’ll need: Yarn, crochet hook, tapestry needle, stitch markers, measuring tape, scissors.
Step-by-Step Instructions
Step 1: Gather Your Essential Supplies
Before you begin, gathering the right tools is crucial. This ensures a smooth and enjoyable crocheting experience from the start.
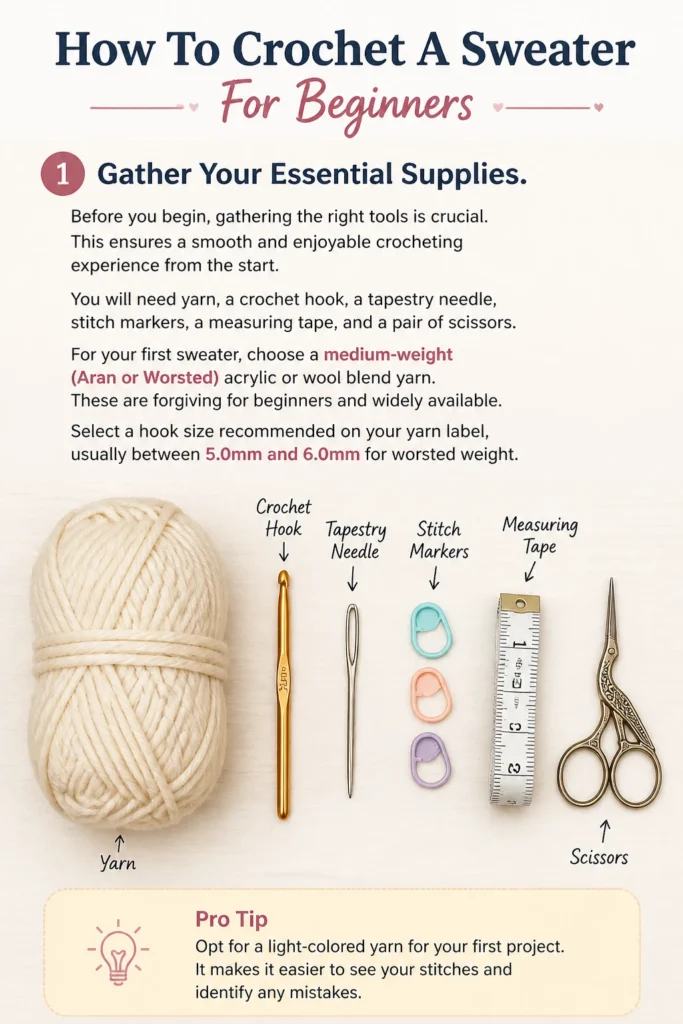
You will need yarn, a crochet hook, a tapestry needle, stitch markers, a measuring tape, and a pair of scissors.
For your first sweater, choose a medium-weight (Aran or Worsted) acrylic or wool blend yarn. These are forgiving for beginners and widely available.
Select a hook size recommended on your yarn label, usually between 5.0mm and 6.0mm for worsted weight.
Pro Tip: Opt for a light-colored yarn for your first project. It makes it easier to see your stitches and identify any mistakes.
Step 2: Choose a Simple Pattern and Understand Gauge
For your first sweater, select a beginner-friendly pattern. Look for designs that use basic stitches like single crochet (SC) or half double crochet (HDC) and are constructed from simple shapes, like a rectangle for the back and front panels.
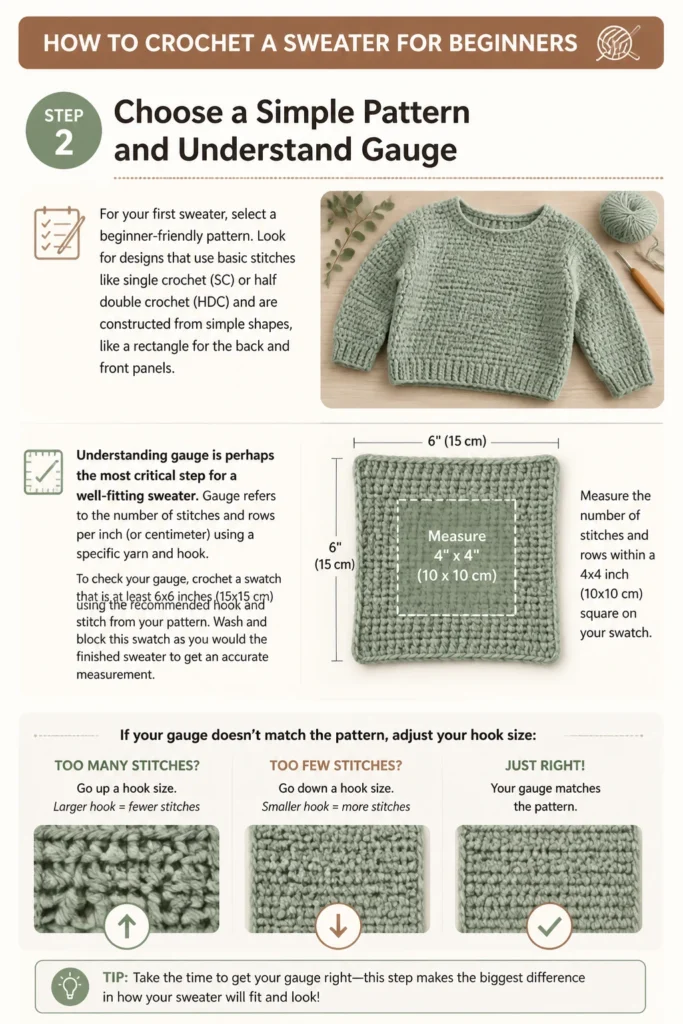
Understanding gauge is perhaps the most critical step for a well-fitting sweater. Gauge refers to the number of stitches and rows per inch (or centimeter) using a specific yarn and hook.
To check your gauge, crochet a swatch that is at least 6×6 inches (15×15 cm) using the recommended hook and stitch from your pattern. Wash and block this swatch as you would the finished sweater to get an accurate measurement.
Measure the number of stitches and rows within a 4×4 inch (10×10 cm) square on your swatch. If you have too many stitches, go up a hook size. If you have too few, go down a hook size. Adjust until your swatch matches the pattern’s gauge.
Step 3: Crochet the Back Panel
Most beginner sweaters are constructed in pieces, starting with the back panel. This is often the largest and most straightforward piece.
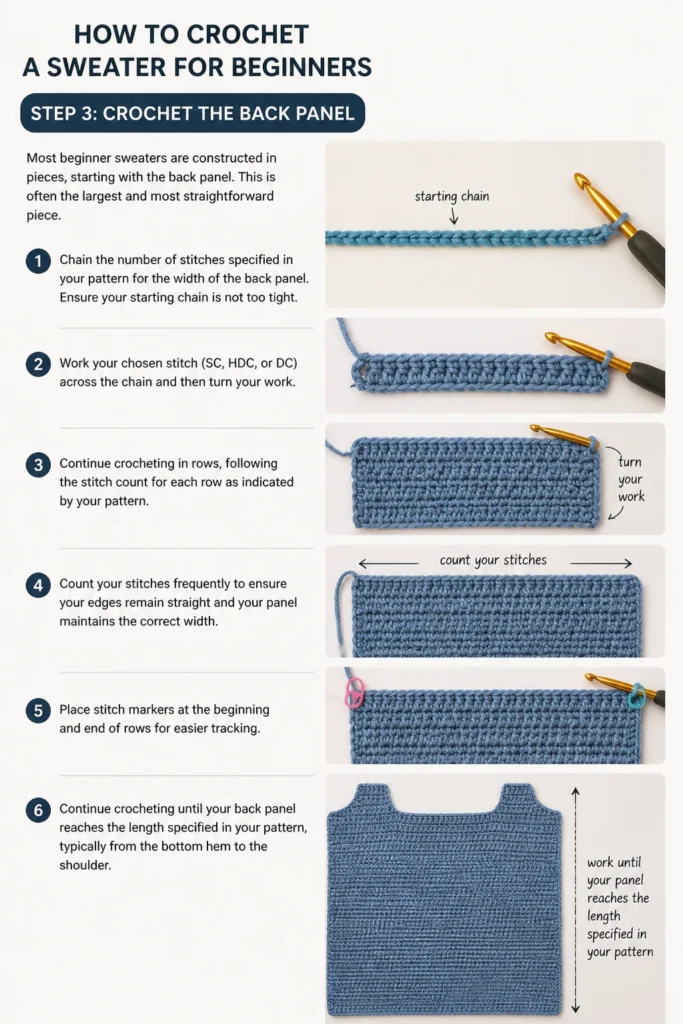
Chain the number of stitches specified in your pattern for the width of the back panel. Ensure your starting chain is not too tight.
Work your chosen stitch (SC, HDC, or DC) across the chain and then turn your work. Continue crocheting in rows, following the stitch count for each row as indicated by your pattern.
Count your stitches frequently to ensure your edges remain straight and your panel maintains the correct width. Place stitch markers at the beginning and end of rows for easier tracking.
Continue crocheting until your back panel reaches the length specified in your pattern, typically from the bottom hem to the shoulder.
Step 4: Create the Front Panel
The front panel is often very similar to the back, but it may include shaping for the neckline. Some beginner patterns might even suggest two identical panels for simplicity.
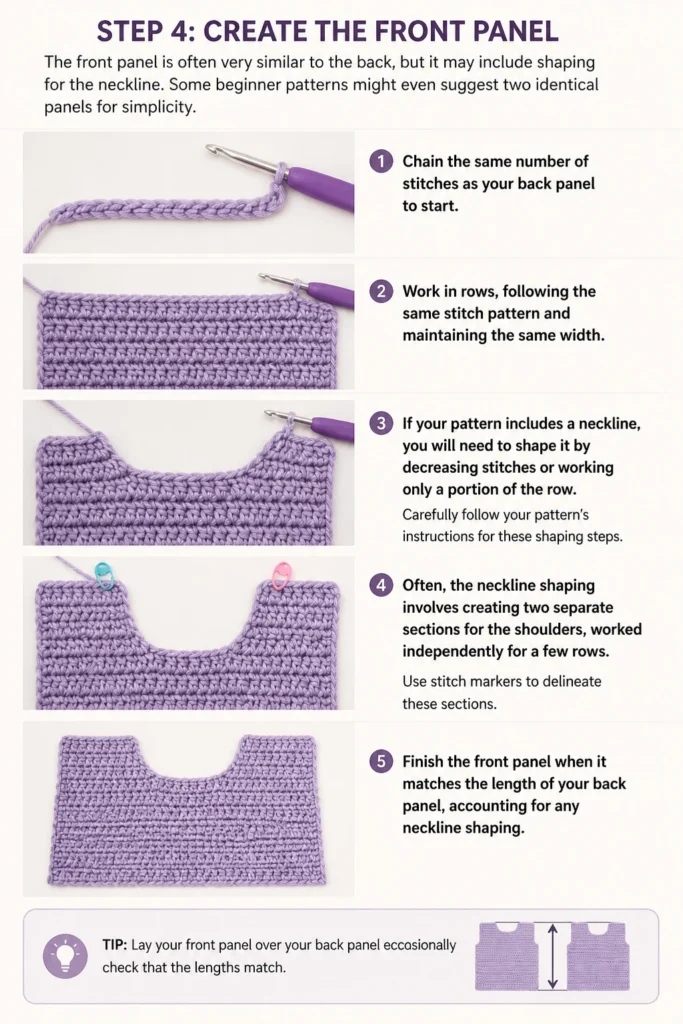
Chain the same number of stitches as your back panel to start. Work in rows, following the same stitch pattern and maintaining the same width.
If your pattern includes a neckline, you will need to shape it by decreasing stitches or working only a portion of the row. Carefully follow your pattern’s instructions for these shaping steps.
Often, the neckline shaping involves creating two separate sections for the shoulders, worked independently for a few rows. Use stitch markers to delineate these sections.
Finish the front panel when it matches the length of your back panel, accounting for any neckline shaping.
Step 5: Work the Sleeves
Sleeves are typically crocheted flat and then seamed, or worked in the round. For beginners, flat panels are often easier to manage.
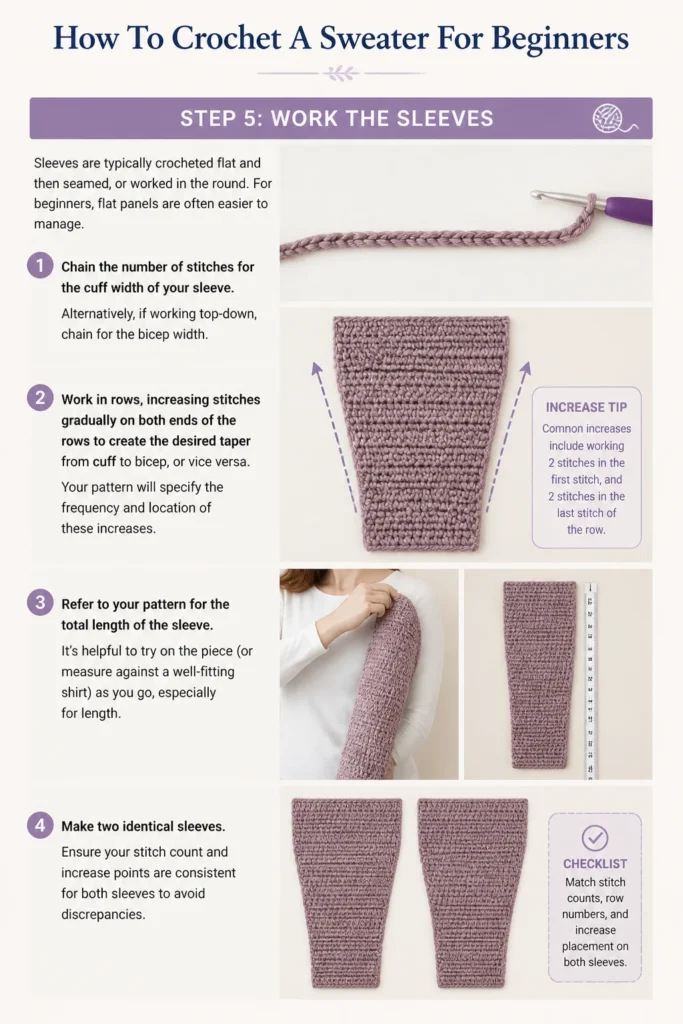
Chain the number of stitches for the cuff width of your sleeve. Alternatively, if working top-down, chain for the bicep width.
Work in rows, increasing stitches gradually on both ends of the rows to create the desired taper from cuff to bicep, or vice versa. Your pattern will specify the frequency and location of these increases.
Refer to your pattern for the total length of the sleeve. It’s helpful to try on the piece (or measure against a well-fitting shirt) as you go, especially for length.
Make two identical sleeves. Ensure your stitch count and increase points are consistent for both sleeves to avoid discrepancies.
Step 6: Assemble Your Sweater
Once all your panels are complete (back, front, and two sleeves), it’s time to join them together. This step brings your sweater to life.
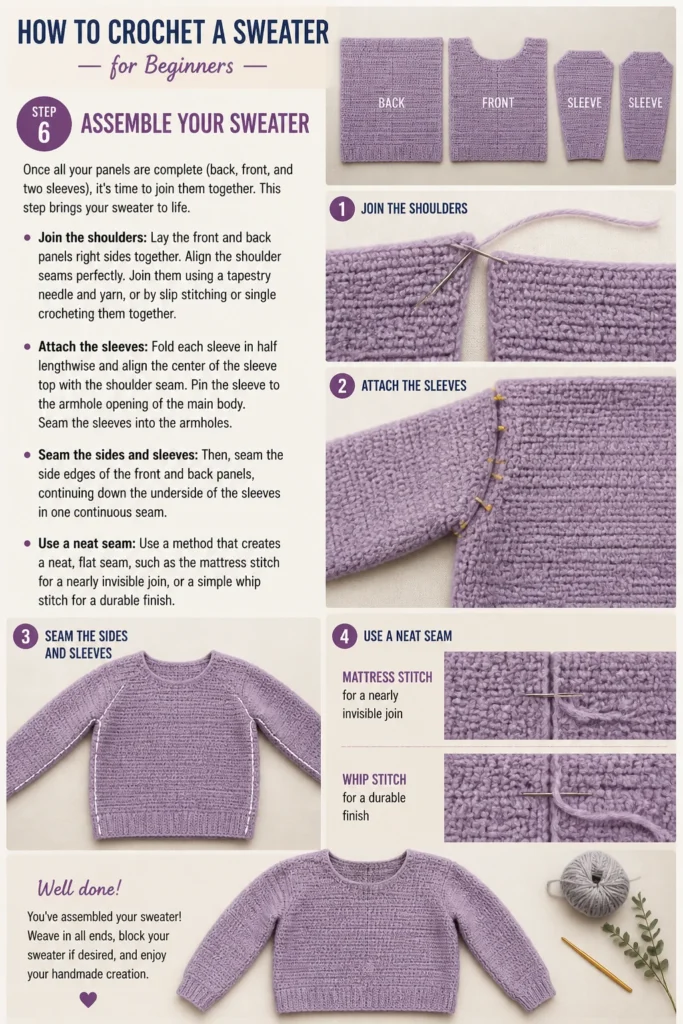
Lay the front and back panels right sides together. Align the shoulder seams perfectly. Join them using a tapestry needle and yarn, or by slip stitching or single crocheting them together.
Attach the sleeves next. Fold each sleeve in half lengthwise and align the center of the sleeve top with the shoulder seam. Pin the sleeve to the armhole opening of the main body.
Seam the sleeves into the armholes. Then, seam the side edges of the front and back panels, continuing down the underside of the sleeves in one continuous seam.
Use a method that creates a neat, flat seam, such as the mattress stitch for a nearly invisible join, or a simple whip stitch for a visible but sturdy seam.
Step 7: Add Finishing Touches and Blocking
Finishing touches elevate your sweater from a collection of pieces to a polished garment.
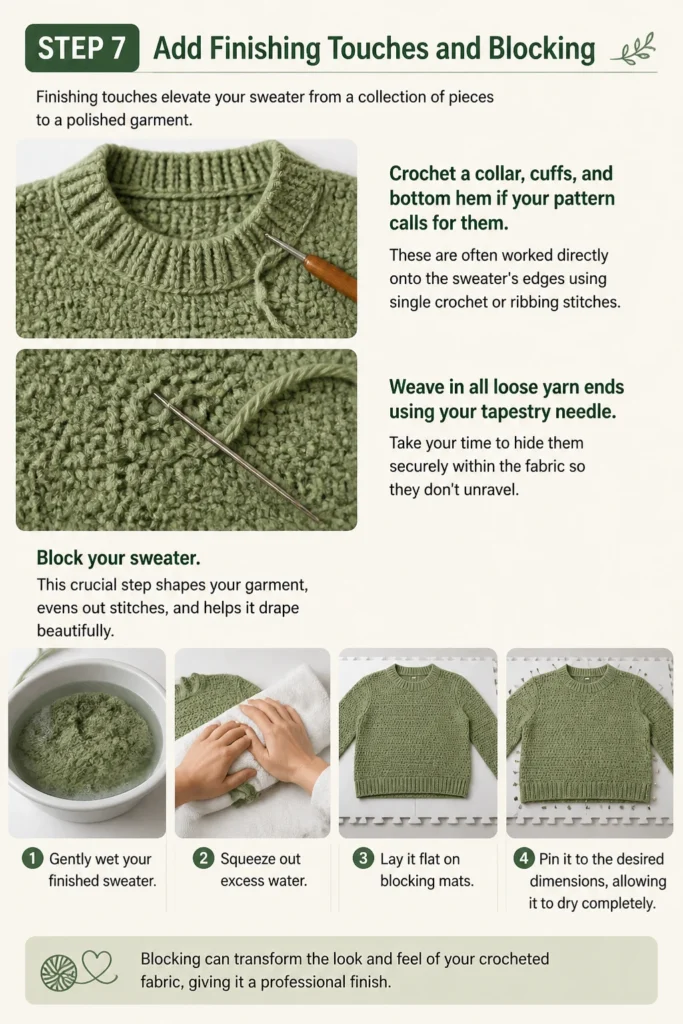
Crochet a collar, cuffs, and bottom hem if your pattern calls for them. These are often worked directly onto the sweater’s edges using single crochet or ribbing stitches.
Weave in all loose yarn ends using your tapestry needle. Take your time to hide them securely within the fabric so they don’t unravel.
Block your sweater. This crucial step shapes your garment, evens out stitches, and helps it drape beautifully. Gently wet your finished sweater, squeeze out excess water, and lay it flat on blocking mats. Pin it to the desired dimensions, allowing it to dry completely.
Blocking can transform the look and feel of your crocheted fabric, giving it a professional finish.
Common Mistakes to Avoid
Skipping the Gauge Swatch
Many beginners are eager to jump straight into the project, bypassing the gauge swatch. This often leads to a sweater that is significantly too large or too small, wasting hours of work.
Always take the time to crochet and measure a swatch. Adjust your hook size if necessary to match the pattern’s gauge. This small step saves you immense frustration later on.
Incorrect Sizing
Beyond gauge, choosing the wrong size from the pattern can lead to disappointment. Always compare the pattern’s finished garment measurements to your own body measurements or those of a favorite well-fitting sweater.
Do not simply rely on the “small,” “medium,” or “large” labels, as these can vary greatly between patterns and designers. Ensure you are making the size that will actually fit you.
Ignoring Yarn Weight
Using a yarn that is a different weight than specified in the pattern can drastically alter the outcome, even if you try to match gauge. A lighter yarn will result in a lacier fabric, while a heavier yarn will create a denser, stiffer garment.
Stick to the recommended yarn weight (e.g., worsted, DK, bulky) to achieve the intended drape and feel of the design. If substituting, ensure the new yarn has a similar fiber content and weight category.
Uneven Tension
Inconsistent tension, where some stitches are tight and others are loose, can lead to a wavy or lumpy fabric. This is a common challenge for beginners as they develop their muscle memory.
Practice helps immensely. Try to relax your grip on the hook and yarn, and be mindful of creating uniform stitches. If you notice significant unevenness, take a break and return with fresh hands.
Troubleshooting
Sweater is Too Big or Too Small
This is almost always a gauge issue. If your sweater is too big, your gauge was likely too loose (too few stitches per inch). If it’s too small, your gauge was too tight (too many stitches per inch).
For future projects, make sure to adjust your hook size until your swatch matches the pattern’s gauge. For the current project, if it’s only slightly off, blocking can sometimes help stretch or shrink it a little. Otherwise, consider unraveling and re-crocheting with the correct hook size.
Edges are Wavy or Uneven
Wavy edges often indicate that you are either adding or skipping stitches at the beginning or end of your rows. Uneven edges can also result from inconsistent turning chains or tension.
Always count your stitches at the end of each row. Use stitch markers in the first and last stitch of every row to clearly mark where you should insert your hook for the next row’s turning chain. Practice consistent turning chains for a neater edge.
Stitches Look Messy or Inconsistent
This is a natural part of the learning process for any new crocheter. It takes time and practice to develop smooth, even stitches.
Focus on maintaining consistent tension in your yarn and hook. Don’t be afraid to unravel (frog) sections that aren’t to your liking. Each stitch you make, even the messy ones, contributes to your skill development. It will improve with every row you crochet.
Key Takeaways
- Always prioritize making a gauge swatch to ensure your sweater fits correctly.
- Choose a beginner-friendly pattern with simple stitches and construction.
- Take your time with each panel, counting stitches frequently for accuracy.
- Properly assembling and seaming the pieces is vital for a professional finish.
- Don’t skip blocking; it dramatically improves the look and drape of your sweater.
- Embrace imperfections as part of your learning journey; every stitch builds skill.
Frequently Asked Questions
What’s the best yarn for a beginner sweater?
Acrylic or a wool-acrylic blend in a worsted or Aran weight is ideal. Acrylic is affordable, easy to care for, and forgiving for new crocheters. Wool blends offer warmth and structure while still being manageable.
Can I use a different hook size than the pattern recommends?
Yes, you absolutely can, and often should! The hook size recommended in a pattern is just a starting point. Your personal tension will dictate the actual hook size you need to achieve the correct gauge. Always adjust your hook to match the pattern’s gauge, not just follow the suggested size.
How do I wash my crochet sweater?
Always follow the care instructions on your yarn label. For most acrylics, machine washing on a gentle cycle with cold water and air drying flat is suitable. Wool items often require hand washing in cool water and laying flat to dry, never hanging, to prevent stretching.
What if my sweater doesn’t look perfect?
No handmade item is ever truly “perfect,” and that’s part of its charm! Every stitch is a testament to your effort and learning. Focus on the joy of creating something with your own hands. Your first sweater is a milestone, a wearable reminder of your new skill, and it will be cherished precisely because you made it.
Our Top Recommended Finds
- Ergonomic Crochet Hook Set: A comfortable hook reduces hand strain, making long crocheting sessions more enjoyable.
- Soft Worsted Weight Yarn Pack: Having a few skeins of a reliable, soft yarn in a versatile weight is perfect for starting your project.
- Stitch Markers and Tapestry Needles: These small tools are indispensable for tracking stitches and seaming your finished pieces neatly.
Craft Your Cozy Masterpiece
You now have a clear roadmap to crocheting your very first sweater. This journey is about more than just yarn and hooks; it’s about learning a new skill, building confidence, and creating something truly unique.
Don’t let the size of the project intimidate you. Break it down into these smaller, manageable steps, and celebrate each panel you complete.
Pick out that beautiful yarn, find a simple pattern, and start your crocheting adventure today. Imagine the satisfaction of wearing your own handmade sweater!