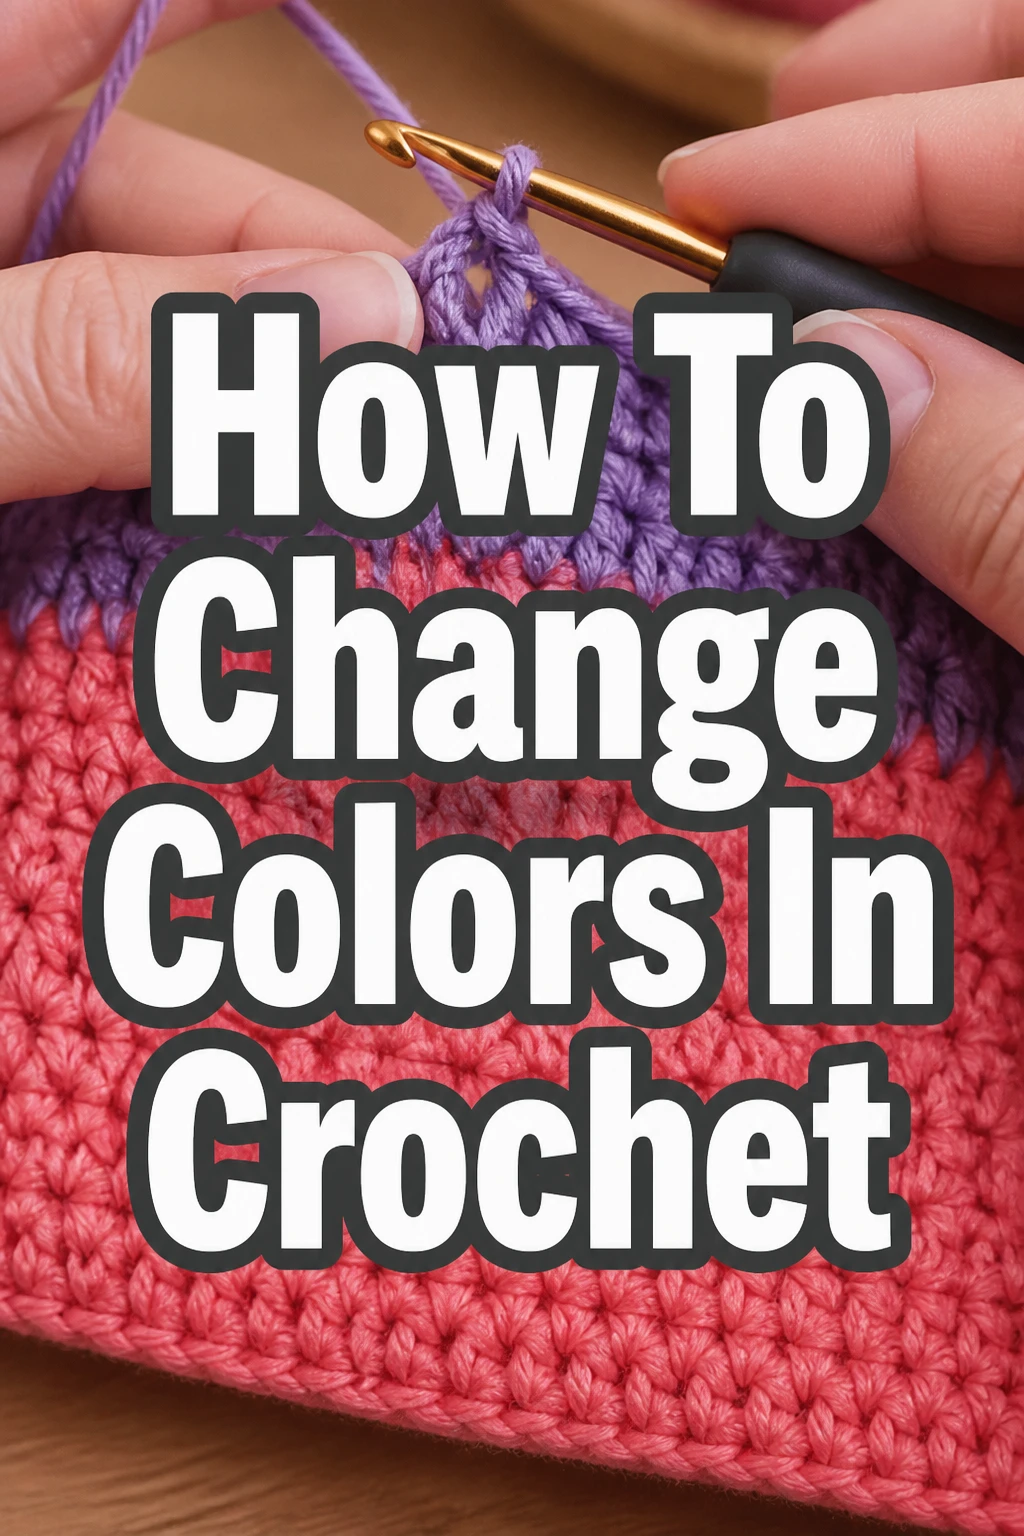
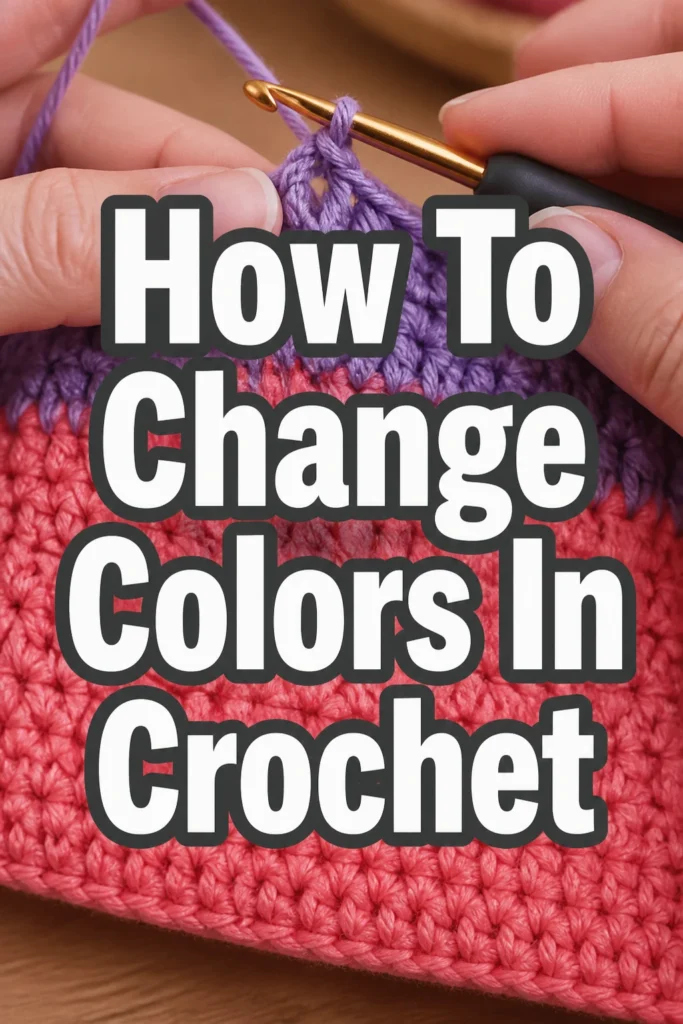
How To Change Colors In Crochet
Learning to change colors in crochet is a truly transformative skill. It opens up a universe of design possibilities, from simple stripes to intricate colorwork patterns.
I remember my first striped blanket; the joy of seeing those vibrant bands emerge was incredibly satisfying. This guide comes from years of hands-on experience, helping you achieve seamless, beautiful color transitions every time.
Let’s dive in and master this fundamental technique together, making your crochet projects even more stunning.
Quick Overview
This guide will equip you with the knowledge to seamlessly change yarn colors in your crochet projects. You’ll learn the core techniques for clean transitions, whether at the end of a row or mid-stitch.
- Time needed: 15-30 minutes (for practice)
- Difficulty: Beginner
- What you’ll need: Yarn in two contrasting colors, a crochet hook, scissors, a yarn needle
Step-by-Step Instructions
Step 1: Gather Your Supplies
Collect all the necessary materials before you begin. Having everything within reach makes the process smoother and prevents interruptions.
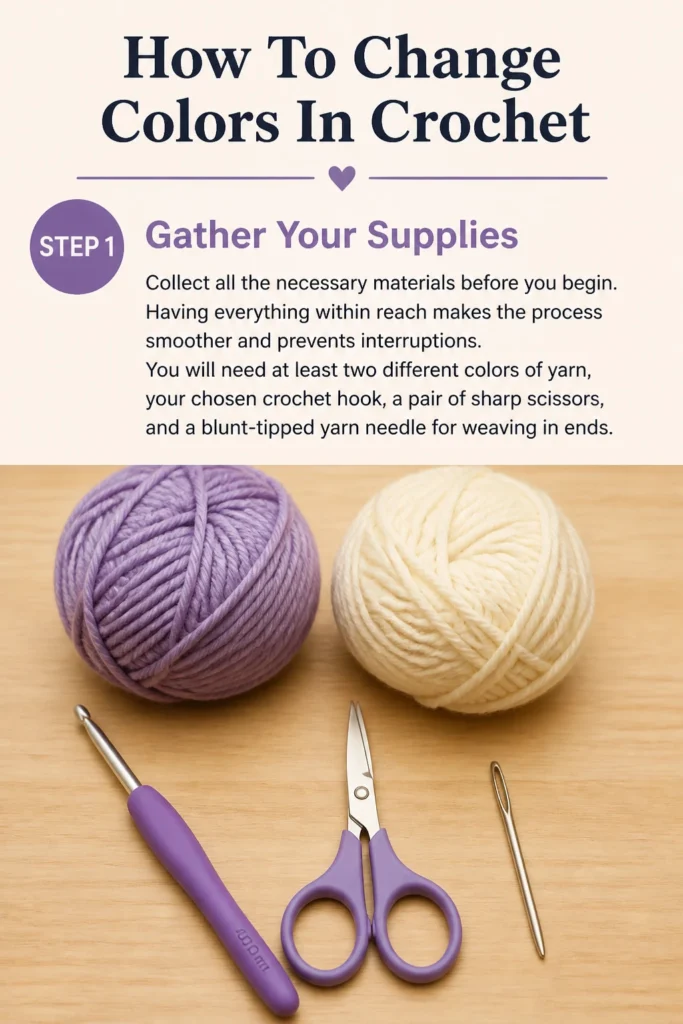
You will need at least two different colors of yarn, your chosen crochet hook, a pair of sharp scissors, and a blunt-tipped yarn needle for weaving in ends.
Step 2: Crochet to the Change Point
Work your current crochet project in your first color until you reach the exact stitch where you want the color change to occur.
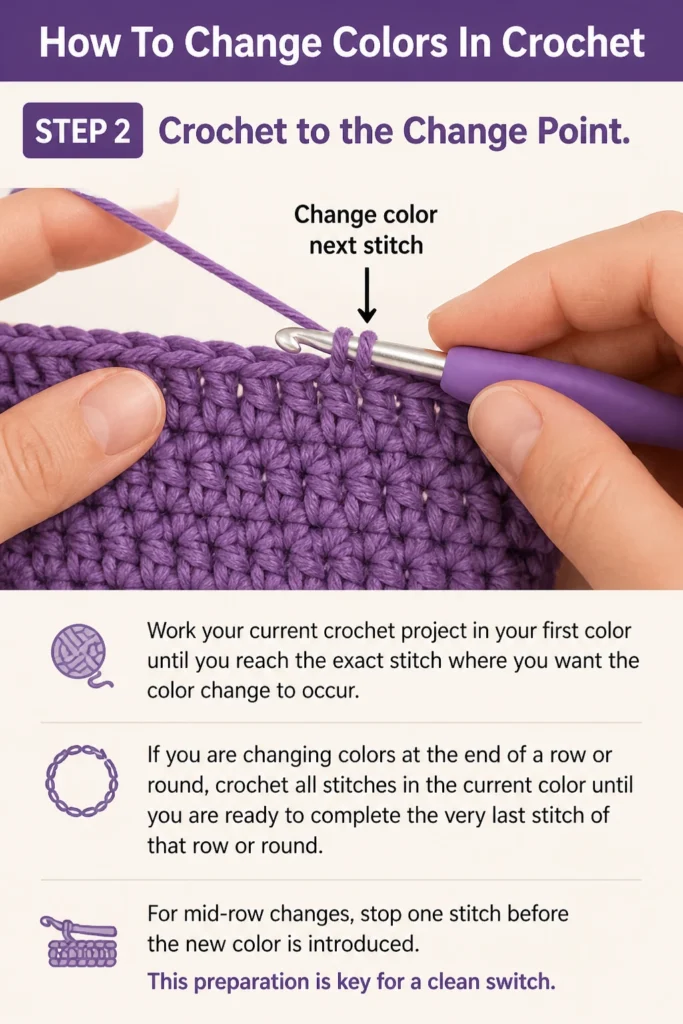
If you are changing colors at the end of a row or round, crochet all stitches in the current color until you are ready to complete the very last stitch of that row or round.
For mid-row changes, stop one stitch before the new color is introduced. This preparation is key for a clean switch.
Step 3: Prepare the New Color Yarn
Unwind a small amount of your new yarn color. Ensure it is easily accessible and not tangled.
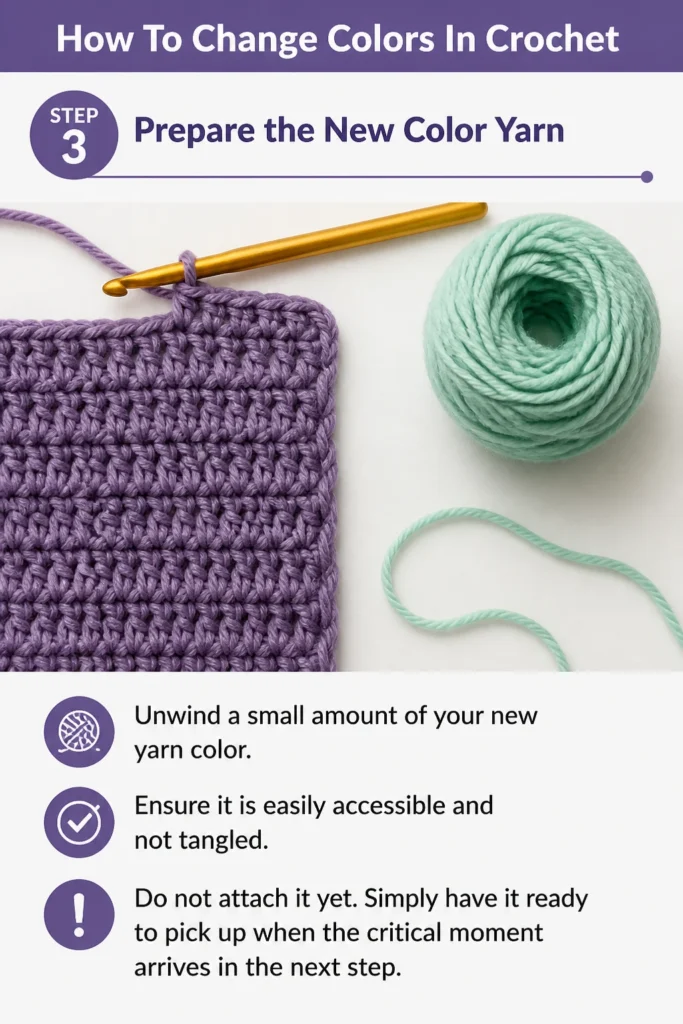
Do not attach it yet. Simply have it ready to pick up when the critical moment arrives in the next step.
Step 4: Execute the Color Change Stitch
Work the last stitch of your old color almost to completion. This is the most crucial part of the process for a seamless transition.
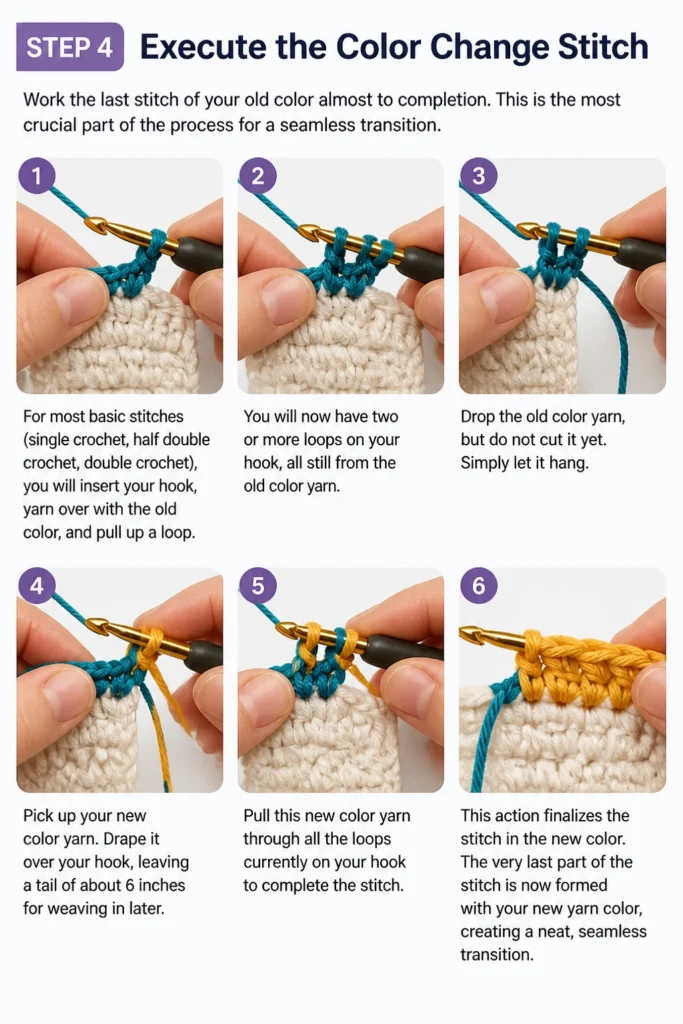
For most basic stitches (single crochet, half double crochet, double crochet), you will insert your hook, yarn over with the old color, and pull up a loop.
You will now have two or more loops on your hook, all still from the old color yarn.
Drop the old color yarn, but do not cut it yet. Simply let it hang.
Pick up your new color yarn. Drape it over your hook, leaving a tail of about 6 inches for weaving in later.
Pull this new color yarn through all the loops currently on your hook to complete the stitch. This action finalizes the stitch in the new color.
The very last part of the stitch is now formed with your new yarn color, creating a neat and almost invisible transition point.
Pro Tip: Maintaining consistent tension at this exact color change point is crucial. Too loose, and you’ll have a noticeable gap; too tight, and the fabric will pucker. Practice this step until it feels natural.
Step 5: Secure the Old Yarn (Temporarily or Permanently)
Decide whether you will carry the old yarn or cut it. If you plan to use the old color again in the next few rows, you can simply drop it and let it hang.
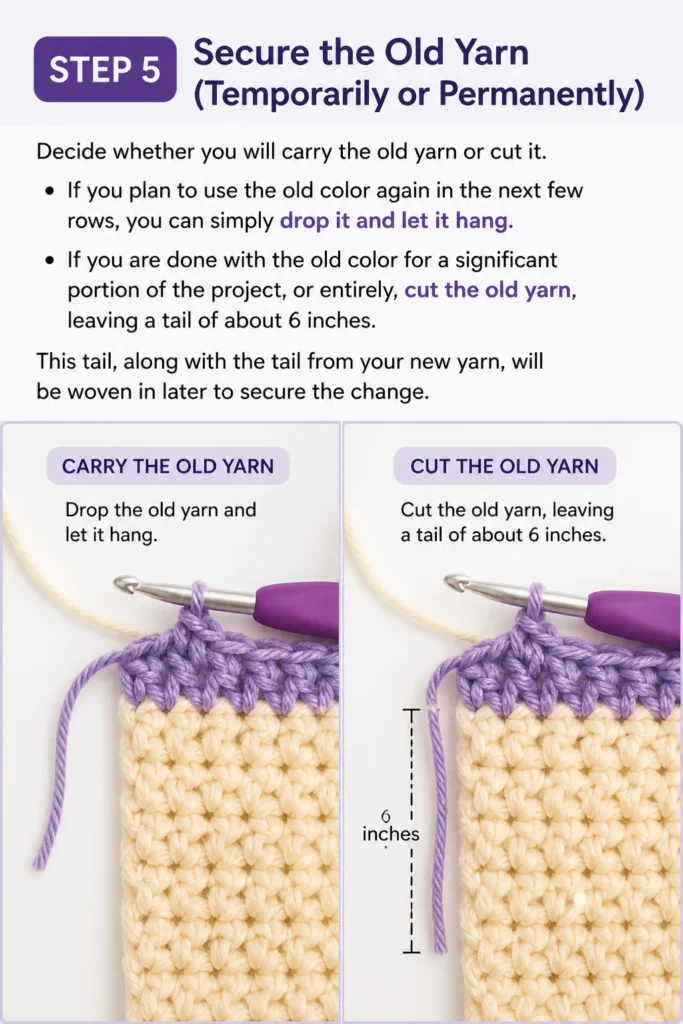
If you are done with the old color for a significant portion of the project, or entirely, cut the old yarn, leaving a tail of about 6 inches.
This tail, along with the tail from your new yarn, will be woven in later to secure the change.
Step 6: Continue with the New Color
Work your next stitches normally using the new yarn color. Ensure the first few stitches are made with a firm but not tight tension to secure the change.
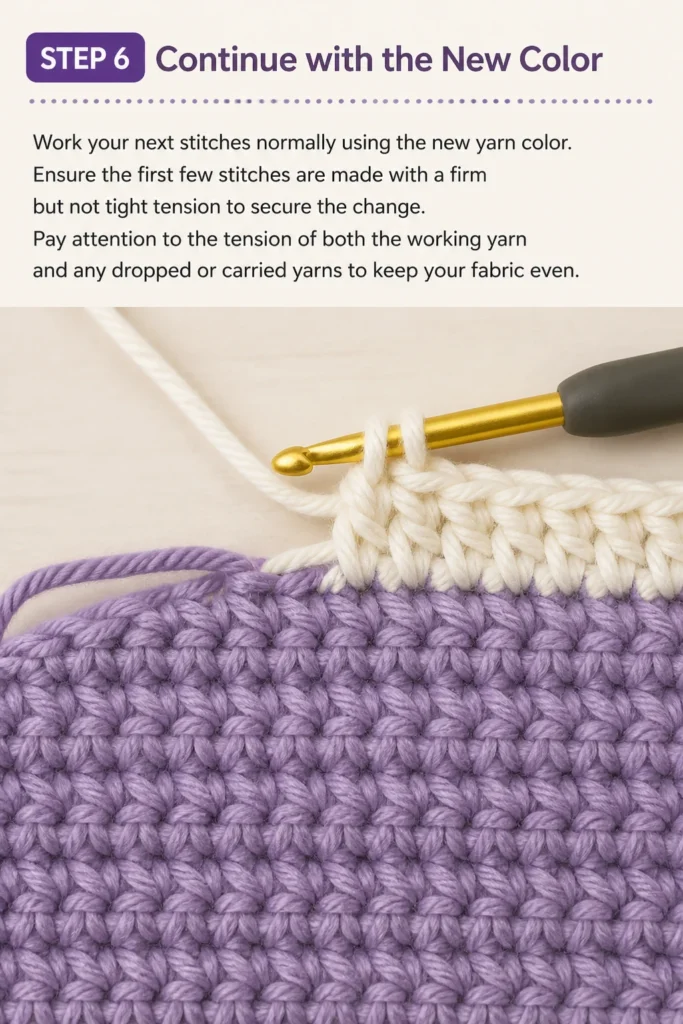
Pay attention to the tension of both the working yarn and any dropped or carried yarns to keep your fabric even.
Step 7: Weaving in Ends for a Clean Finish
Thread the yarn tails (both old and new) onto your yarn needle. This step is essential for a professional-looking finish and to prevent unraveling.
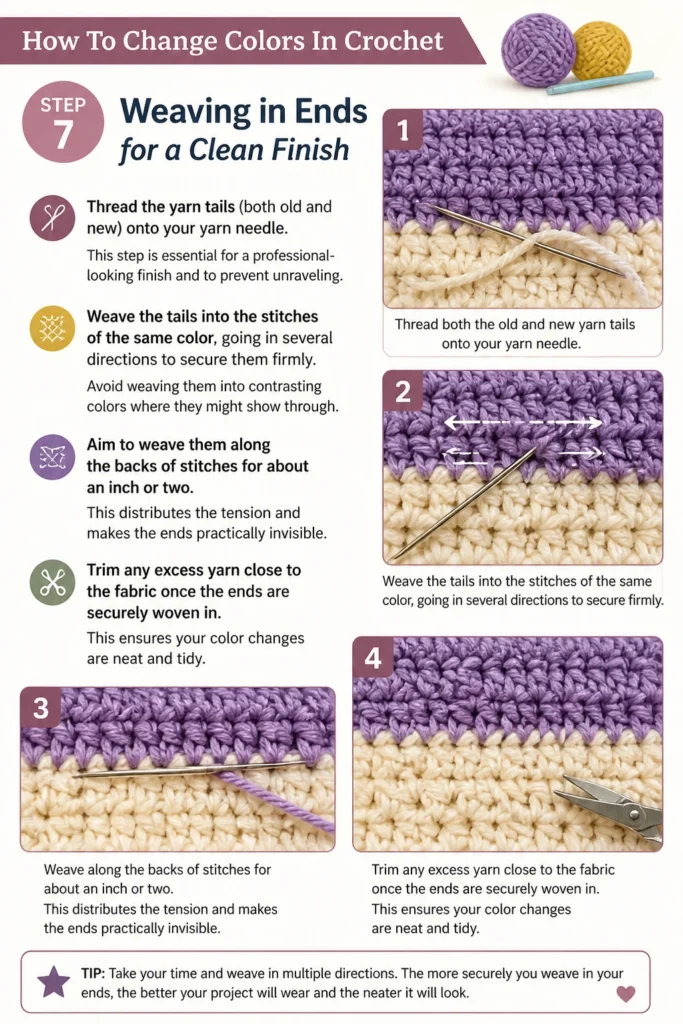
Weave the tails into the stitches of the same color, going in several directions to secure them firmly. Avoid weaving them into contrasting colors where they might show through.
Aim to weave them along the backs of stitches for about an inch or two. This distributes the tension and makes the ends practically invisible.
Trim any excess yarn close to the fabric once the ends are securely woven in. This ensures your color changes are neat and tidy.
Step 8: Changing Colors Mid-Row (Carrying Yarn)
For designs requiring frequent color changes within a single row, like stripes or simple motifs, you can carry the unused yarn.
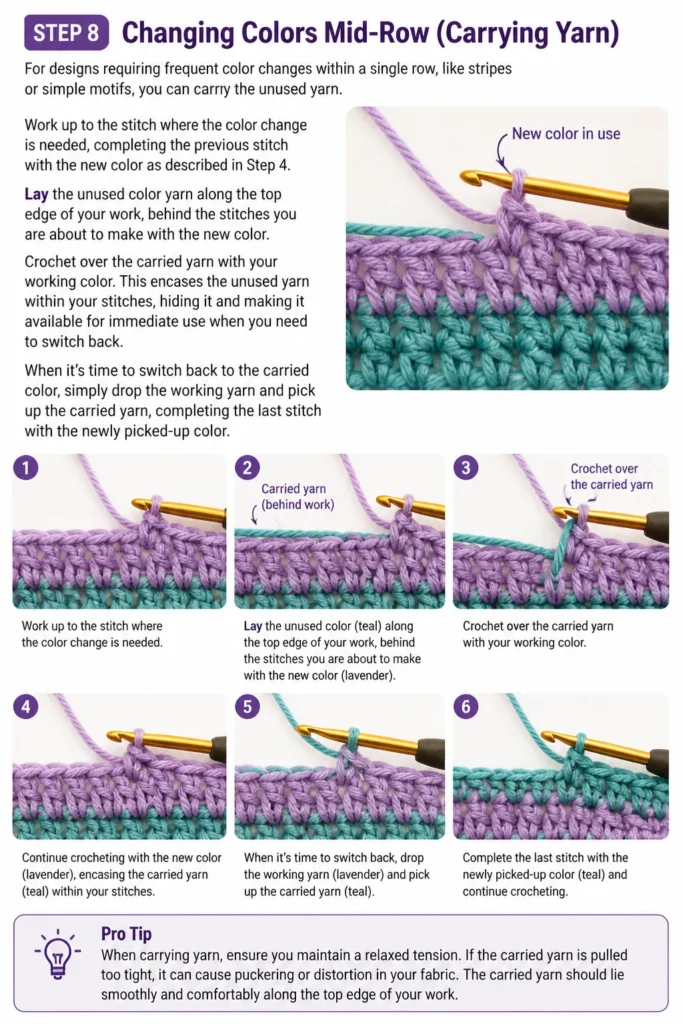
Work up to the stitch where the color change is needed, completing the previous stitch with the new color as described in Step 4.
Lay the unused color yarn along the top edge of your work, behind the stitches you are about to make with the new color.
Crochet over the carried yarn with your working color. This encases the unused yarn within your stitches, hiding it and making it available for immediate use when you need to switch back.
When it’s time to switch back to the carried color, simply drop the working yarn and pick up the carried yarn, completing the last stitch with the newly picked-up color.
Pro Tip: When carrying yarn, ensure you maintain a relaxed tension on the carried strand. If it’s pulled too tightly, your fabric will pucker. If it’s too loose, it might show through.
Step 9: Intarsia Crochet for Larger Blocks
For larger blocks of color within a row where carrying yarn would create too much bulk, Intarsia crochet is an alternative.
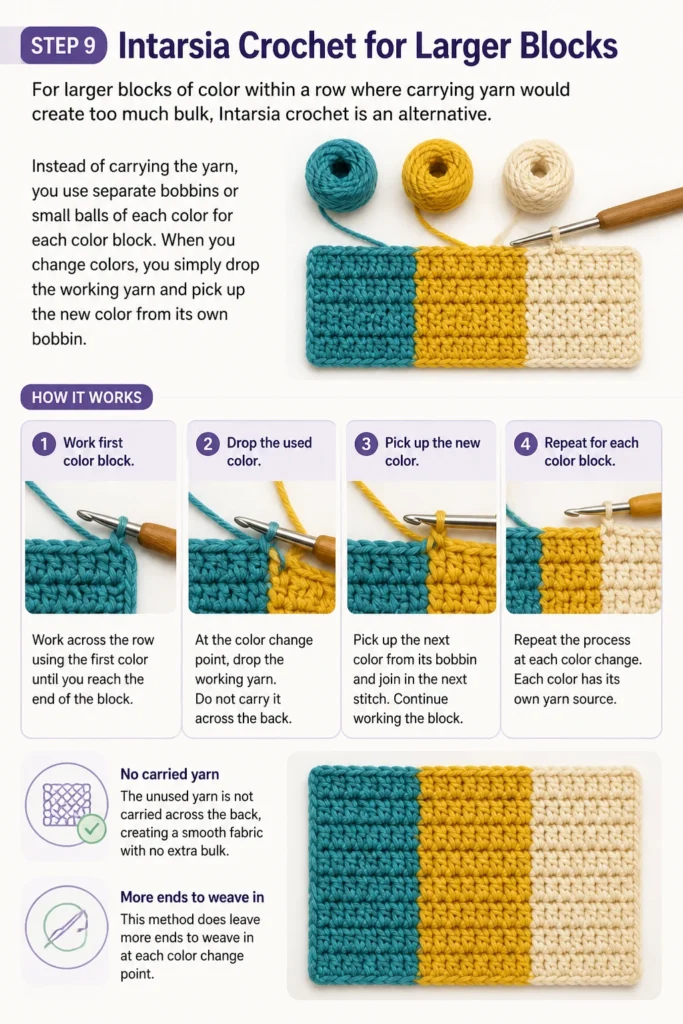
Instead of carrying the yarn, you use separate bobbins or small balls of each color for each color block.
When you change colors, you simply drop the working yarn and pick up the new color from its own bobbin. The unused yarn is not carried across the back.
This method results in a fabric with no carried yarn, ideal for solid color blocks, but it does leave more ends to weave in at each color change point.
Common Mistakes to Avoid
Loose Yarn Ends
A common pitfall is not leaving long enough tails when cutting yarn or not weaving them in securely. Short tails can easily work their way out, causing your project to unravel.
Always leave at least a 6-inch tail and weave it through several stitches in different directions. This creates enough friction to hold the end in place permanently.
Uneven Tension
New crocheters often struggle with uneven tension at the color change point. This can lead to visible gaps, puckering, or a noticeable difference in fabric density.
Consciously pay attention to how tightly you pull the new yarn through the loops. Practice making the change several times until the transition feels smooth and the fabric remains consistent.
Visible Knots
Tying knots to join new colors or secure old ones is a common beginner mistake. Knots are often bulky, can come undone, and are visible in the finished fabric.
Instead of knotting, rely on the method of completing the last stitch with the new color and then weaving in the tails. This creates a much cleaner and more durable join.
Ignoring Yarn Ends Until the End
It can be tempting to leave all the yarn ends to weave in at the very end of a project. However, this often leads to a daunting and time-consuming task.
Make a habit of weaving in ends as you go, or at least every few rows. This keeps the task manageable and ensures a neat finish throughout your work.
Troubleshooting
Messy Joins or Gaps
If your color changes look lumpy, gappy, or otherwise untidy, it’s usually a tension issue. The yarn you drop or the yarn you pick up might be too loose or too tight.
Try to consciously adjust your tension for a few stitches before and after the change. Ensure the last loop of the old color and the first pull-through of the new color are snug but not tight. Practice is the best way to develop this feel.
Yarn Tangles When Carrying Multiple Colors
Working with several colors at once, especially when carrying them, can quickly lead to a tangled mess of yarn. This slows down your progress and can be frustrating.
One solution is to turn your work in the same direction each time you finish a row, which helps keep the yarn strands aligned. Alternatively, use small bobbins for each color, which can minimize large tangles.
Colors Showing Through
Sometimes, especially with light-colored yarn over dark-carried yarn, the carried color can peek through the stitches, creating an undesirable effect.
To prevent this, ensure your stitches are tight enough to completely enclose the carried yarn. You can also try twisting the working yarn around the carried yarn before making a stitch, which helps to hide it more effectively.
Key Takeaways
- Practice the color change technique frequently to build muscle memory.
- Consistent tension is the most critical factor for neat and invisible color transitions.
- Always complete the very last step of a stitch with the new color yarn.
- Weave in all yarn ends securely and neatly to prevent unraveling and create a professional finish.
- Choose the appropriate color change method (carrying yarn or Intarsia) based on your project’s design and color block size.
- Don’t be afraid to experiment with different color combinations and patterns.
Frequently Asked Questions
Can I change colors with any crochet stitch?
Yes, the fundamental principle of changing colors remains the same regardless of the stitch. You always complete the final “yarn over and pull through” step of the last stitch in the old color with the new color yarn. The number of loops on your hook will vary, but the method adapts easily.
When should I cut the old yarn?
If you plan to use the old color again in the next few rows (e.g., for stripes), you can simply drop it and pick it up again when needed. If you are done with that color for a significant section or the entire project, cut it, leaving a 6-inch tail to weave in.
How do I avoid knots at the color change?
The best way to avoid knots is by never tying them. Instead, rely on the secure method of changing colors by pulling the new yarn through the final loops, and then meticulously weaving in both the old and new yarn tails into the fabric. This method is much more durable and invisible.
What’s the best way to carry yarn without it showing?
When carrying yarn, ensure your working stitches are tight enough to fully encase the carried strand. You can also try twisting the working yarn around the carried yarn before making each stitch. This helps to hide the carried yarn more effectively and prevents it from peeking through.
Our Top Recommended Finds
- Ergonomic Crochet Hook Set: A comfortable hook makes hours of crocheting a joy, reducing hand fatigue and improving stitch consistency.
- Blunt-Tipped Yarn Needles: Essential for neatly weaving in ends without splitting your yarn, ensuring a professional finish for every project.
- Quality Acrylic Yarn Assortment: Perfect for practicing color changes and experimenting with different color palettes without a large investment.
Embrace Your Colorful Crochet Journey
Changing colors in crochet is more than just a technique; it’s an artistic expression. With the skills you’ve learned today, your projects can truly come alive with vibrant patterns and captivating designs.
Consider exploring advanced colorwork like mosaic crochet or Fair Isle to further challenge and inspire yourself. Each new method builds on these foundational steps.
Don’t hesitate to pick up your hook and a couple of yarn colors right now. Practice these steps, embrace any mistakes as learning opportunities, and watch your crochet world expand with every beautiful stitch.