How To Make A Slip Knot Crochet
Learning to crochet can feel like stepping into a new world, full of exciting possibilities. But every incredible project starts with one simple, foundational skill.
I remember my own first attempts at crochet, fumbling with yarn and feeling a little lost. Mastering the slip knot was my first small victory, and it quickly became second nature.
This guide will walk you through creating the perfect slip knot, setting you up for success in all your crochet adventures.
Quick Overview
You’ll soon be able to confidently create the essential starting point for any crochet project. This simple knot forms the first loop on your hook.
It’s a skill you’ll use every single time you pick up your hook and yarn. Let’s get started.
- Time needed: 2-5 minutes
- Difficulty: Beginner
- What you’ll need: Yarn, Crochet Hook
Step-by-Step Instructions
The slip knot is the very first loop that goes onto your crochet hook. It’s designed to be adjustable, allowing you to control the tension of your starting chain. Follow these steps carefully to master it.
Step 1: Gather Your Supplies
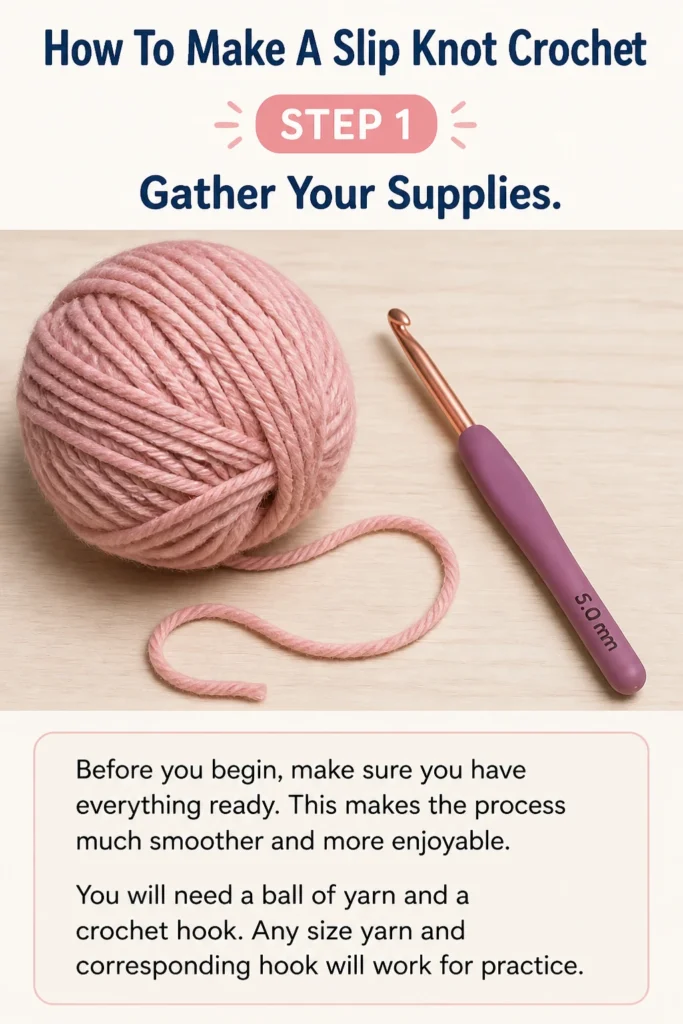
Before you begin, make sure you have everything ready. This makes the process much smoother and more enjoyable.
You will need a ball of yarn and a crochet hook. Any size yarn and corresponding hook will work for practice.
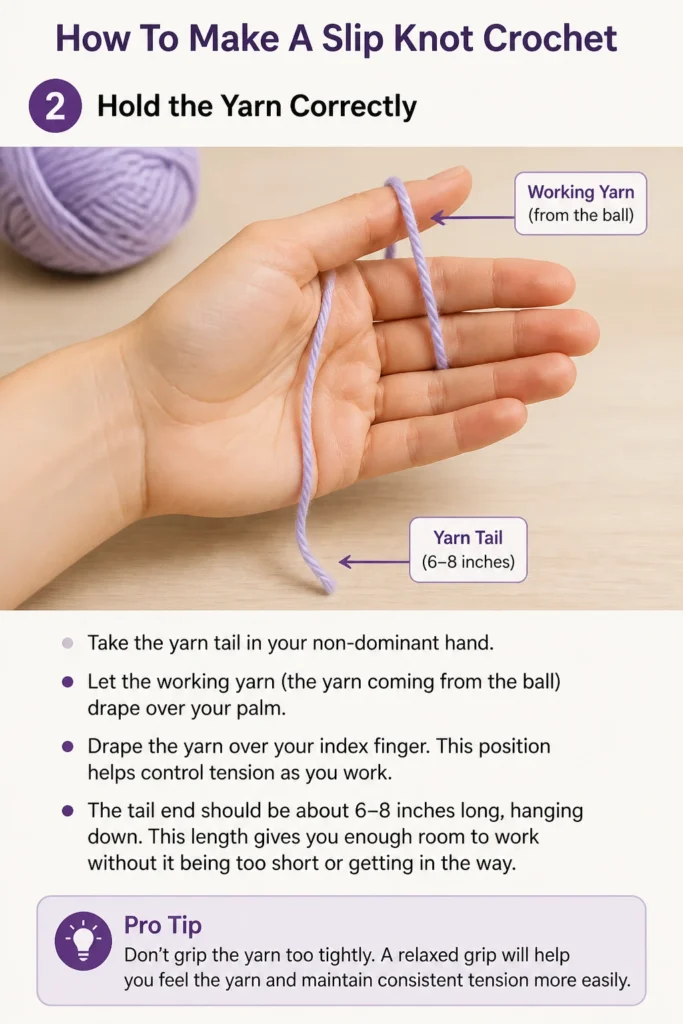
Step 2: Hold the Yarn Correctly
Take the yarn tail in your non-dominant hand. Let the working yarn (the yarn coming from the ball) drape over your palm.
Drape the yarn over your index finger. This position helps control tension as you work.
The tail end should be about 6-8 inches long, hanging down. This length gives you enough room to work without it being too short or getting in the way.
Pro Tip: Don’t grip the yarn too tightly. A relaxed grip will help you feel the yarn and maintain consistent tension more easily.
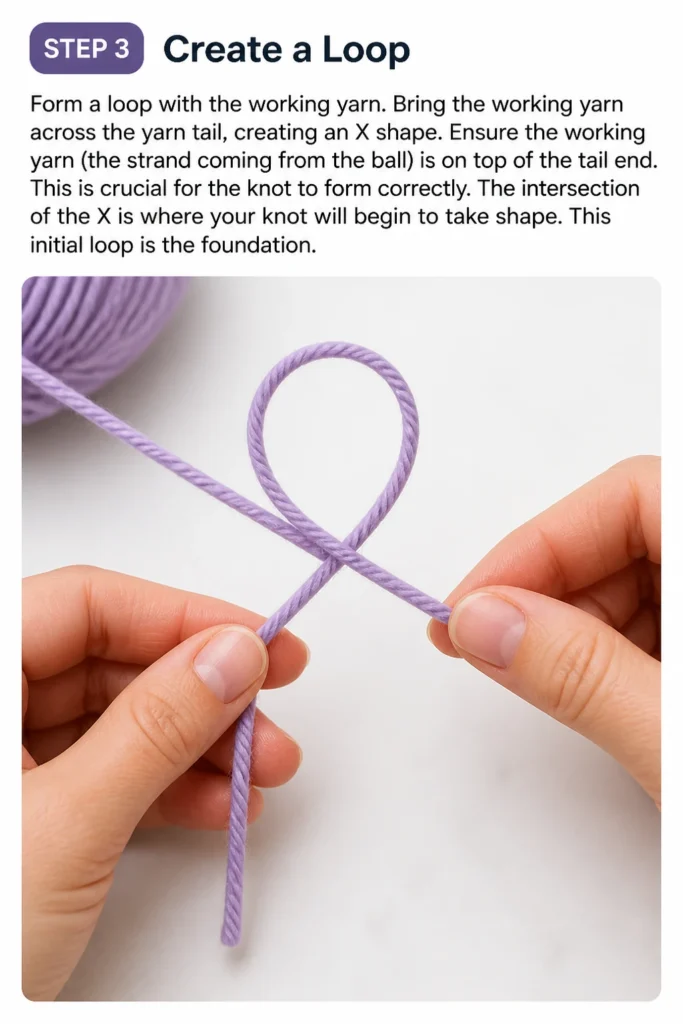
Step 3: Create a Loop
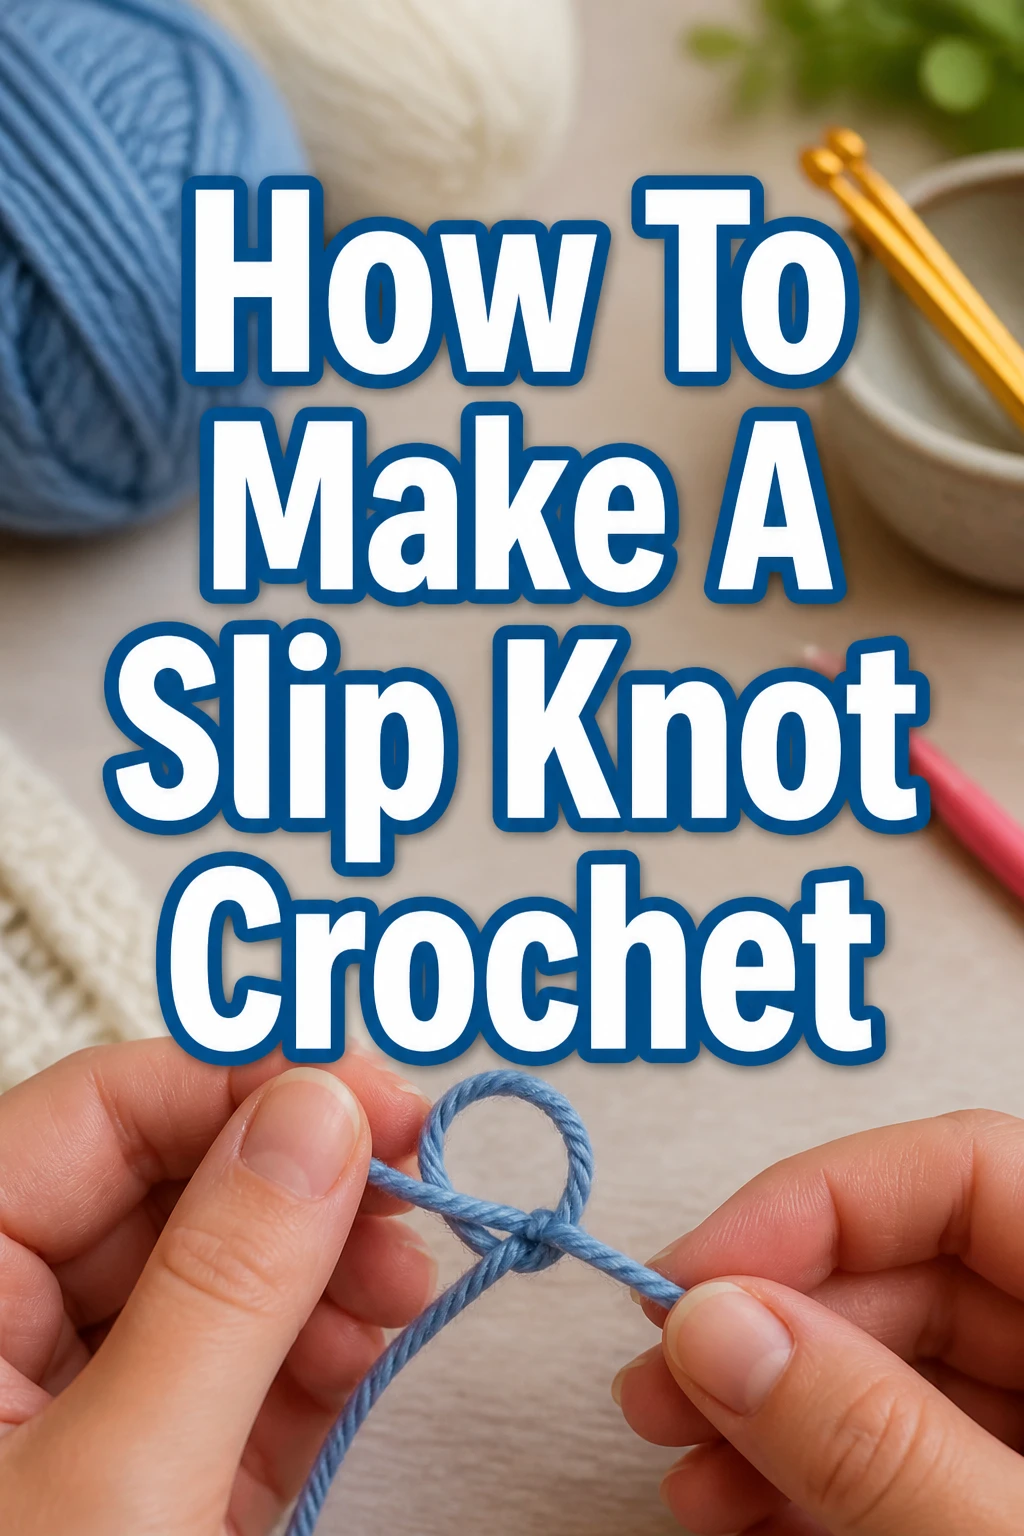
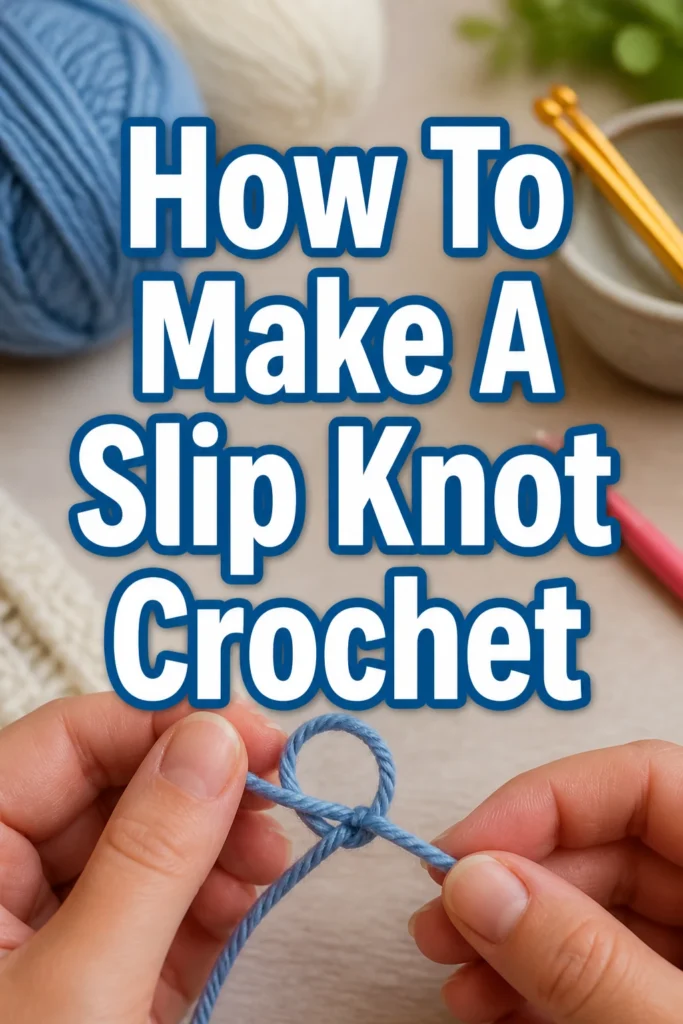
Form a loop with the working yarn. Bring the working yarn across the yarn tail, creating an “X” shape.
Ensure the working yarn (the strand coming from the ball) is on top of the tail end. This is crucial for the knot to form correctly.
The intersection of the “X” is where your knot will begin to take shape. This initial loop is the foundation.
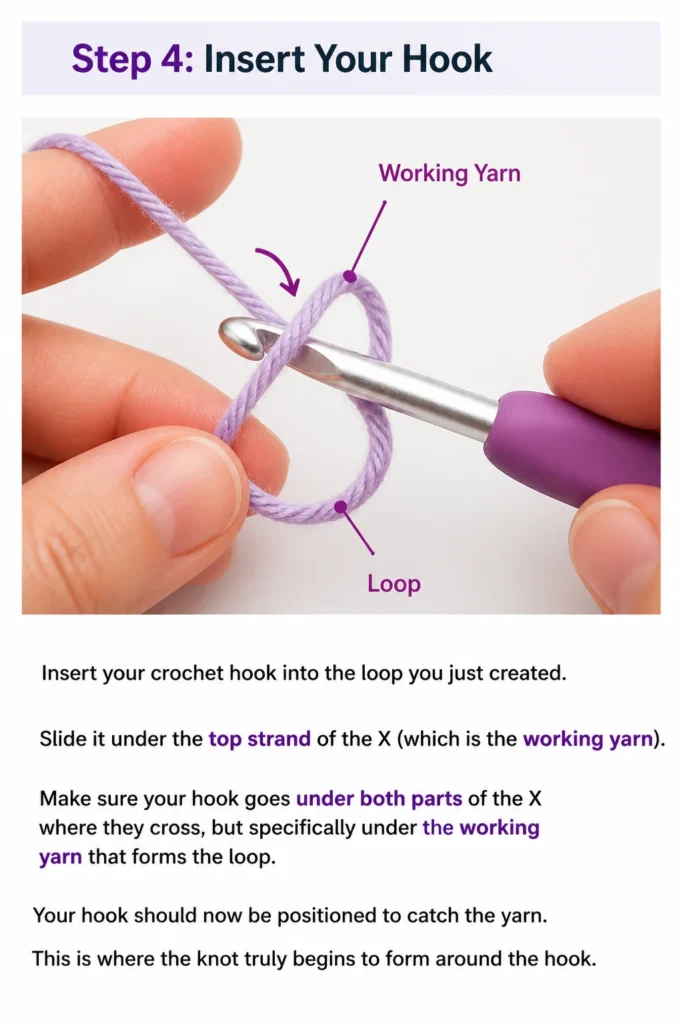
Step 4: Insert Your Hook
Insert your crochet hook into the loop you just created. Slide it under the top strand of the “X” (which is the working yarn).
Make sure your hook goes under both parts of the “X” where they cross, but specifically under the working yarn that forms the loop.
Your hook should now be positioned to catch the yarn. This is where the knot truly begins to form around the hook.
Step 5: Yarn Over and Pull Through
Catch the working yarn with your hook. This action is often called “yarn over” (YO).
Pull the caught yarn through the loop you initially made. You will now have a new loop on your hook.
This new loop is the actual slip knot forming. It should look like a small knot at the base of your hook.
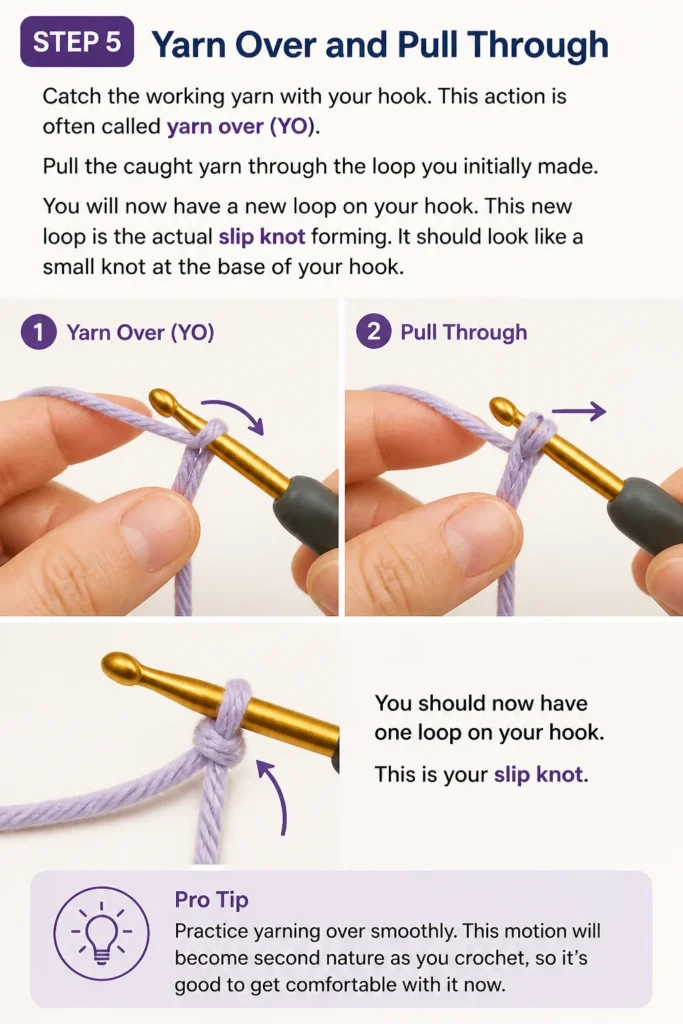
Pro Tip: Practice yarning over smoothly. This motion will become second nature as you crochet, so it’s good to get comfortable with it now.
Step 6: Tighten the Knot
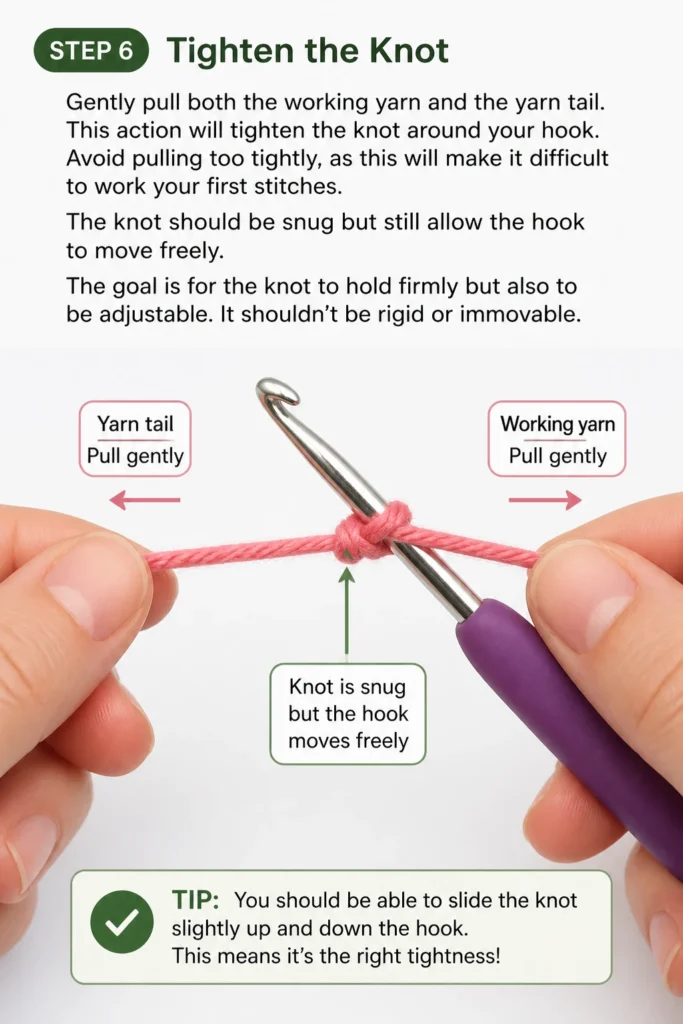
Gently pull both the working yarn and the yarn tail. This action will tighten the knot around your hook.
Avoid pulling too tightly, as this will make it difficult to work your first stitches. The knot should be snug but still allow the hook to move freely.
The goal is for the knot to hold firmly but also to be adjustable. It shouldn’t be rigid or immovable.
Step 7: Adjust for Perfect Tension
Pull on the working yarn to tighten the loop on your hook.
Pull on the yarn tail to loosen the loop on your hook.
You want the loop on your hook to be just large enough for the hook to slide comfortably. It shouldn’t be stretched or too loose.
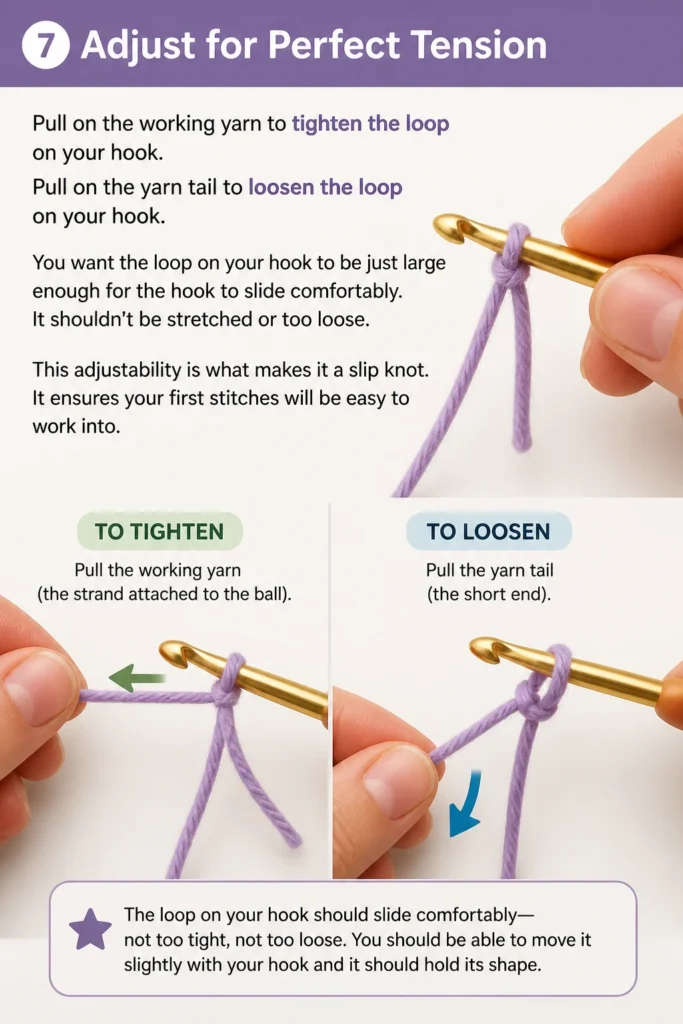
This adjustability is what makes it a “slip” knot. It ensures your first stitches will be easy to work into.
Common Mistakes to Avoid
Even simple steps can lead to common pitfalls. Being aware of these will help you avoid frustration.
Knot is Too Tight or Too Loose
A slip knot that is too tight will make it incredibly difficult to insert your hook for the first chain stitch. Your fingers might cramp, and your stitches will look uneven. Conversely, a knot that is too loose will cause your starting chain to be floppy and inconsistent, making it hard to maintain even tension throughout your project. Aim for a Goldilocks tension: snug enough to stay put but loose enough for the hook to move freely.
Not Catching Both Strands
Sometimes, when creating the initial loop or pulling through, beginners might only catch one strand of the yarn instead of both. This results in a knot that unravels easily or isn’t a true slip knot at all. Always double-check that your hook is securely under the correct strands before pulling through, ensuring the “X” is properly formed and engaged.
Confusing the Working Yarn with the Tail
It’s easy to get the working yarn (coming from the ball) and the yarn tail (the short end) mixed up, especially when you’re first learning. If you try to pull on the wrong strand to tighten or adjust, your knot won’t behave as expected, or it might fall apart. Always identify which is which: the working yarn is the continuous strand connected to your project, and the tail is the short, loose end.
Troubleshooting
Don’t worry if your slip knot doesn’t look perfect on the first try. These common issues have simple fixes.
Knot Keeps Slipping Off the Hook
If your knot isn’t staying on the hook, it’s likely too loose. Try re-forming the knot and, after pulling the new loop through, gently pull both the working yarn and the tail to snug it up more securely around the hook. Make sure the loop on your hook is just slightly larger than the hook itself, not gaping.
Loop is Too Small/Big After Tightening
If your loop is too small, your hook will struggle to fit, making your first stitches very difficult. If it’s too big, your stitches will be loose and uneven. To adjust, pull on the working yarn to make the loop smaller, or pull on the yarn tail to make it larger. Experiment until the loop on your hook feels comfortable and easily slides up and down the shaft of the hook.
Can’t Get the Yarn to Loop Correctly
Sometimes the initial “X” or loop formation can be tricky. If your yarn isn’t cooperating, simply unwind a bit of yarn and start fresh. Focus on clearly crossing the working yarn over the tail to form a distinct “X”. Practice this simple crossing motion a few times without the hook until it feels natural.
Key Takeaways
Making a slip knot is a fundamental skill that opens the door to all crochet projects. It might take a few tries, but persistence pays off.
Here are the most important things to remember as you practice.
- The slip knot is the essential first step for any crochet project.
- Always ensure the working yarn crosses over the tail to form the initial “X”.
- The knot should be snug on the hook but still allow for easy movement.
- Practice adjusting the loop size by pulling on the working yarn (to tighten) or the tail (to loosen).
- Don’t be afraid to undo and redo your knot until it feels just right.
- Consistent tension in your slip knot sets the foundation for even stitches.
Frequently Asked Questions
New crocheters often have similar questions when starting out. Here are some common inquiries.
Why is the slip knot so important?
The slip knot provides the adjustable loop that sits on your crochet hook, serving as the starting point for your first chain of stitches. Without a proper slip knot, your project would unravel or be impossible to begin with consistent tension. It’s the anchor for everything that follows.
Can I use a slip knot for other crafts?
While the slip knot is primarily associated with crochet and knitting, the basic principle of creating an adjustable loop can be adapted for other yarn or cord crafts. However, its specific form and function are optimized for creating a starting loop that can be easily worked into with a hook or needle.
How do I undo a slip knot?
Undoing a slip knot is incredibly simple. Just pull firmly on the yarn tail, and the entire knot will unravel. This makes it very forgiving for beginners who need to restart their work. It’s designed to come undone without a trace when you pull the correct end.
Does the size of the hook matter for a slip knot?
The size of your crochet hook doesn’t change how you make a slip knot, but it does affect the size of the loop you create. Always choose a hook size appropriate for your yarn, as indicated on the yarn label. The slip knot should always be adjustable to comfortably fit the hook you are using.
Our Top Recommended Finds
Having the right tools can make a big difference when you’re learning. These items are perfect for beginners.
- Ergonomic Crochet Hook Set: Comfortable hooks reduce hand fatigue, making practice sessions more enjoyable.
- Soft Acrylic Yarn Pack: Acrylic yarn is affordable, easy to work with, and comes in many colors, ideal for learning.
- Yarn Winder: This tool helps organize your yarn, preventing tangles and making it easier to manage your working yarn.
Your Crochet Journey Begins Now
You’ve just learned the very first step in crochet, a skill you’ll use time and time again. This small achievement is a huge leap in your crafting journey.
Don’t stop here! The next natural step is learning to make a foundation chain, which builds directly on your slip knot. Grab your yarn and hook and keep practicing.
Each stitch you make builds confidence and skill. Take pride in your progress and enjoy the creative process that lies ahead.