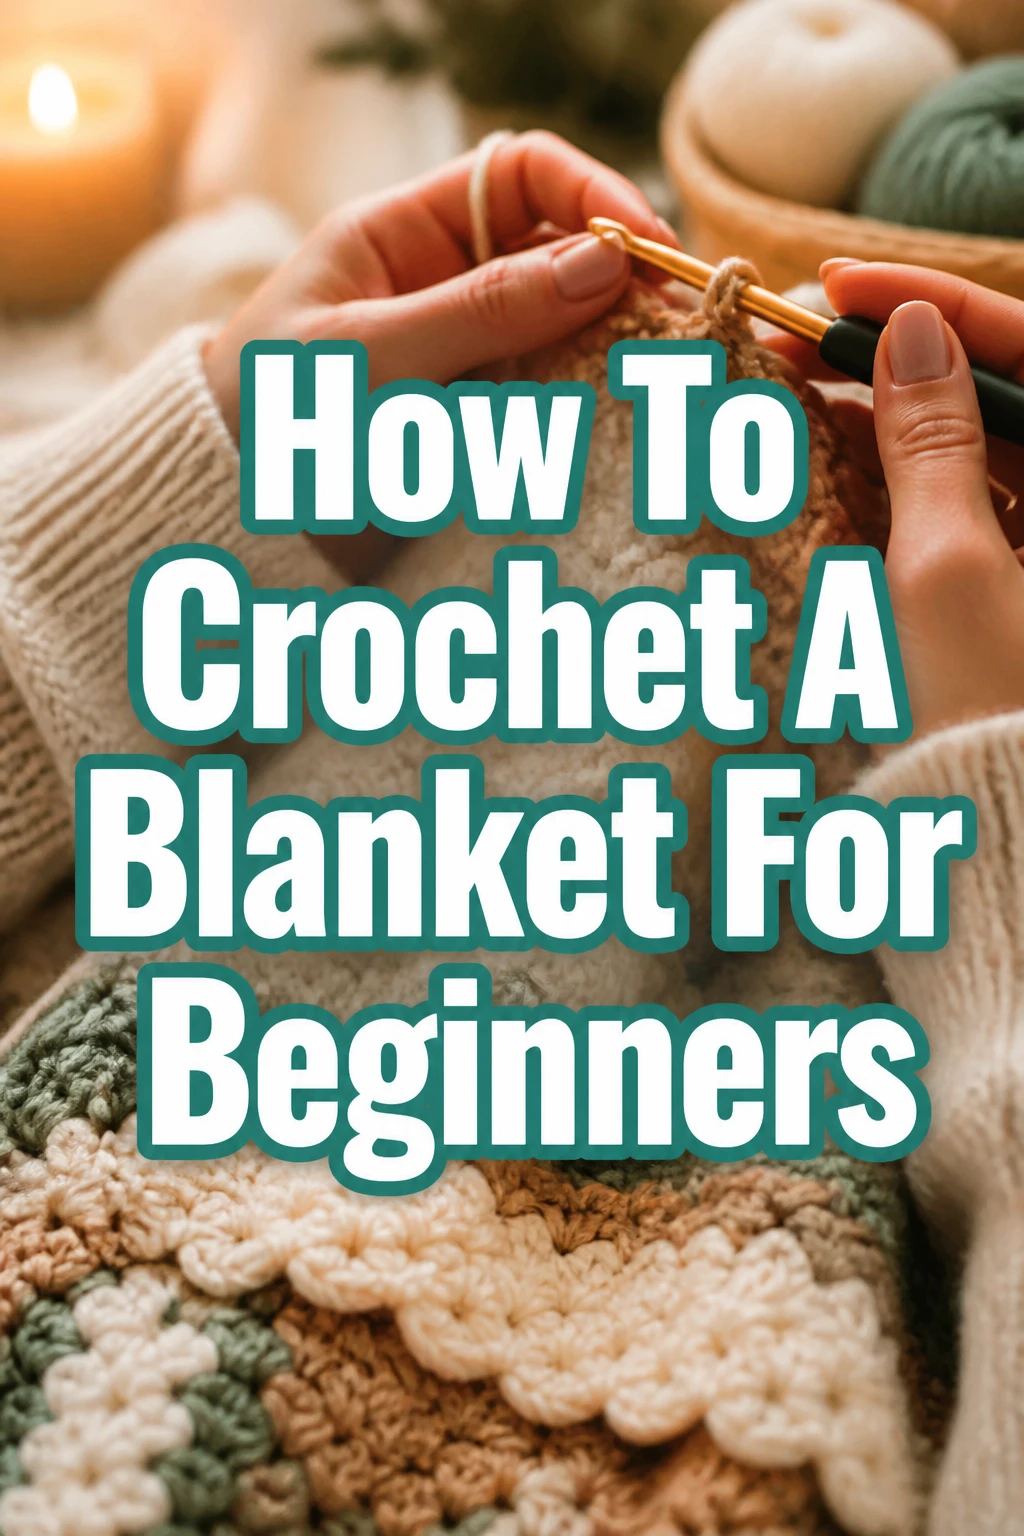
How To Crochet A Blanket For Beginners
Learning to crochet a blanket might seem like a big project, but it’s much simpler than you think.
I remember starting my first blanket, overwhelmed by patterns, until my grandma showed me the magic of basic stitches.
This guide distills that friendly, step-by-step approach, making your first blanket journey enjoyable and successful.
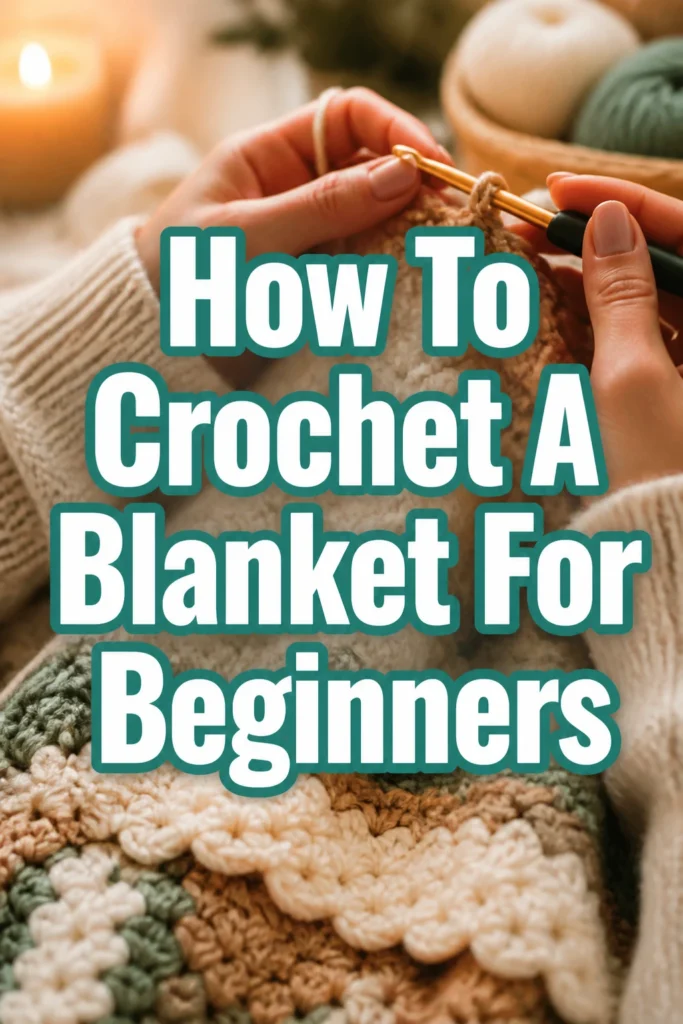
Quick Overview
This guide walks you through the essential steps to create a beautiful, cozy blanket.
You’ll master foundational crochet stitches and techniques, building confidence with every row.
- Time needed: 10-30 hours (depending on blanket size and personal pace)
- Difficulty: Beginner
- What you’ll need: Yarn, a crochet hook, scissors, and a yarn needle
Step-by-Step Instructions
Step 1: Choose Your Supplies Wisely
Select your primary yarn. For beginners, a medium-weight (also known as worsted weight or size 4) acrylic yarn is an excellent choice.
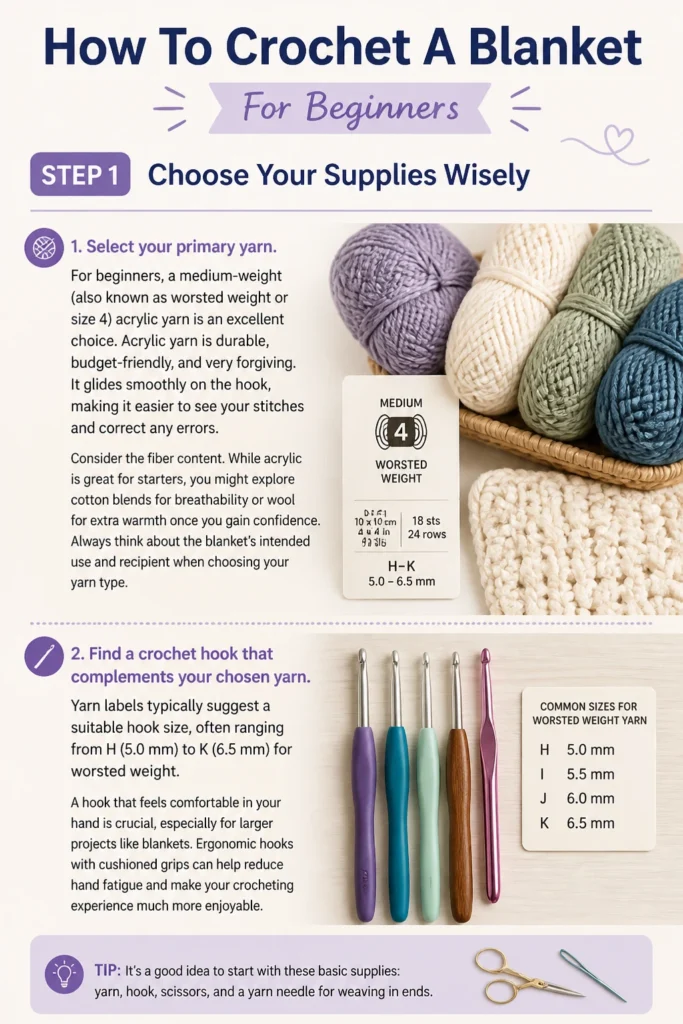
Acrylic yarn is durable, budget-friendly, and very forgiving. It glides smoothly on the hook, making it easier to see your stitches and correct any errors.
Consider the fiber content. While acrylic is great for starters, you might explore cotton blends for breathability or wool for extra warmth once you gain confidence.
Always think about the blanket’s intended use and recipient when choosing your yarn type.
Find a crochet hook that complements your chosen yarn. Yarn labels typically suggest a suitable hook size, often ranging from H (5.0 mm) to K (6.5 mm) for worsted weight.
A hook that feels comfortable in your hand is crucial, especially for larger projects. Ergonomic hooks with soft grips can prevent hand fatigue.
Gather essential accessories. You’ll need a good pair of sharp scissors for cutting yarn and a large-eye yarn needle for weaving in loose ends.
Stitch markers are also incredibly helpful for beginners to keep track of rows and specific stitches.
Pro Tip: Opt for a lighter-colored yarn for your first blanket. Darker shades can make it challenging to see individual stitches, which is vital when you’re still learning to identify them.
Step 2: Master the Slip Knot
Begin by creating a slip knot. This is the foundational loop that goes onto your crochet hook.
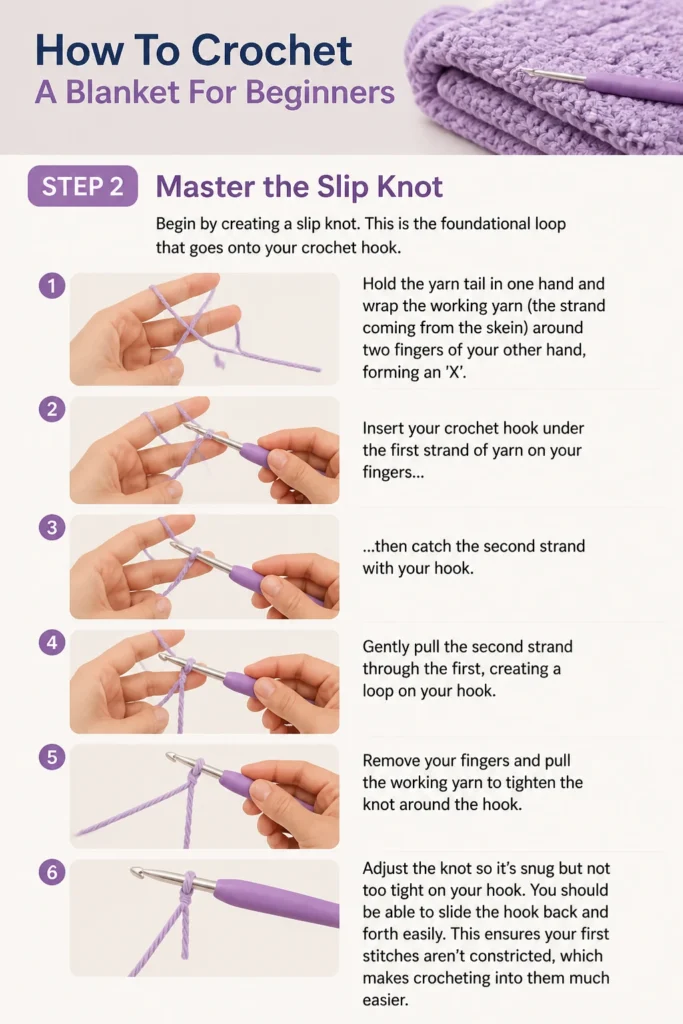
Hold the yarn tail in one hand and wrap the working yarn (the strand coming from the skein) around two fingers of your other hand, forming an ‘X’.
Insert your crochet hook under the first strand of yarn on your fingers, then catch the second strand with your hook.
Gently pull the second strand through the first, creating a loop on your hook. Remove your fingers and pull the working yarn to tighten the knot around the hook.
Adjust the knot so it’s snug but not too tight on your hook. You should be able to slide the hook back and forth easily.
This ensures your first stitches aren’t constricted, which makes crocheting into them much easier.
Step 3: Create Your Foundation Chain
Form your foundation chain, which serves as the starting width of your blanket.
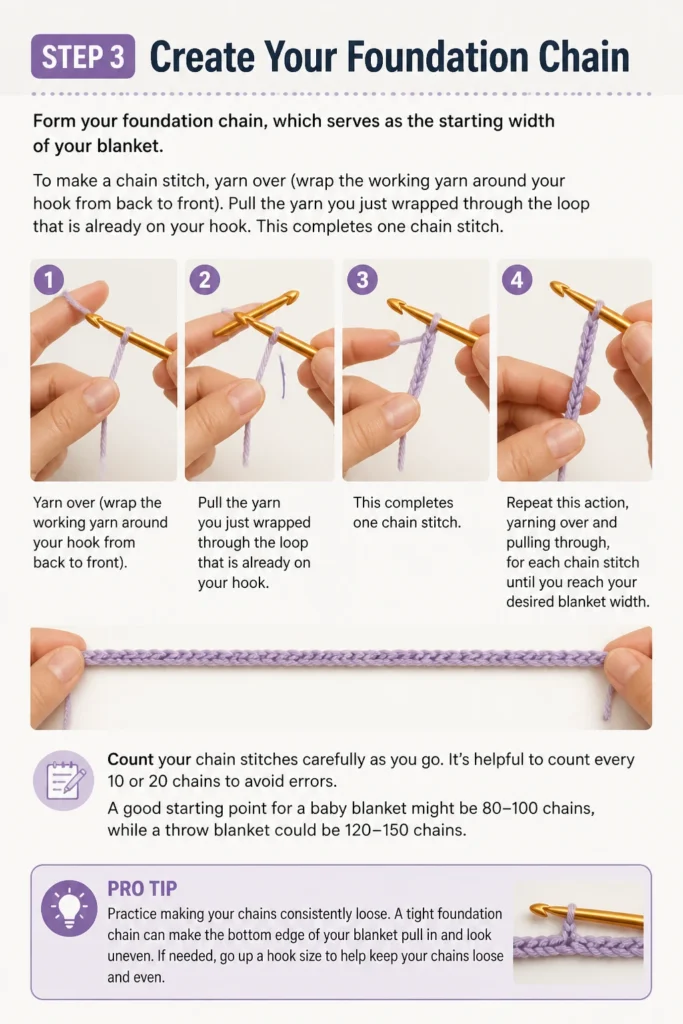
To make a chain stitch, yarn over (wrap the working yarn around your hook from back to front).
Pull the yarn you just wrapped through the loop that is already on your hook. This completes one chain stitch.
Repeat this action, yarning over and pulling through, for each chain stitch until you reach your desired blanket width.
Count your chain stitches carefully as you go. It’s helpful to count every 10 or 20 chains to avoid errors.
A good starting point for a baby blanket might be 80-100 chains, while a throw blanket could be 120-150 chains.
Pro Tip: Practice making your chains consistently loose. A tight foundation chain can make the bottom edge of your blanket pull in and look uneven. If needed, go up a hook size just for the chain.
Step 4: Learn the Half Double Crochet (HDC) Stitch
The half double crochet (HDC) stitch is perfect for blankets. It creates a fabric that is denser than single crochet but works up faster than double crochet.
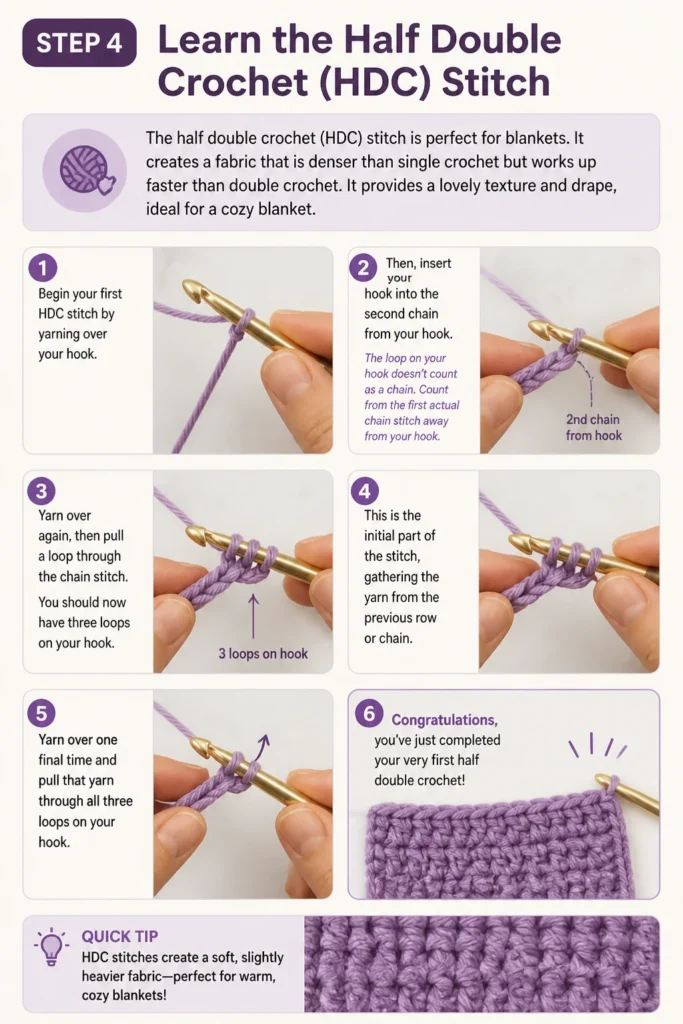
It provides a lovely texture and drape, ideal for a cozy blanket.
Begin your first HDC stitch by yarning over your hook. Then, insert your hook into the second chain from your hook.
The loop on your hook doesn’t count as a chain. Count from the first actual chain stitch away from your hook.
Yarn over again, then pull a loop through the chain stitch. You should now have three loops on your hook.
This is the initial part of the stitch, gathering the yarn from the previous row or chain.
Yarn over one final time and pull that yarn through all three loops on your hook.
Congratulations, you’ve just completed your very first half double crochet stitch!
Step 5: Turn and Begin New Rows
Continue making HDC stitches across your entire foundation chain. Work one HDC into each chain stitch.
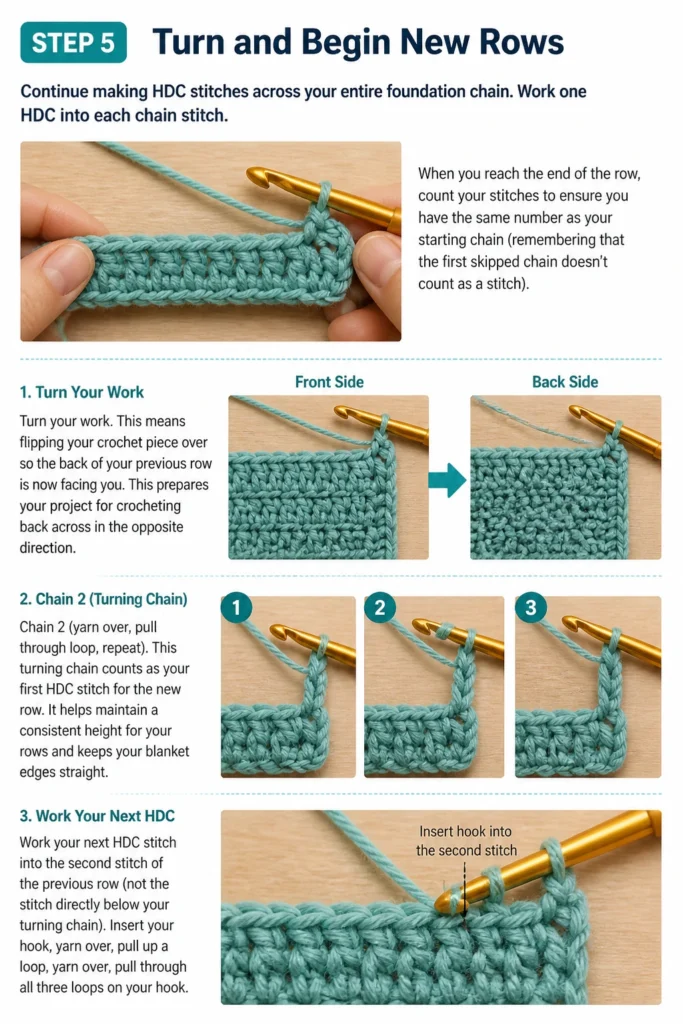
When you reach the end of the row, count your stitches to ensure you have the same number as your starting chain (remembering that the first skipped chain doesn’t count as a stitch).
Turn your work. This means flipping your crochet piece over so the back of your previous row is now facing you.
This prepares your project for crocheting back across in the opposite direction.
Chain 2 (yarn over, pull through loop, repeat). This turning chain counts as your first HDC stitch for the new row.
It helps maintain a consistent height for your rows and keeps your blanket edges straight.
Work your next HDC stitch into the second stitch of the previous row (not the stitch directly below your turning chain).
Since the turning chain acts as your first stitch, you skip the actual first stitch of the row below.
Pro Tip: Always place a stitch marker in the top of your turning chain at the end of each row. This makes it easy to identify where to place your very last stitch in the following row, preventing unwanted increases or decreases.
Step 6: Continue Building Length
Repeat the HDC stitch across the entire row, working into the top of each stitch from the previous row.
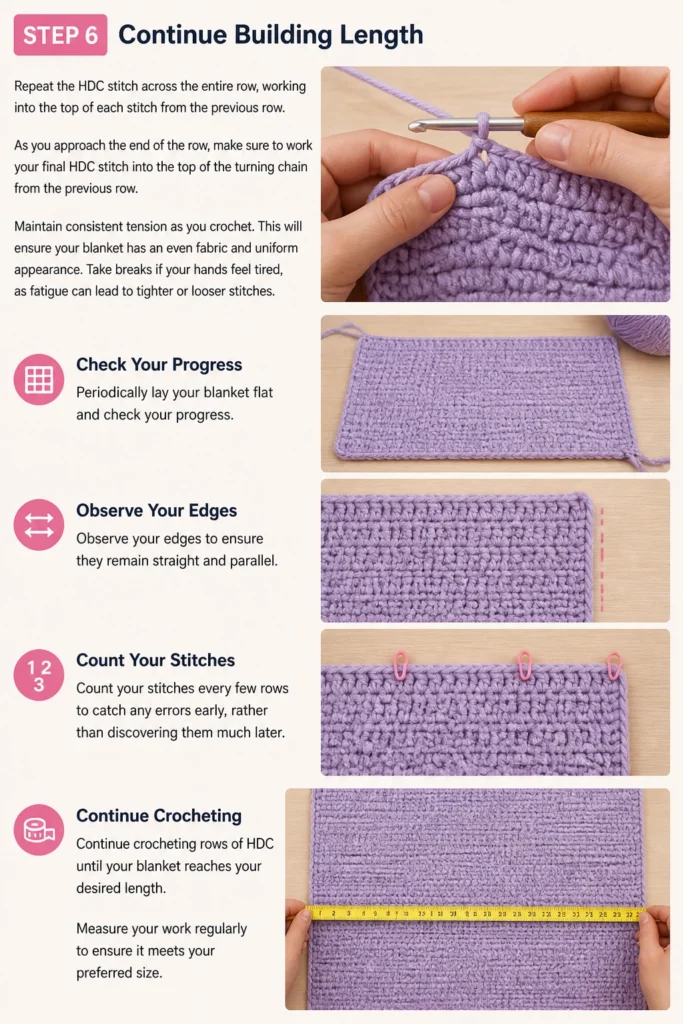
As you approach the end of the row, make sure to work your final HDC stitch into the top of the turning chain from the previous row.
Maintain consistent tension as you crochet. This will ensure your blanket has an even fabric and uniform appearance.
Take breaks if your hands feel tired, as fatigue can lead to tighter or looser stitches.
Periodically lay your blanket flat and check your progress. Observe your edges to ensure they remain straight and parallel.
Count your stitches every few rows to catch any errors early, rather than discovering them much later.
Continue crocheting rows of HDC until your blanket reaches your desired length.
Measure your work regularly to ensure it meets your expectations for size.
Step 7: Finish and Weave in Ends
Once your blanket reaches the desired length, it’s time to finish it off securely. This process is called “fastening off.”
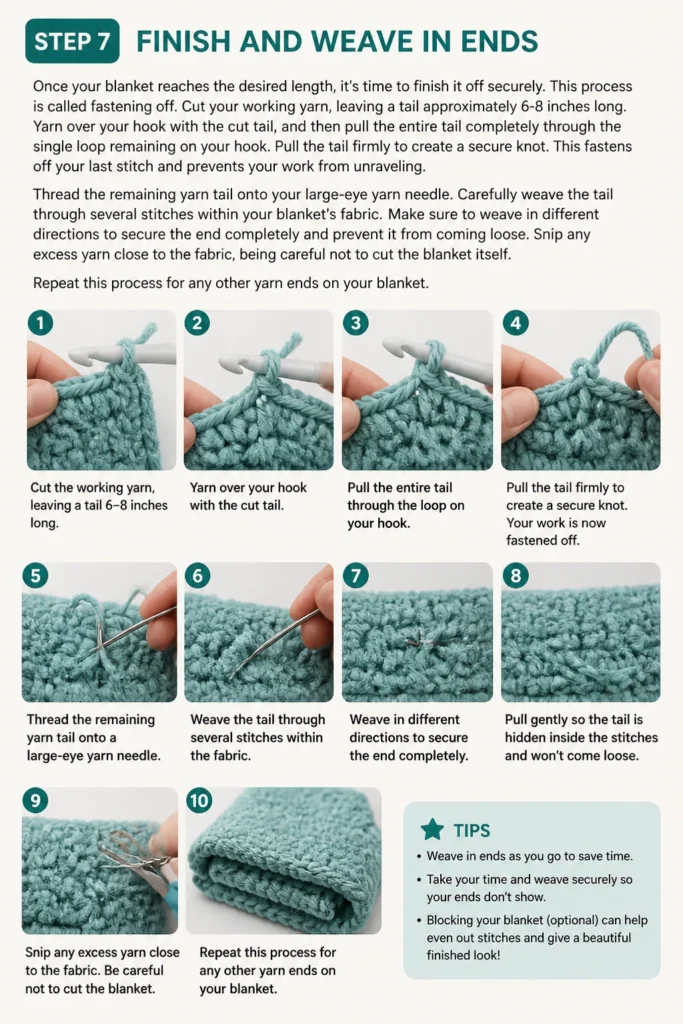
Cut your working yarn, leaving a tail approximately 6-8 inches long.
Yarn over your hook with the cut tail, and then pull the entire tail completely through the single loop remaining on your hook.
Pull the tail firmly to create a secure knot. This fastens off your last stitch and prevents your work from unraveling.
Thread the remaining yarn tail onto your large-eye yarn needle. Carefully weave the tail through several stitches within your blanket’s fabric.
Make sure to weave in different directions to secure the end completely and prevent it from coming loose.
Snip any excess yarn close to the fabric, being careful not to cut the blanket itself. Repeat this process for any other yarn tails you might have from joining new skeins.
Properly weaving in ends gives your blanket a professional, finished look.
Common Mistakes to Avoid
Inconsistent Tension
Crocheting with uneven tension is a frequent challenge for beginners. Some stitches might be very tight, while others are loose, leading to a wavy or bumpy fabric.
To improve, try to relax your grip on both the yarn and the hook. Practice helps build the muscle memory needed for more uniform stitch size and fabric consistency.
Uneven Edges
This common issue occurs when you either accidentally skip the first or last stitch of a row, or you miss crocheting into the turning chain.
Always count your stitches at the end of each row to ensure the number remains consistent. Using a stitch marker in your turning chain can significantly help you maintain straight and even edges.
Ignoring Yarn Label Recommendations
The yarn label provides vital information beyond just the color. It includes recommended hook size, fiber content, and crucial care instructions.
Using a hook size that is too small for your yarn can result in a stiff, dense blanket, while a hook that is too large can create a loose, floppy fabric. Always refer to the label for guidance.
Getting Discouraged by Mistakes
Every single crocheter, regardless of experience, makes mistakes. Do not let a dropped stitch, an uneven row, or a missed count deter you from continuing.
Crochet is incredibly forgiving; you can always “frogging” (unravel) your work back to