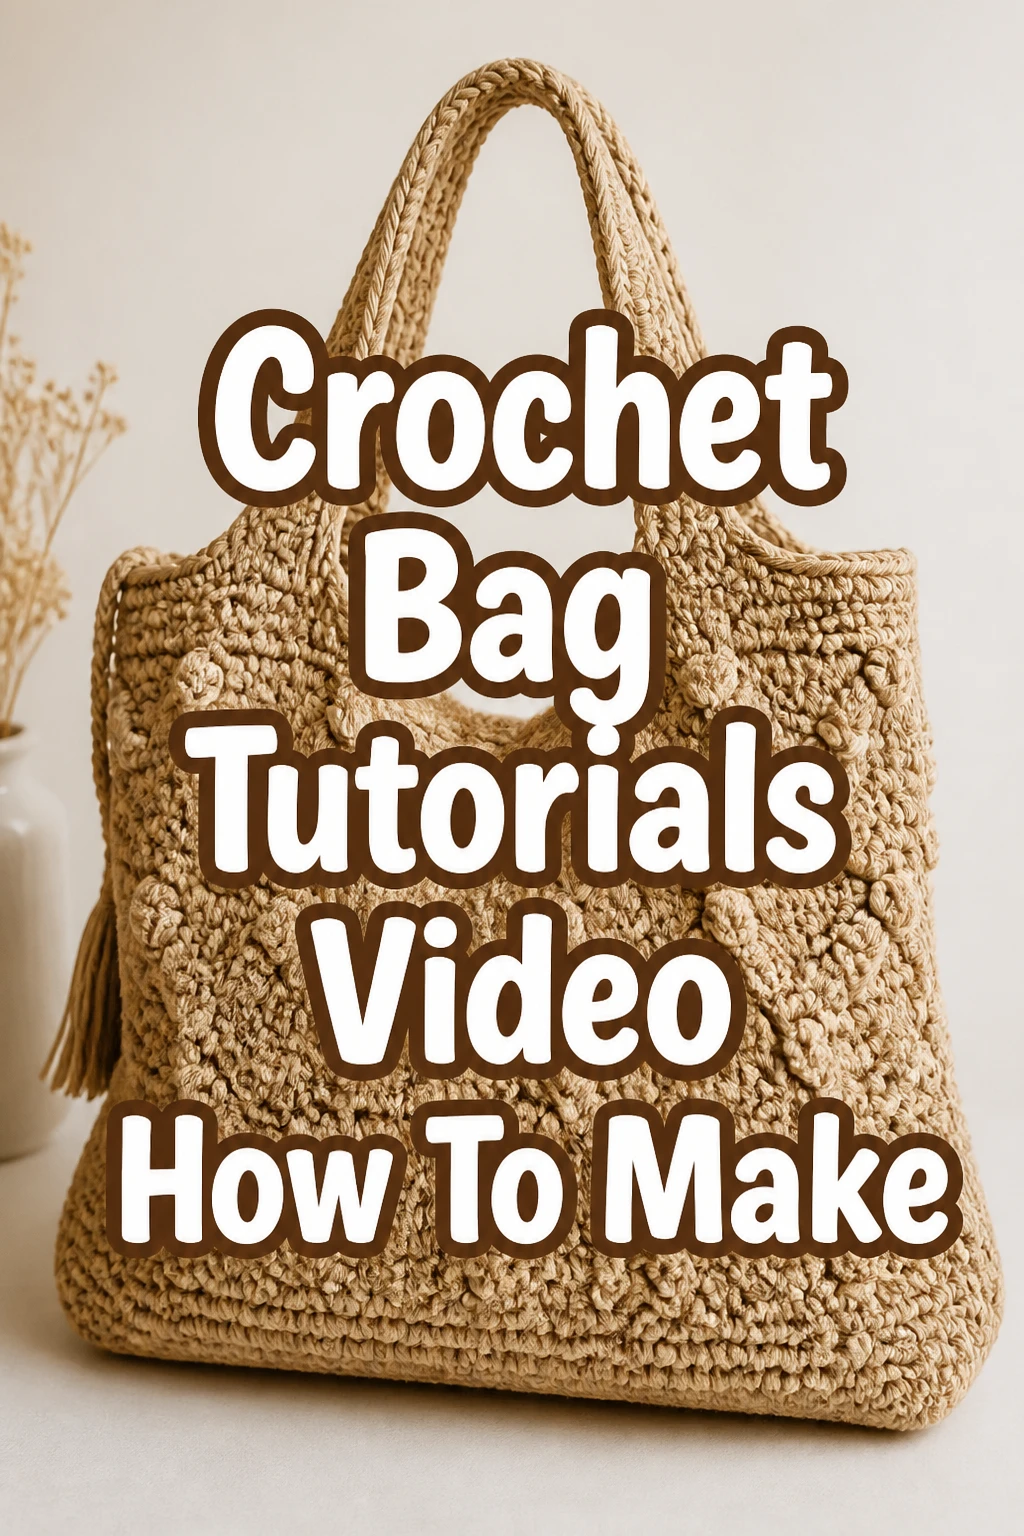
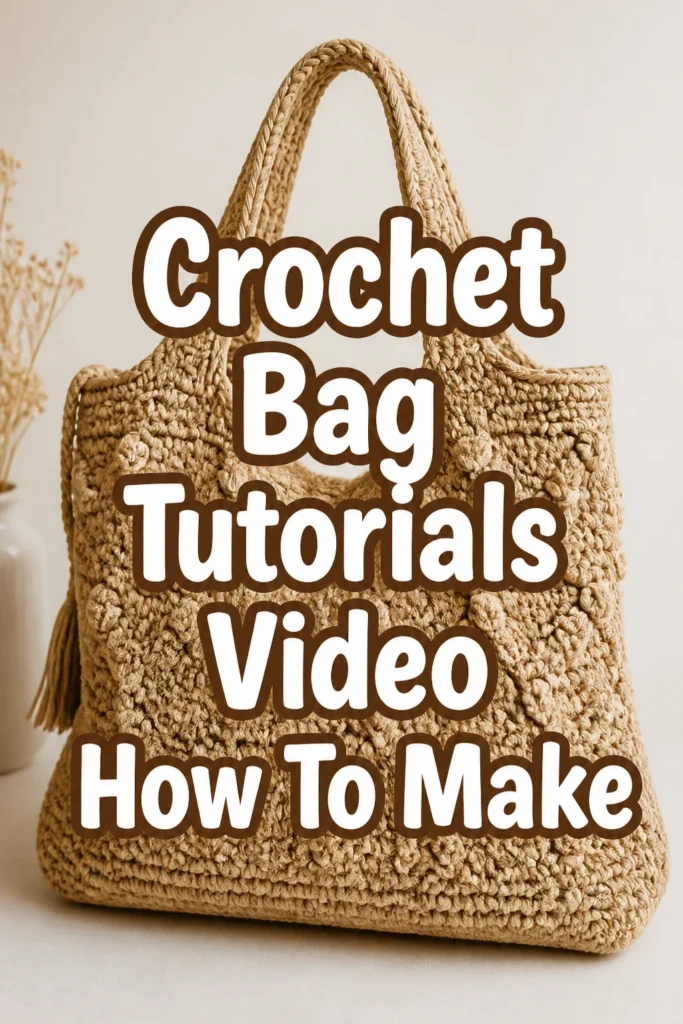
Crochet Bag Tutorials Video How To Make
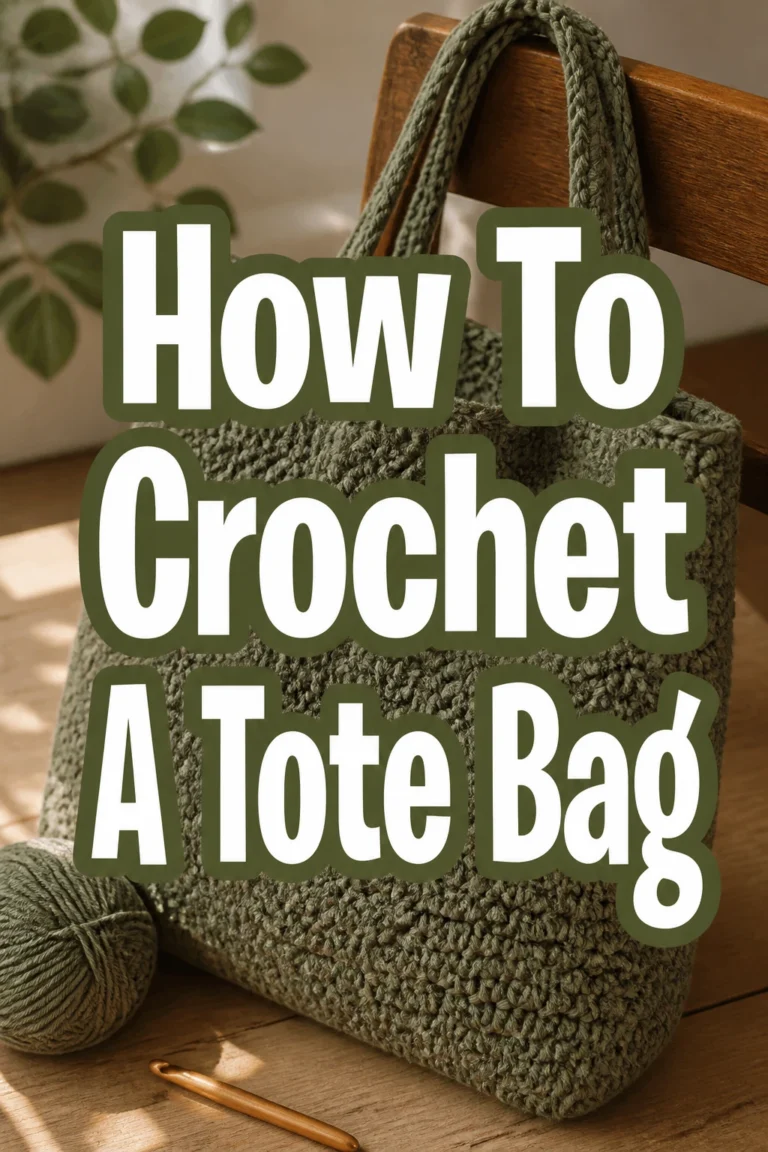
Learning to crochet a bag can feel like a big step, but it’s incredibly rewarding.
I remember the first time I finished a crochet bag; the feeling of accomplishment was unmatched.
This guide combines the best of video learning with clear, written instructions, helping you craft a beautiful bag of your own.
Quick Overview
This guide will walk you through the essential steps for creating a crochet bag, from choosing your yarn to finishing touches.
We’ll cover the techniques often shown in video tutorials, making it easy to follow along whether you’re watching or reading.
- Time needed: 4-8 hours (depending on bag size and complexity)
- Difficulty: Beginner to Intermediate
- What you’ll need: Yarn, crochet hook, scissors, tapestry needle, stitch markers
Step-by-Step Instructions
Step 1: Gather Your Materials
Before you begin, ensure you have all the necessary supplies readily available.
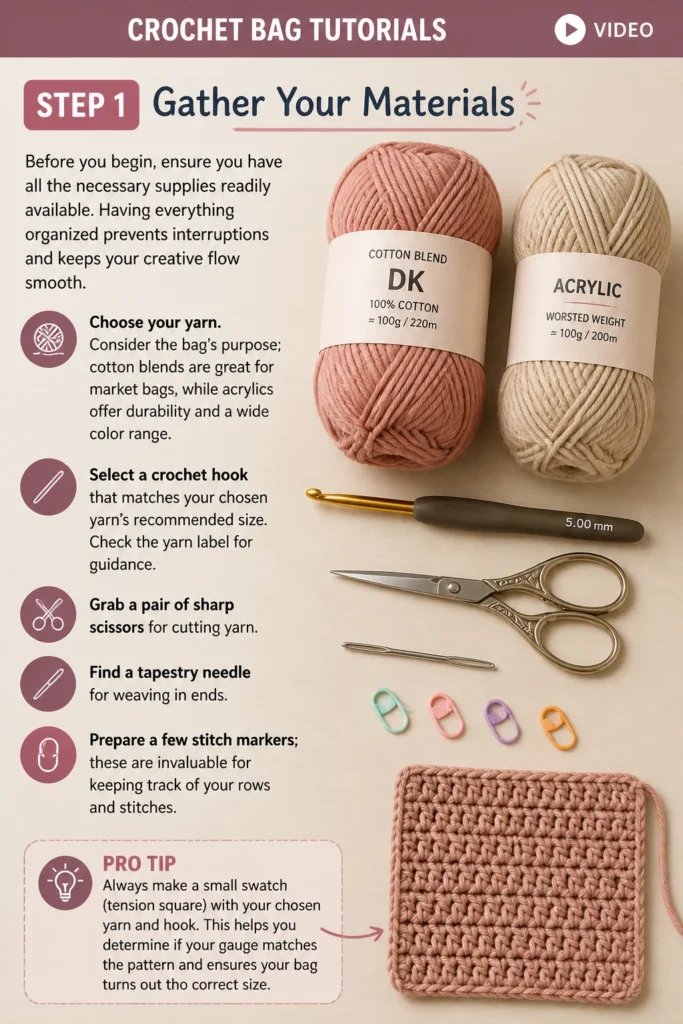
Having everything organized prevents interruptions and keeps your creative flow smooth.
- Choose your yarn. Consider the bag’s purpose; cotton blends are great for market bags, while acrylics offer durability and a wide color range.
- Select a crochet hook that matches your chosen yarn’s recommended size. Check the yarn label for guidance.
- Grab a pair of sharp scissors for cutting yarn.
- Find a tapestry needle for weaving in ends.
- Prepare a few stitch markers; these are invaluable for keeping track of your rows and stitches.
Pro Tip: Always make a small swatch (tension square) with your chosen yarn and hook. This helps you determine if your gauge matches the pattern and ensures your bag turns out the correct size.
Step 2: Understand Basic Stitches
Most crochet bags utilize a few fundamental stitches.
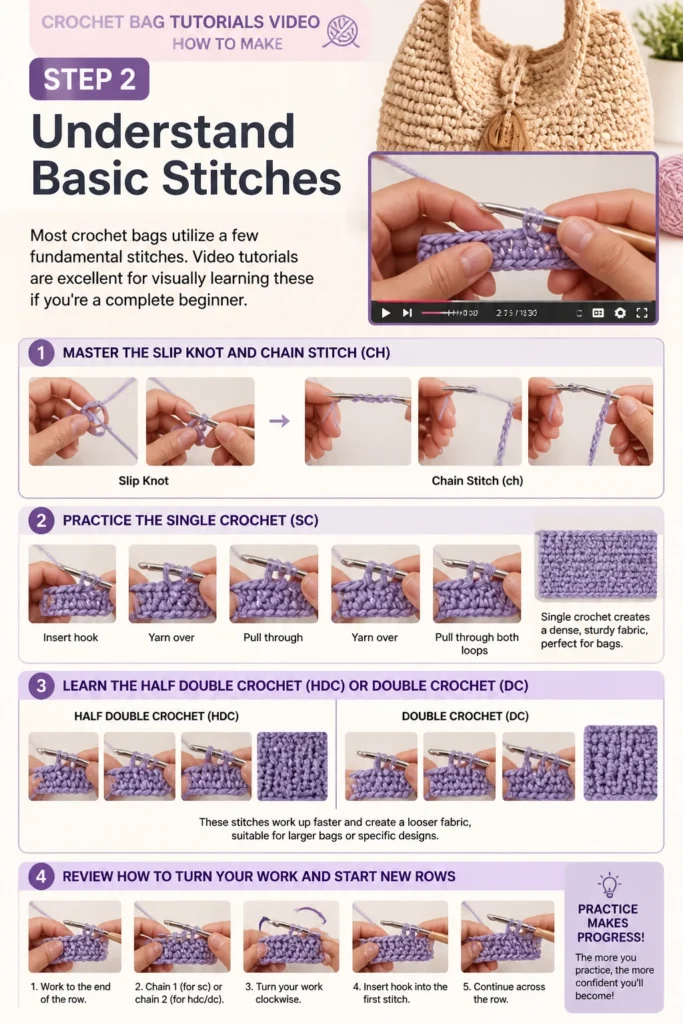
Video tutorials are excellent for visually learning these if you’re a complete beginner.
- Master the slip knot and chain stitch (ch). These form the foundation of most crochet projects.
- Practice the single crochet (sc). This stitch creates a dense, sturdy fabric, perfect for bags.
- Learn the half double crochet (hdc) or double crochet (dc). These stitches work up faster and create a looser fabric, suitable for larger bags or specific designs.
- Review how to turn your work and start new rows.
Step 3: Begin the Bag Base
The base of your bag provides its structure and shape.
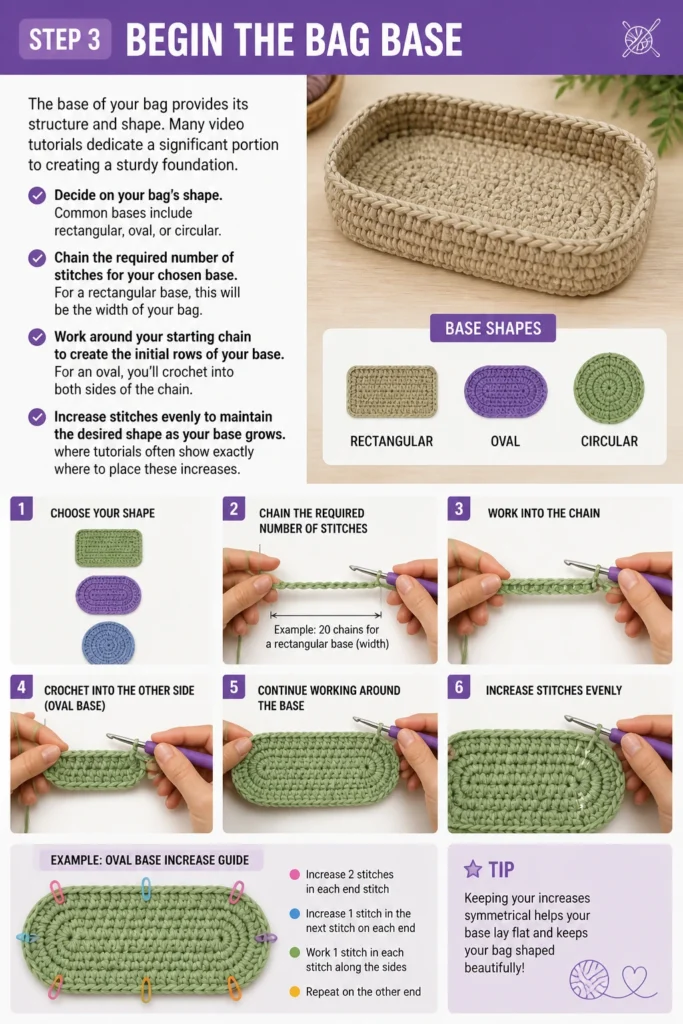
Many video tutorials dedicate a significant portion to creating a sturdy foundation.
- Decide on your bag’s shape. Common bases include rectangular, oval, or circular.
- Chain the required number of stitches for your chosen base. For a rectangular base, this will be the width of your bag.
- Work around your starting chain to create the initial rows of your base. For an oval, you’ll crochet into both sides of the chain.
- Increase stitches evenly to maintain the desired shape as your base grows. Video tutorials often show exactly where to place these increases.
Step 4: Build the Bag Body
Once your base is complete, you’ll work upwards to form the sides of your bag.
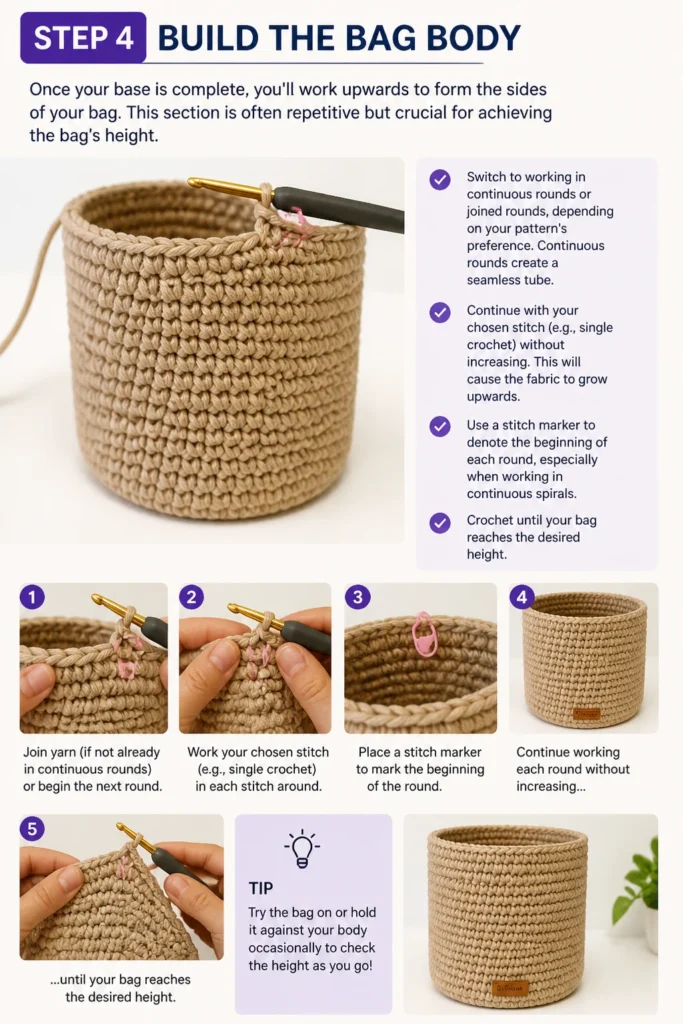
This section is often repetitive but crucial for achieving the bag’s height.
- Switch to working in continuous rounds or joined rounds, depending on your pattern’s preference. Continuous rounds create a seamless tube.
- Continue with your chosen stitch (e.g., single crochet) without increasing. This will cause the fabric to grow upwards.
- Use a stitch marker to denote the beginning of each round, especially when working in continuous spirals.
- Crochet until your bag reaches the desired height.
Step 5: Create the Handles
Bag handles are essential for functionality and can significantly impact the bag’s aesthetic.
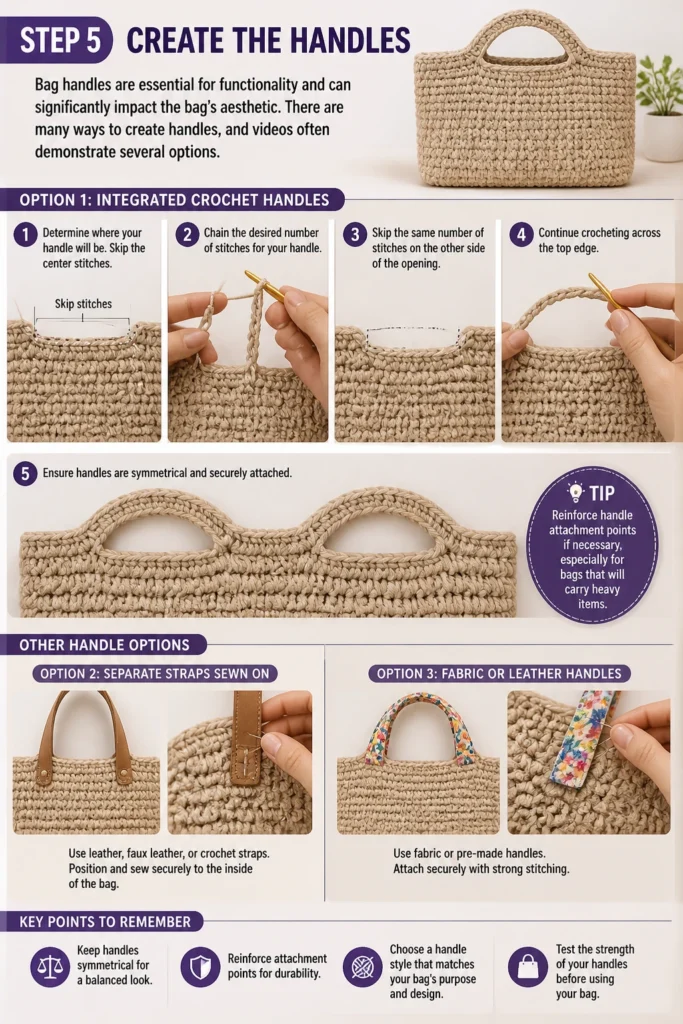
There are many ways to create handles, and videos often demonstrate several options.
- Choose your handle style: integrated crochet handles, separate straps sewn on, or even fabric/leather handles.
- For integrated handles, you’ll typically chain a certain number of stitches, skip a corresponding number of stitches on the bag’s top edge, and then continue crocheting. This creates an opening for the handle.
- Ensure your handles are symmetrical and securely attached to the bag body.
- Reinforce handle attachment points if necessary, especially for bags that will carry heavy items.
Step 6: Add Finishing Touches
The final details elevate your handmade bag from good to great.
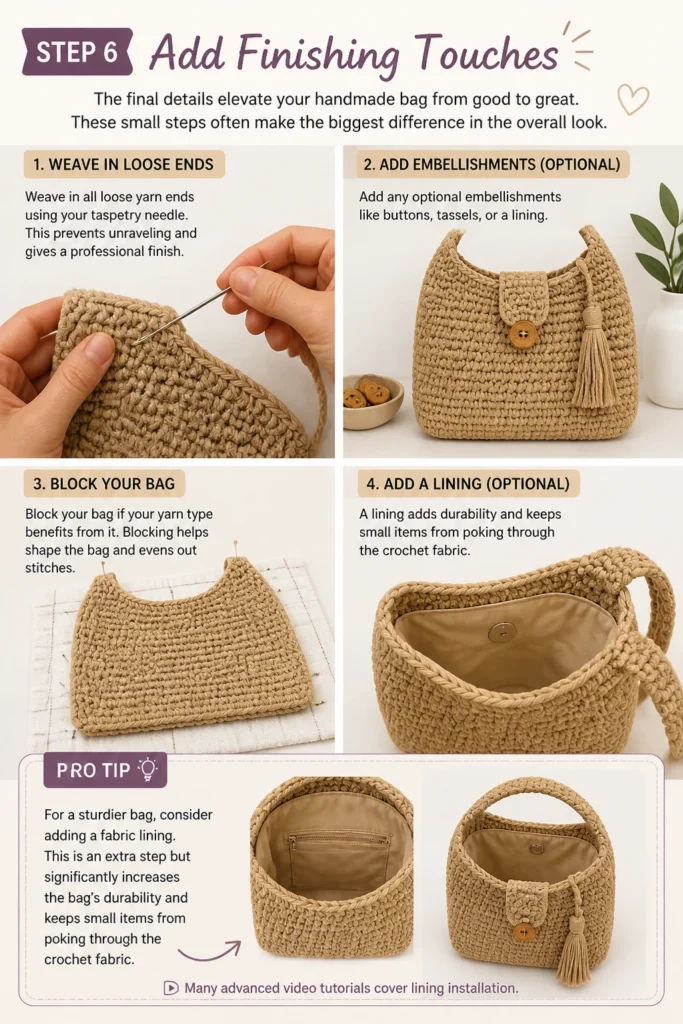
These small steps often make the biggest difference in the overall look.
- Weave in all loose yarn ends using your tapestry needle. This prevents unraveling and gives a professional finish.
- Add any optional embellishments like buttons, tassels, or a lining.
- Block your bag if your yarn type benefits from it. Blocking helps shape the bag and evens out stitches.
Pro Tip: For a sturdier bag, consider adding a fabric lining. This is an extra step but significantly increases the bag’s durability and keeps small items from poking through the crochet fabric. Many advanced video tutorials cover lining installation.
Common Mistakes to Avoid
Inconsistent Tension
One common pitfall for beginners is inconsistent yarn tension. This leads to uneven stitches, a lumpy fabric, and a bag that might not hold its shape well.
Practice helps, but also pay attention to how you hold your yarn and hook. Try to maintain a steady grip and pull the yarn through with the same amount of force for each stitch.
Forgetting Stitch Markers
Especially when working in rounds, it’s easy to lose track of where a round begins or ends. This can result in a crooked seam or an off-kilter design.
Always place a stitch marker in the first stitch of each round. Move it up as you progress to ensure you stay on track and count accurately.
Not Weaving in Ends Properly
Leaving loose ends or weaving them in too loosely is a quick way to undermine your hard work. Unwoven ends can unravel, causing your bag to fall apart over time.
Take the time to weave in ends securely, running them through several stitches in different directions. This locks them in place and makes them virtually invisible.
Ignoring Gauge
Many patterns provide a gauge, which is the number of stitches and rows per inch. Skipping this step can lead to a bag that is much larger or smaller than intended.
Always create a small swatch to check your gauge. If it doesn’t match, adjust your hook size until it does. This ensures your bag will be the correct dimensions.
Troubleshooting
My Bag is Crooked/Slanted
A crooked or slanted bag often indicates inconsistent stitch counts or missed stitches at the end of rows, especially when working back and forth.
Carefully count your stitches at the end of every row or round. Use stitch markers to identify the first and last stitch. If working in rows, ensure you are always crocheting into the correct stitch when turning.
My Stitches Look Uneven
Uneven stitches usually stem from varying tension or inconsistent hook placement. Some stitches might be too tight, others too loose.
Focus on maintaining a consistent tension in your yarn. Practice the stitch slowly, ensuring your hook enters the same part of the previous stitch each time. Over time, your muscle memory will improve.
My Bag Base is Curling
A curling bag base often means you haven’t made enough increases for the shape you’re trying to achieve, or your tension is too tight.
Check your pattern for the recommended increase schedule. If you’re free-handing, try adding a few more increases in the next round. Loosen your tension slightly if it feels very tight.
Key Takeaways
- Preparation is key: Gather all materials and understand basic stitches before starting.
- Gauge matters: Always check your gauge to ensure your bag is the correct size and shape.
- Stitch markers are your friends: Use them to prevent mistakes and keep track of your progress.
- Practice makes perfect: Inconsistent tension improves with regular crocheting.
- Finishing touches count: Weave in ends securely and consider blocking for a professional look.
- Don’t be afraid to unravel: Ripping out stitches (frogging) to correct errors is a normal part of the process.
Frequently Asked Questions
What type of yarn is best for a crochet bag?
The best yarn depends on the bag’s intended use. Cotton or cotton blends are excellent for sturdy market bags. Acrylic yarn is durable, affordable, and comes in many colors, suitable for everyday bags. Wool or wool blends can create a softer, more luxurious feel but may require lining for shape retention.
How do I make my crochet bag strong enough to hold heavy items?
To make your bag strong, use a dense stitch like single crochet and a smaller hook size than recommended for your yarn. This creates a tighter fabric. Consider using two strands of yarn held together. Additionally, a fabric lining will significantly increase the bag’s durability and prevent stretching.
Can I wash my crochet bag?
Washing instructions depend on the yarn fiber. Always check your yarn label for care instructions. Most acrylic and cotton bags can be hand-washed in cool water with a mild detergent and laid flat to dry. Avoid machine washing or drying unless specifically indicated, as it can cause stretching or damage.
What if my bag turns out too small or too big?
This is usually a gauge issue. If your bag is too small, your stitches are likely too tight, or you’re using a hook that’s too small. If it’s too big, your stitches are too loose, or your hook is too large. Adjust your hook size accordingly for future projects, or try to loosen/tighten your tension.
Our Top Recommended Finds
- Ergonomic Crochet Hook Set: Comfortable handles reduce hand fatigue, allowing for longer crafting sessions.
- Large Yarn Winder: Converts skeins into neat cakes, preventing tangles and making storage easier.
- Blocking Mats with Pins: Essential for shaping and professional finishing of your crochet projects, especially bags.
Your Crochet Bag Adventure Begins Now
You now have a solid understanding of how to approach making your very own crochet bag.
The satisfaction of creating something functional and beautiful with your own hands is truly special.
Don’t hesitate to revisit video tutorials for visual guidance on specific steps, or explore patterns for different bag styles.
Pick up your hook and yarn today, and start crafting the perfect bag that reflects your unique style.