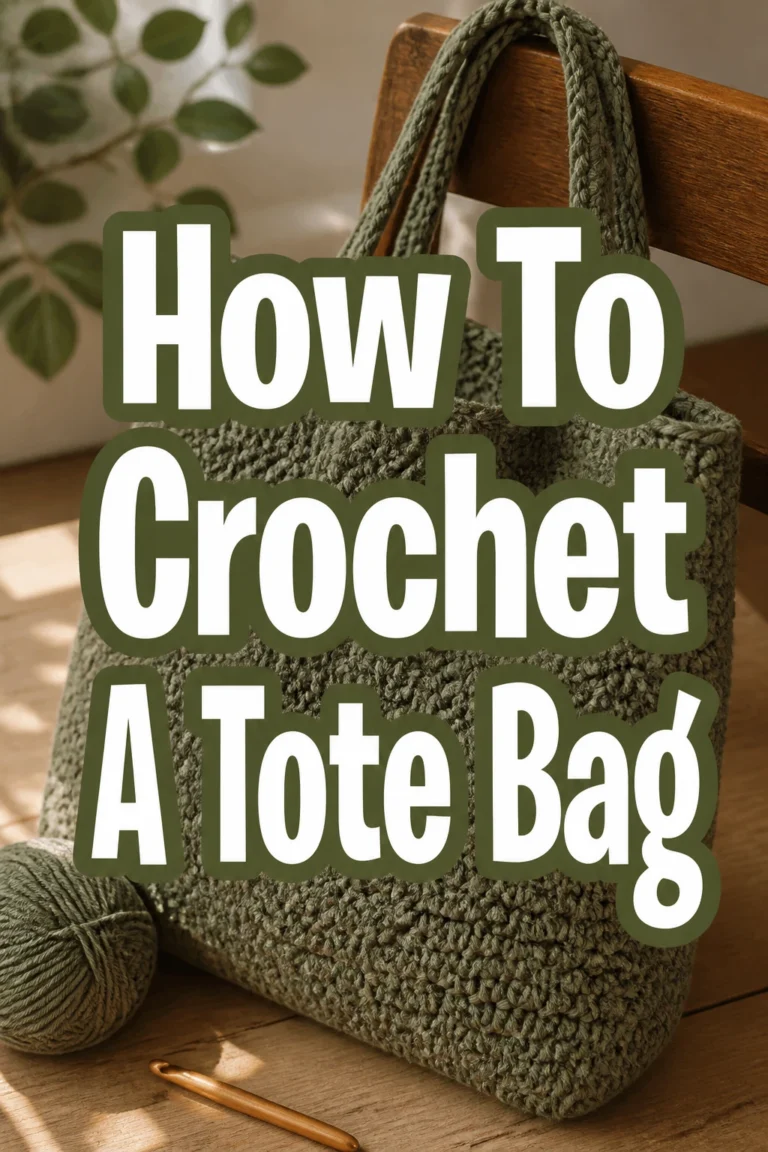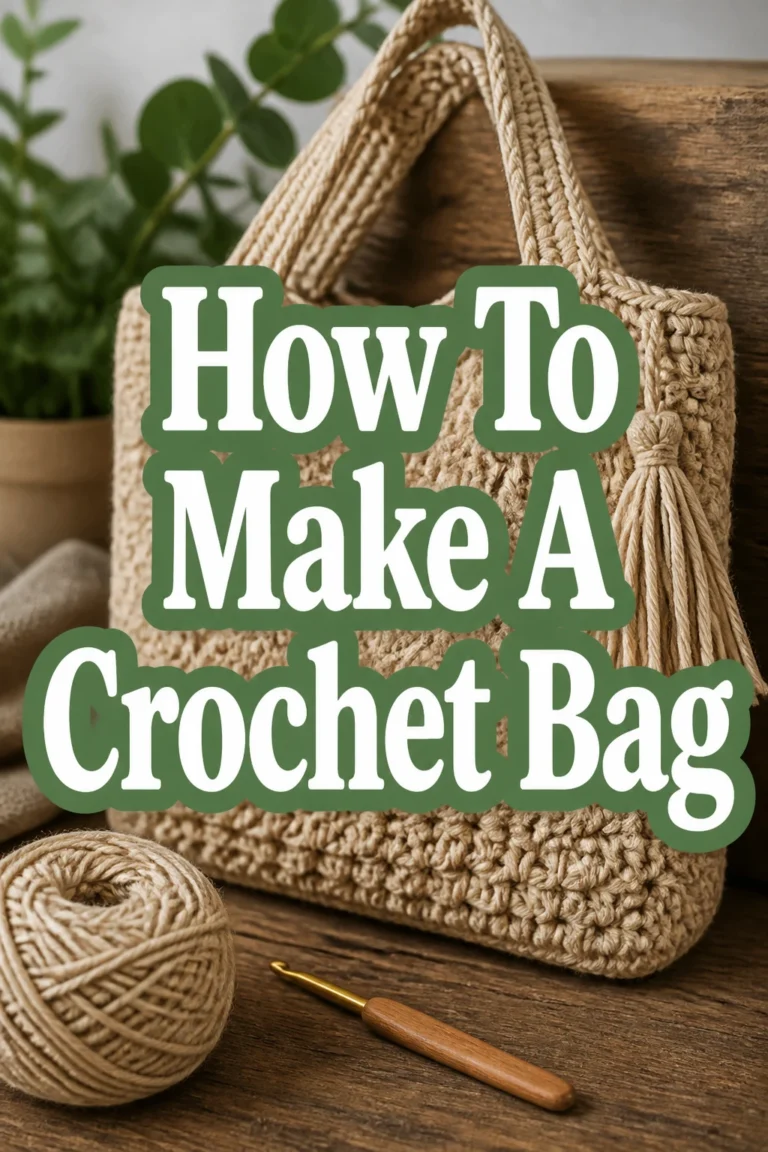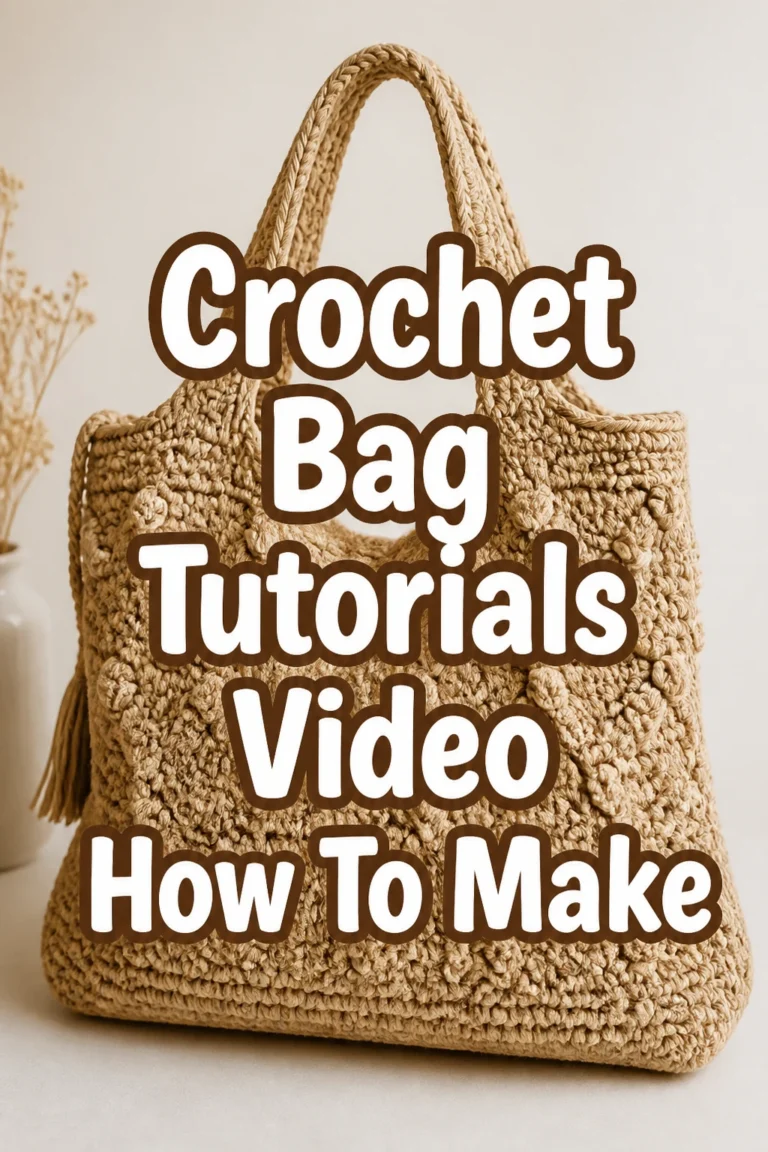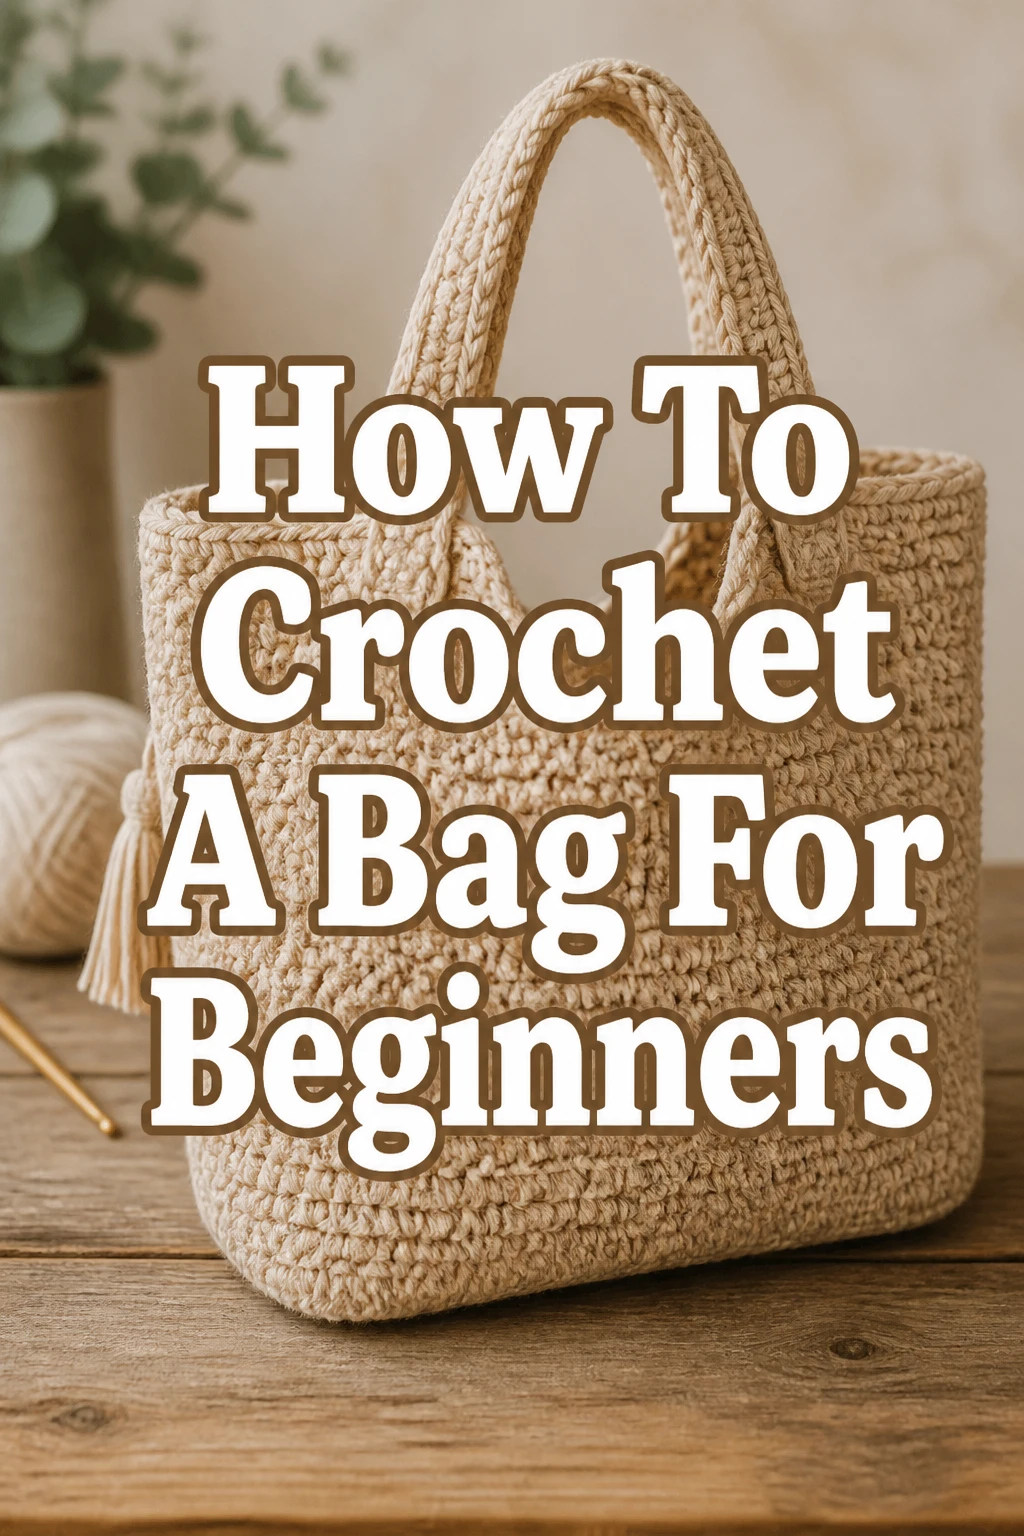
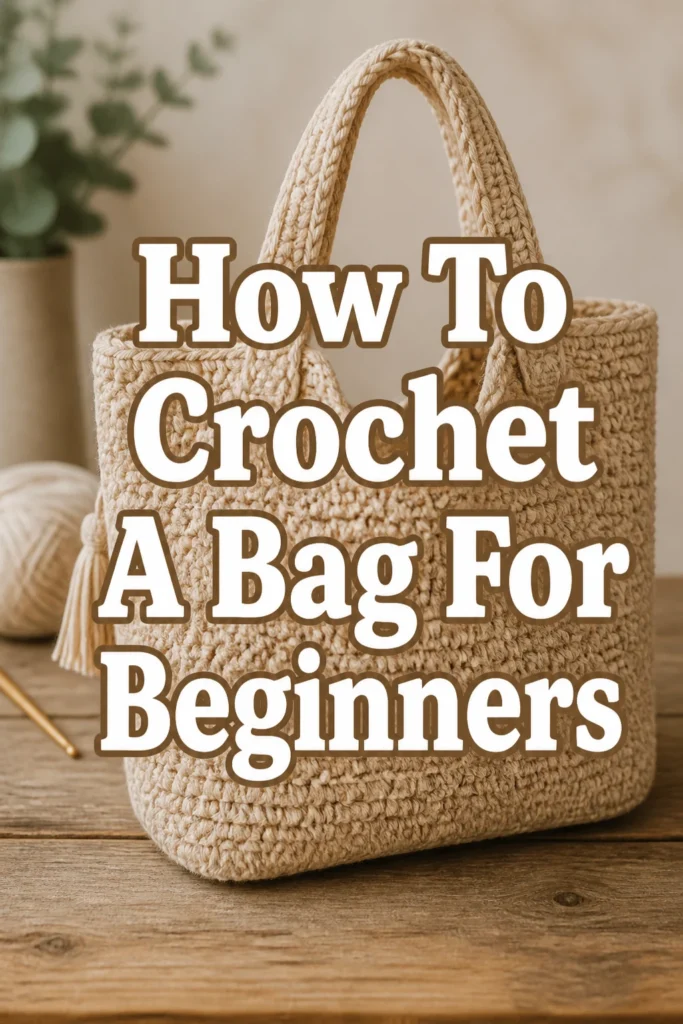
How To Crochet A Bag For Beginners
Learning to crochet a bag can feel like a big step when you’re just starting out. I remember the satisfaction of finishing my very first one, a simple tote that I still use today. This guide will walk you through each step, making the process clear and enjoyable.
You’ll soon have a handmade bag you can proudly show off.
Quick Overview
This guide will help you create a sturdy, stylish crochet bag from start to finish. You will master basic stitches and construction techniques. By the end, you’ll have a functional accessory and a strong foundation in crochet.
- Time needed: 4-8 hours (spread over several sessions for beginners)
- Difficulty: Beginner
- What you’ll need: Yarn, crochet hook, scissors, tapestry needle, stitch markers
Step-by-Step Instructions
Crocheting your first bag is an exciting project. Take your time with each step and enjoy the process. We will build your bag piece by piece.
Step 1: Gather Your Materials
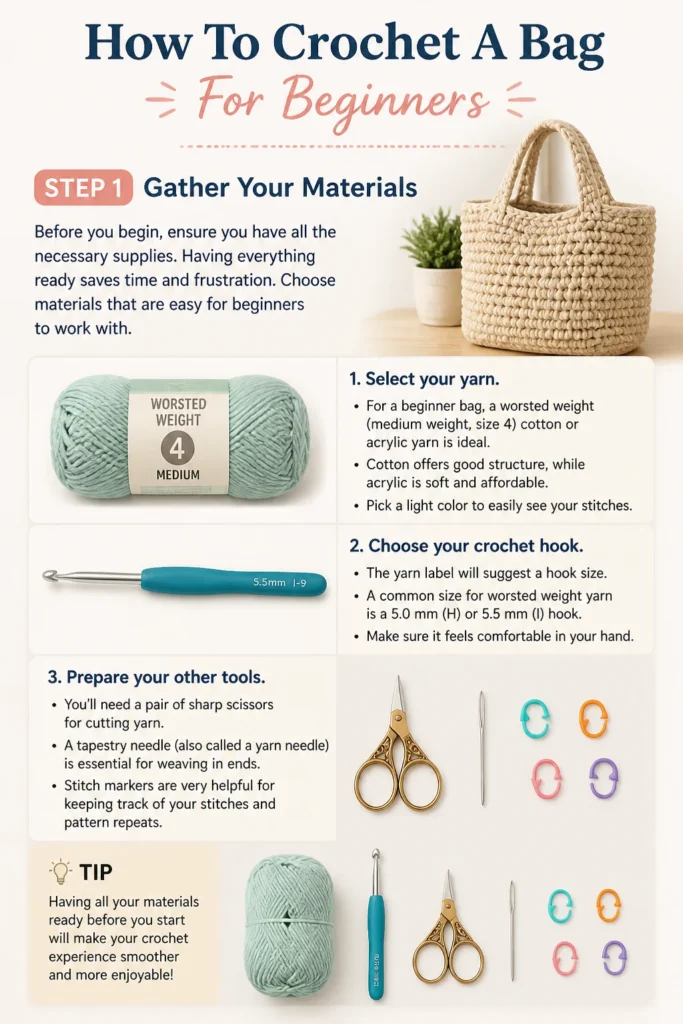
Before you begin, ensure you have all the necessary supplies. Having everything ready saves time and frustration. Choose materials that are easy for beginners to work with.
- Select your yarn. For a beginner bag, a worsted weight (medium weight, size 4) cotton or acrylic yarn is ideal. Cotton offers good structure, while acrylic is soft and affordable. Pick a light color to easily see your stitches.
- Choose your crochet hook. The yarn label will suggest a hook size. A common size for worsted weight yarn is a 5.0 mm (H) or 5.5 mm (I) hook. Make sure it feels comfortable in your hand.
- Prepare your other tools. You’ll need a pair of sharp scissors for cutting yarn. A tapestry needle (also called a yarn needle) is essential for weaving in ends. Stitch markers are very helpful for keeping track of your rows and stitches, especially in the round.
Step 2: Learn Basic Stitches
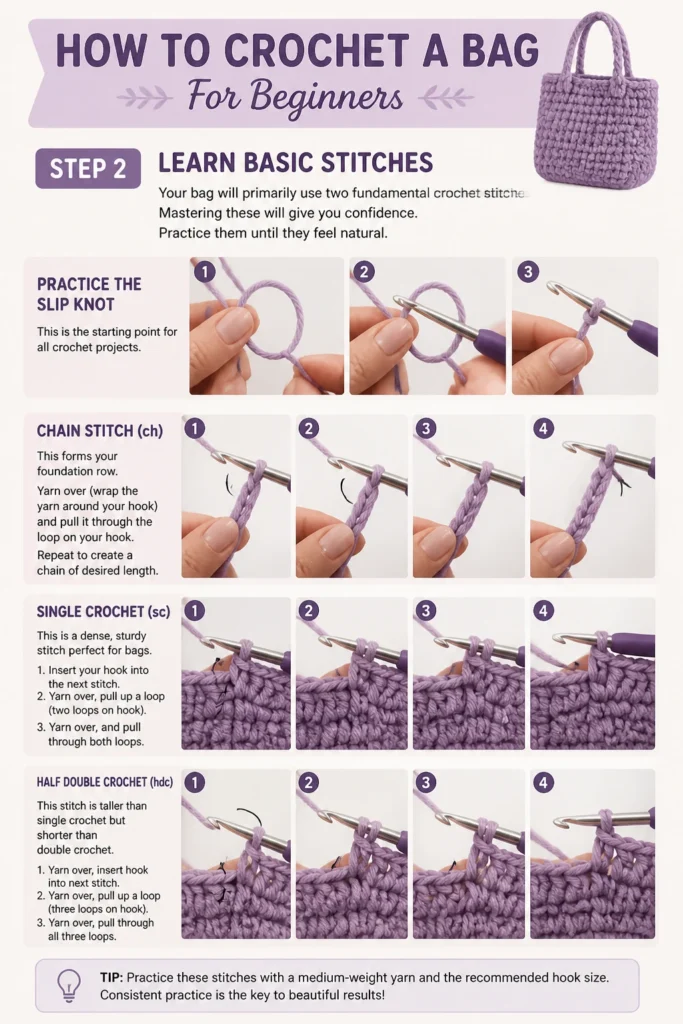
Your bag will primarily use two fundamental crochet stitches. Mastering these will give you confidence. Practice them until they feel natural.
- Practice the slip knot. This is the starting point for all crochet projects. Make a loop, insert your hook, and pull the working yarn through.
- Chain stitch (ch). This forms your foundation row. Yarn over (wrap the yarn around your hook) and pull it through the loop on your hook. Repeat to create a chain of desired length.
- Single crochet (sc). This is a dense, sturdy stitch perfect for bags. Insert your hook into the next stitch, yarn over, pull up a loop (two loops on hook), yarn over, and pull through both loops.
- Half double crochet (hdc). This stitch is taller than single crochet but shorter than double crochet. Yarn over, insert hook into next stitch, yarn over, pull up a loop (three loops on hook), yarn over, pull through all three loops.
Pro Tip: Watch a few video tutorials for these basic stitches if you’re a visual learner. Seeing the motion can make a big difference. Practice chaining and single crocheting until your stitches are even.
Step 3: Create the Bag Base
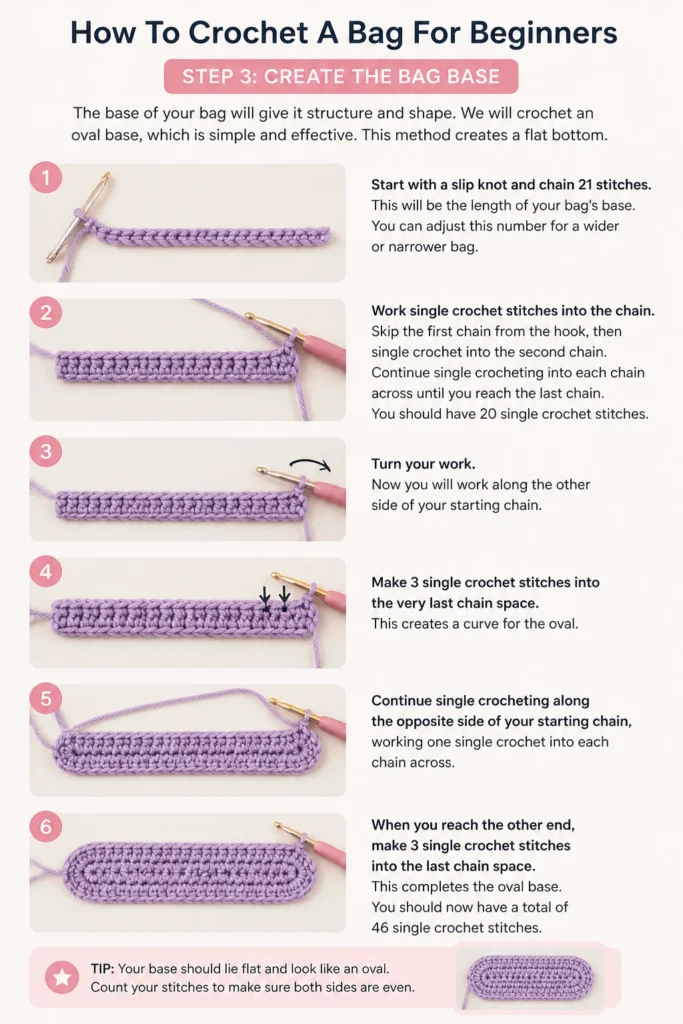
The base of your bag will give it structure and shape. We will crochet an oval base, which is simple and effective. This method creates a flat bottom.
- Start with a slip knot and chain 21 stitches. This will be the length of your bag’s base. You can adjust this number for a wider or narrower bag.
- Work single crochet stitches into the chain. Skip the first chain from the hook, then single crochet into the second chain. Continue single crocheting into each chain across until you reach the last chain. You should have 20 single crochet stitches.
- Turn your work. Now you will work along the other side of your starting chain. Make 3 single crochet stitches into the very last chain space. This creates a curve for the oval.
- Continue single crocheting along the opposite side of your starting chain, working one single crochet into each chain space. You should have 19 single crochet stitches along this side.
- Finish the round. Make 2 single crochet stitches into the very first chain space you worked into at the beginning. Join with a slip stitch to the first single crochet of the round. You should now have an oval base.
Step 4: Build the Bag Sides
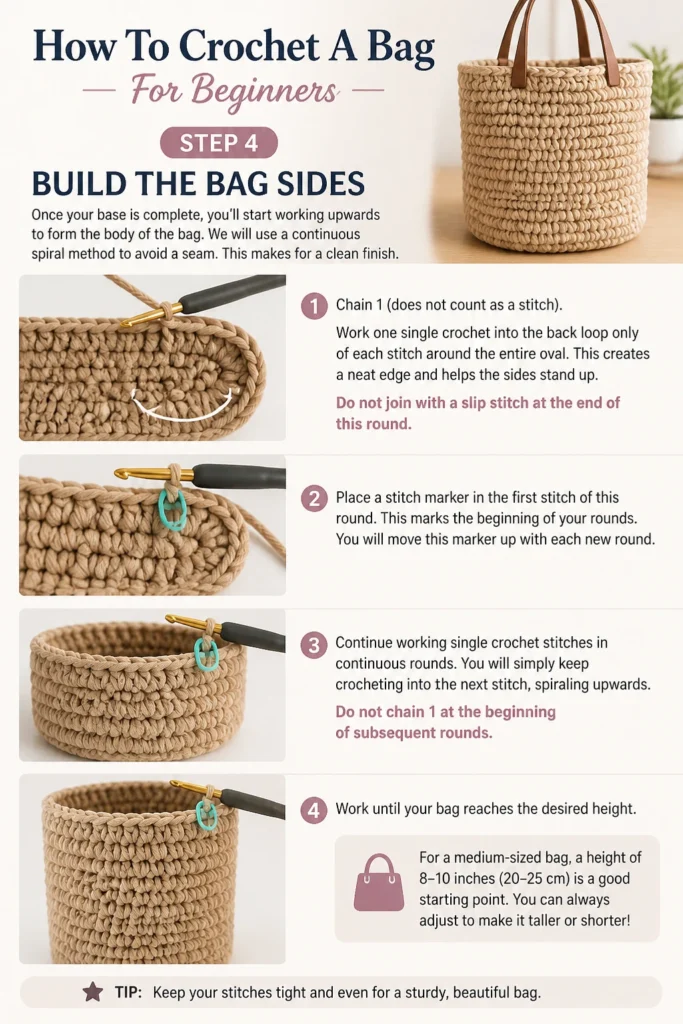
Once your base is complete, you’ll start working upwards to form the body of the bag. We will use a continuous spiral method to avoid a seam. This makes for a clean finish.
- Chain 1 (does not count as a stitch). Work one single crochet into the back loop only of each stitch around the entire oval. This creates a neat edge and helps the sides stand up. Do not join with a slip stitch at the end of this round.
- Place a stitch marker in the first stitch of this round. This marks the beginning of your rounds. You will move this marker up with each new round.
- Continue working single crochet stitches in continuous rounds. You will simply keep crocheting into the next stitch, spiraling upwards. Do not chain 1 at the beginning of subsequent rounds.
- Work until your bag reaches the desired height. For a medium-sized tote, this might be 20-30 rounds or about 10-12 inches. Keep counting your stitches periodically to ensure your sides are straight. Inconsistent stitch count can lead to a lopsided bag.
Pro Tip: Using a stitch marker is crucial when working in continuous rounds. It helps you identify the start and end of each round, preventing you from losing your place. Always move it to the first stitch of your new round.
Step 5: Create the Handles
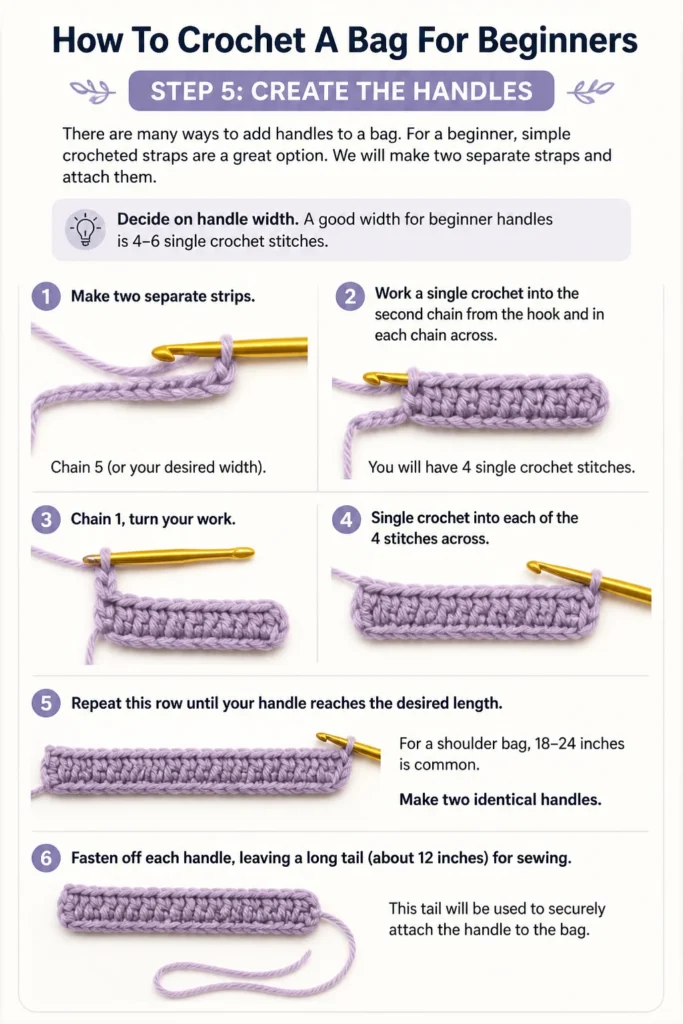
There are many ways to add handles to a bag. For a beginner, simple crocheted straps are a great option. We will make two separate straps and attach them.
- Decide on handle width. A good width for beginner handles is 4-6 single crochet stitches. Make two separate strips.
- Chain 5 (or your desired width). Work a single crochet into the second chain from the hook and in each chain across. You will have 4 single crochet stitches.
- Chain 1, turn your work. Single crochet into each of the 4 stitches across. Repeat this row until your handle reaches the desired length. For a shoulder bag, 18-24 inches is common. Make two identical handles.
- Fasten off each handle, leaving a long tail (about 12 inches) for sewing. This tail will be used to securely attach the handle to the bag.
Step 6: Attach the Handles
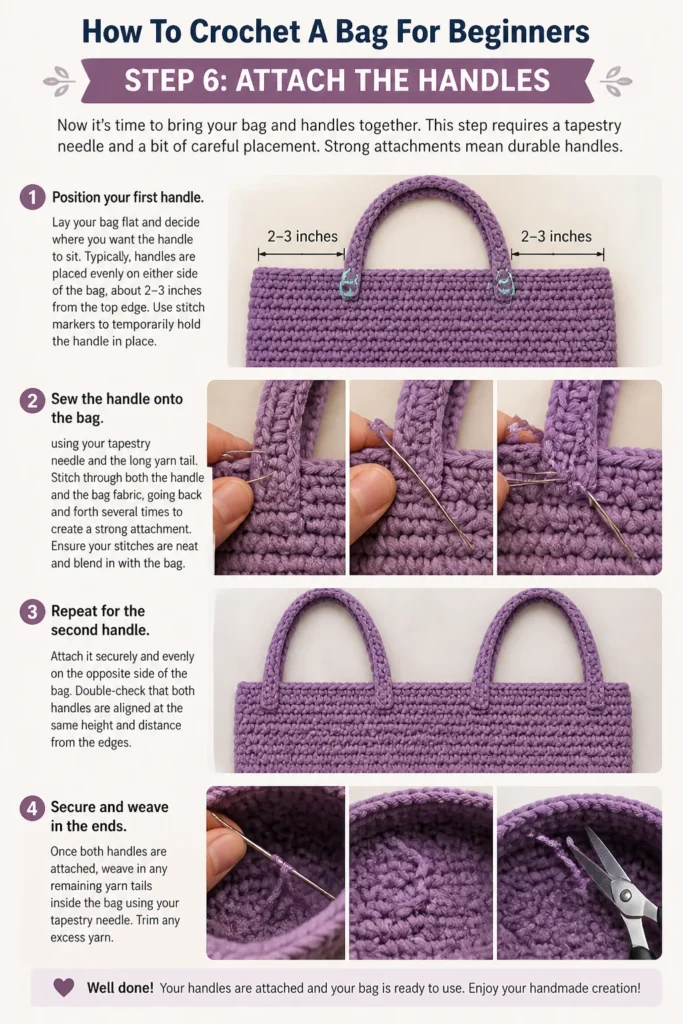
Now it’s time to bring your bag and handles together. This step requires a tapestry needle and a bit of careful placement. Strong attachments mean durable handles.
- Position your first handle. Lay your bag flat and decide where you want the handle to sit. Typically, handles are placed evenly on either side of the bag, about 2-3 inches from the top edge. Use stitch markers to temporarily hold the handle in place.
- Sew the handle onto the bag using your tapestry needle and the long yarn tail. Stitch through both the handle and the bag fabric, going back and forth several times to create a strong attachment. Ensure your stitches are neat and blend in with the bag.
- Repeat for the second handle. Attach it securely and evenly on the opposite side of the bag. Double-check that both handles are aligned and not twisted.
- Weave in any remaining tails from attaching the handles. Make sure they are hidden and secure so they don’t unravel.
Step 7: Finish Your Bag
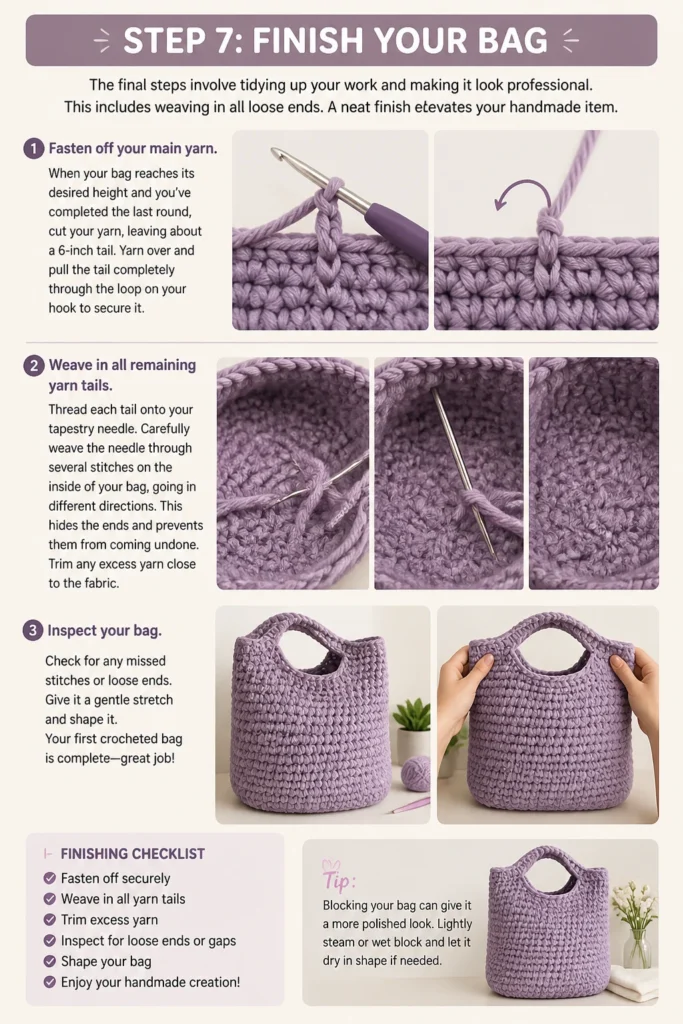
The final steps involve tidying up your work and making it look professional. This includes weaving in all loose ends. A neat finish elevates your handmade item.
- Fasten off your main yarn. When your bag reaches its desired height and you’ve completed the last round, cut your yarn, leaving about a 6-inch tail. Yarn over and pull the tail completely through the loop on your hook to secure it.
- Weave in all remaining yarn tails. Thread each tail onto your tapestry needle. Carefully weave the needle through several stitches on the inside of your bag, going in different directions. This hides the ends and prevents them from coming undone. Trim any excess yarn close to the fabric.
- Inspect your bag. Check for any missed stitches or loose ends. Give it a gentle stretch and shape it. Your first crocheted bag is now complete!
Common Mistakes to Avoid
Even experienced crocheters make mistakes sometimes. Knowing what to watch out for can save you time and frustration. Be patient with yourself as you learn.
Inconsistent Tension
This is a very common issue for beginners. If your stitches are sometimes tight and sometimes loose, your fabric will look uneven and potentially wavy. This affects the overall shape and appearance of your bag.
To fix this, try to maintain a consistent grip on your yarn and hook. Practice making swatches (small squares of crochet) focusing only on keeping your tension even. Your hook size can also influence tension; a slightly larger hook might help if your stitches are consistently too tight.
Incorrect Stitch Count
Losing track of your stitches can lead to a bag that is wider on one side or tapers unexpectedly. This often happens when you accidentally skip a stitch or add an extra one. Counting stitches can feel tedious, but it’s vital.
Always count your stitches at the end of each round or row, especially when you are new to a pattern. Use stitch markers to mark the first and last stitches of a round, or at regular intervals. If your stitch count is off, unravel back to where the count was correct and re-do the section.
Forgetting to Turn or Chain
When working in rows (not in the round), you typically need to chain a certain number of stitches before turning your work to start a new row. Forgetting to do this can make your edges uneven or shorten your rows.
Always refer to your pattern instructions for the correct turning chain. For single crochet, it’s usually chain 1. For half double crochet, it’s usually chain 2. Make sure you are working into the correct stitch after turning, often the last stitch of the previous row or the second chain from the hook.
Choosing Overly Complex Patterns
It’s easy to get excited and want to jump into intricate designs. However, starting with a pattern that is too complex for your skill level can quickly lead to frustration and giving up. Complex stitch patterns or shaping can be overwhelming.
Begin with simple patterns that use basic stitches and straightforward construction, like the one outlined here. Build your confidence and skill with foundational projects. Once you’re comfortable, you can gradually move on to more challenging patterns and techniques.
Troubleshooting
Even with the best instructions, you might encounter a few hiccups. Don’t worry, most common problems have simple solutions. Here are some issues you might face.
My Bag Sides Are Wavy or Flared Out
If your bag sides are not standing up straight and instead look wavy or are flaring outwards, you might be increasing your stitch count without realizing it. This often happens when you accidentally work extra stitches into a round.
Carefully count your stitches at the end of each round. Make sure you are not putting two stitches into one space unless the pattern specifically calls for an increase. If your tension is very loose, your fabric might also appear wavy; try a smaller hook size to make your stitches tighter.
My Bag is Too Stiff or Too Floppy
The texture of your finished bag depends on your yarn choice and tension. If your bag feels too rigid, your stitches might be too tight. If it’s too flimsy and doesn’t hold its shape, your stitches might be too loose or your yarn isn’t suitable.
For a stiff bag, try relaxing your grip on the yarn and hook. You might even go up a hook size. For a floppy bag, try working with a tighter tension or going down a hook size. Using a sturdier yarn like cotton or a blend with some structure can also help. You can also line the bag with fabric for extra stability.
I Keep Running Out of Yarn
It’s frustrating to be near the end of a project and realize you don’t have enough yarn. This happens when you underestimate the yarn requirements or use a different gauge than the pattern.
Always check the recommended yarn yardage for a pattern and buy a little extra, especially if you’re a beginner (beginners tend to use more yarn). If you’re adapting a pattern, make a gauge swatch to estimate how much yarn you’ll need. If you do run out, try to find the exact same dye lot if possible, or incorporate a contrasting color for the handles or top edge.
Key Takeaways
Crocheting your first bag is a rewarding journey. Remember these crucial points to ensure success and enjoyment. Consistent practice builds confidence and skill.
- Always start with a slip knot and a foundation chain.
- Master single crochet and half double crochet stitches first.
- Use stitch markers to keep track of your rounds and stitches.
- Count your stitches regularly to maintain an even shape.
- Practice consistent tension for a neat and uniform fabric.
- Weave in all yarn ends securely for a professional finish.
Frequently Asked Questions
New crafters often have similar questions. Knowing the answers can help you move forward with confidence. Here are some common queries.
What type of yarn is best for a beginner bag?
Worsted weight (medium weight, size 4) cotton or acrylic yarn is highly recommended for beginners. Cotton provides good structure and stitch definition, making it easy to see your work. Acrylic is soft, affordable, and widely available, offering a smooth crocheting experience. Avoid very thin or very fuzzy yarns initially.
Can I wash my crocheted bag?
Yes, most crocheted bags can be washed, but always check your yarn label for specific care instructions. Cotton yarns are often machine washable on a gentle cycle and can be air-dried. Acrylic yarns are also typically machine washable. Hand washing and air drying flat is generally the safest method for any handmade item to maintain its shape and integrity.
How long does it typically take to crochet a bag?
The time it takes to crochet a bag varies greatly depending on its size, the complexity of the pattern, and your personal speed. For a beginner using a simple pattern like this one, it might take anywhere from 4 to 8 hours spread over several sessions. As you gain experience, your speed will naturally increase.
What if my bag turns out too small or too big?
The size of your finished bag depends on your gauge (how tightly or loosely you crochet) and the hook size you use. If your bag is too small, your stitches might be too tight; try going up a hook size. If it’s too big, your stitches might be too loose; try going down a hook size. You can also adjust the initial chain length to make the base wider or narrower.
Our Top Recommended Finds
Having the right tools can significantly enhance your crocheting experience. These are a few items that many beginners find helpful. They make the process smoother and more enjoyable.
- Ergonomic Crochet Hook Set: These hooks feature comfortable handles that reduce hand fatigue, allowing you to crochet for longer periods. They come in various sizes, perfect for different yarn weights.
- Locking Stitch Markers: Essential for keeping track of your stitches, especially when working in the round. These markers clip securely into your stitches and won’t fall out.
- Yarn Winder and Swift: While not strictly necessary for your first project, these tools transform skeins of yarn into neat cakes, preventing tangles and making your yarn much easier to work with.
Your Creative Journey Awaits
You now have a comprehensive guide to crocheting your very first bag. This project is more than just a craft; it’s an opportunity to create something beautiful and functional with your own hands. The skills you’ve learned here are foundational and will open doors to countless other projects.
Don’t hesitate to start today. Pick out some yarn, grab your hook, and begin your crocheting adventure. The satisfaction of carrying a bag you made yourself is truly unmatched. What will you create next?