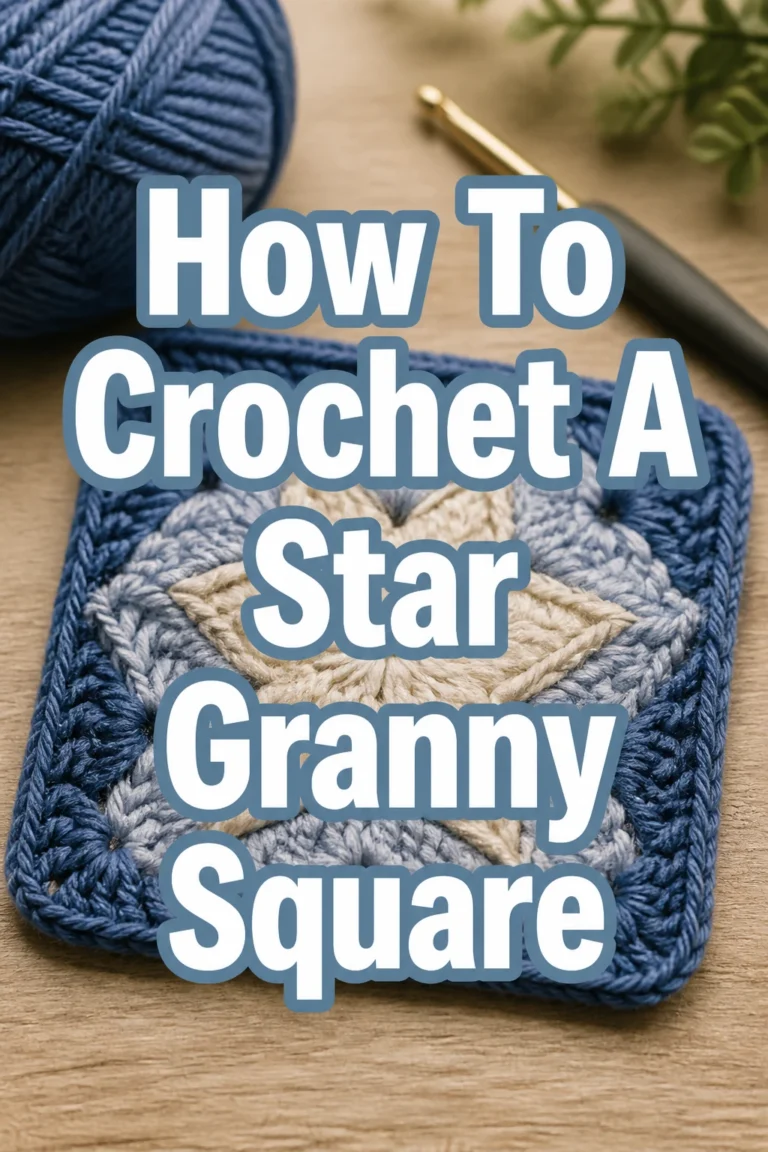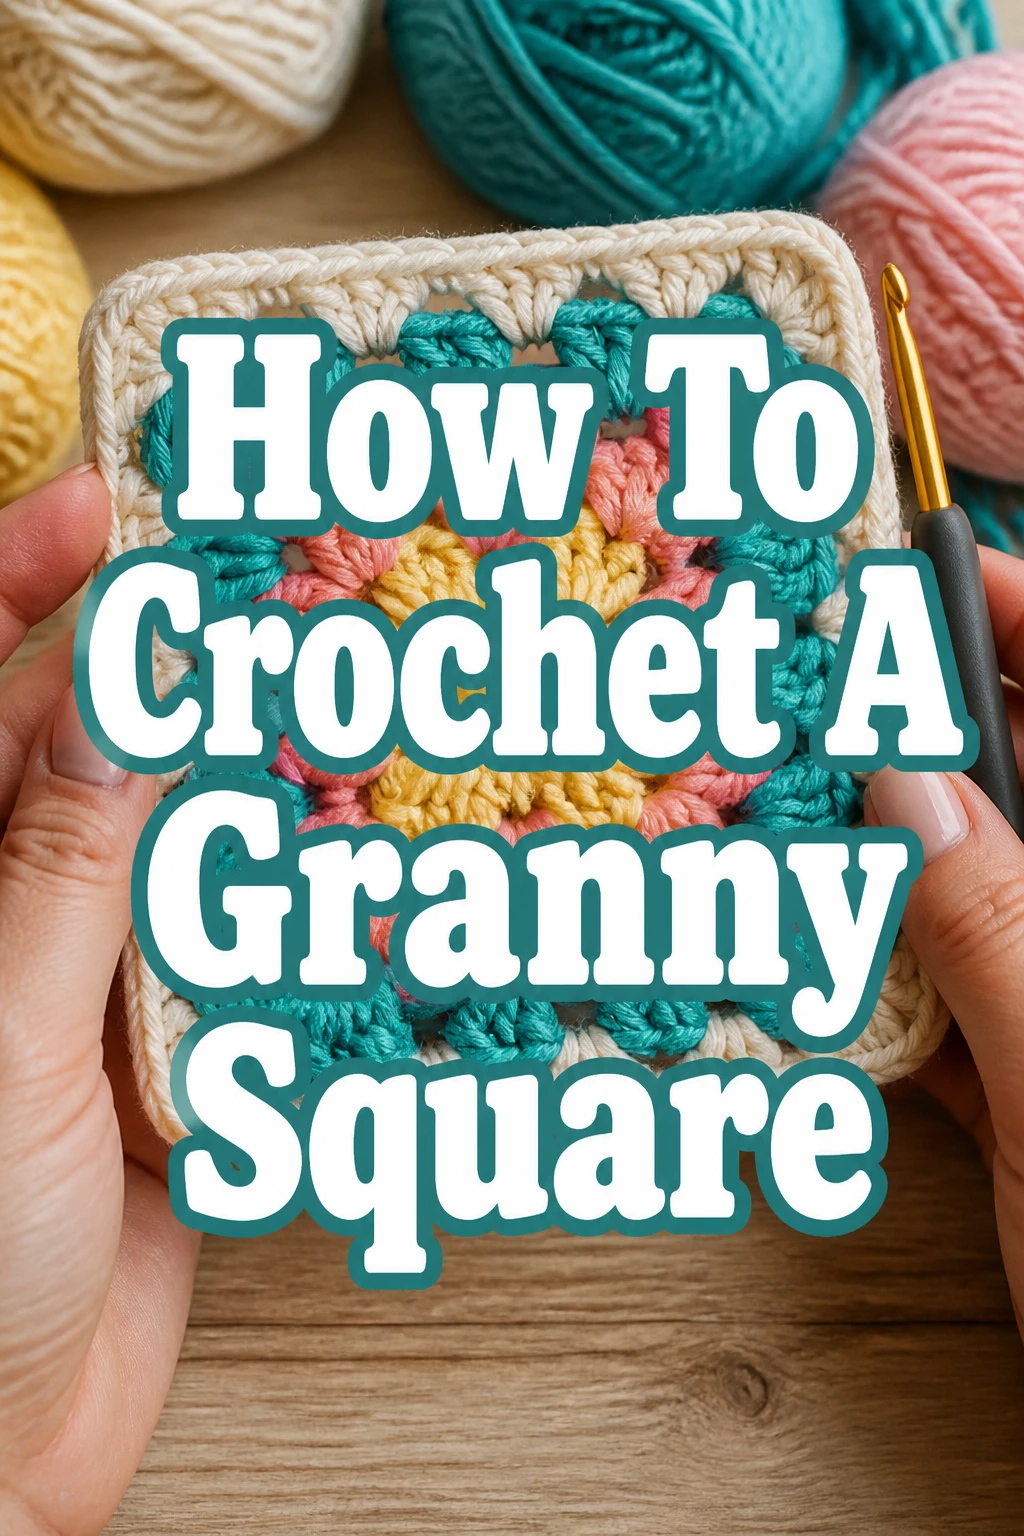
How To Crochet A Granny Square
Learning to crochet a granny square opens up a world of creative possibilities.
I remember the satisfaction of completing my very first one, a slightly wonky but cherished piece of fabric.
This guide will walk you through each stitch, ensuring you gain the confidence to make perfect squares every time.
Quick Overview
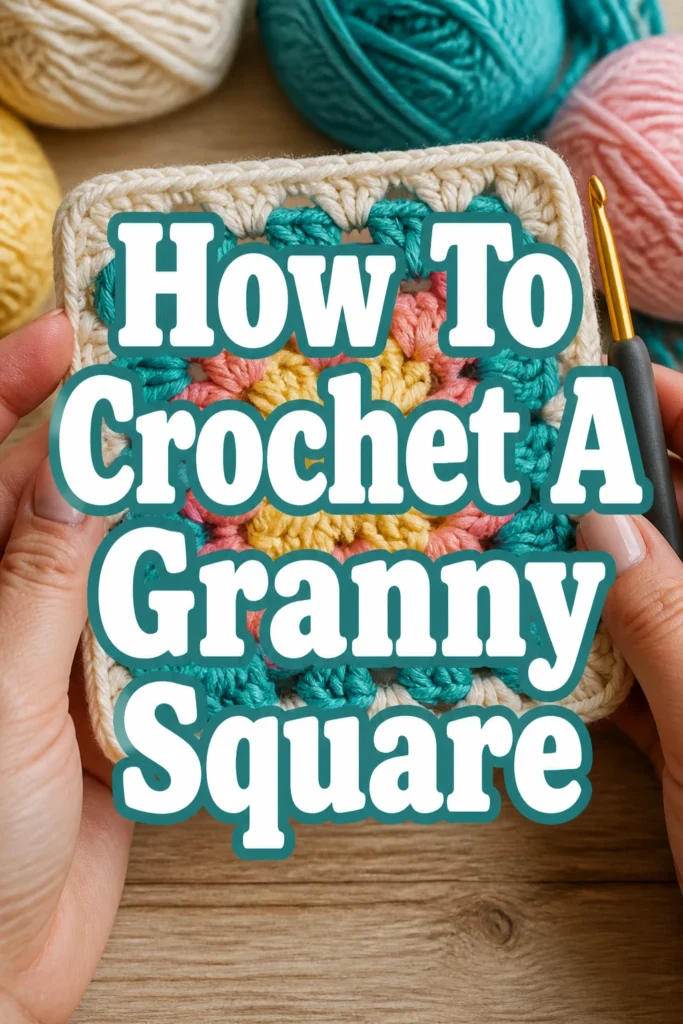
You’re about to create a timeless crochet classic. This guide will teach you the foundational techniques to craft your very own granny square, a versatile building block for countless projects.
- Time needed: 30-60 minutes for your first square, much faster afterward
- Difficulty: Beginner
- What you’ll need: Yarn, crochet hook, scissors, yarn needle
Step-by-Step Instructions
Step 1: Gather Your Materials
Before you begin, make sure you have everything ready. This prevents interruptions and helps you focus on the stitches.
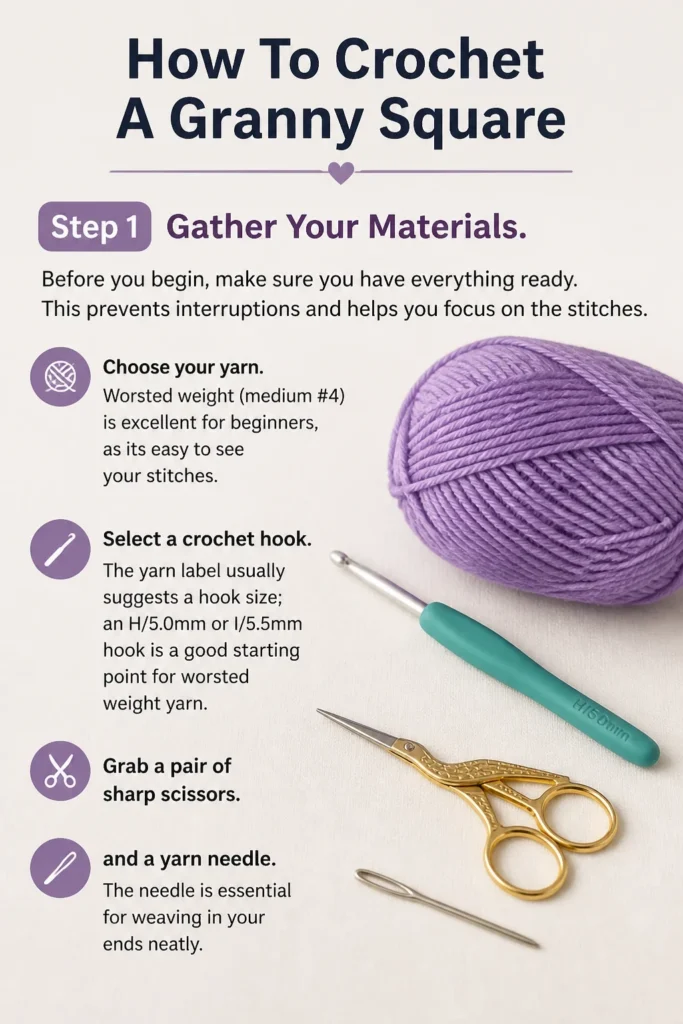
Choose your yarn. Worsted weight (medium #4) is excellent for beginners, as it’s easy to see your stitches.
Select a crochet hook. The yarn label usually suggests a hook size; an H/5.0mm or I/5.5mm hook is a good starting point for worsted weight yarn.
Grab a pair of sharp scissors and a yarn needle. The needle is essential for weaving in your ends neatly.
Step 2: Create a Slip Knot
Every crochet project starts with a slip knot on your hook. This forms the adjustable loop that your first stitches will be worked into.
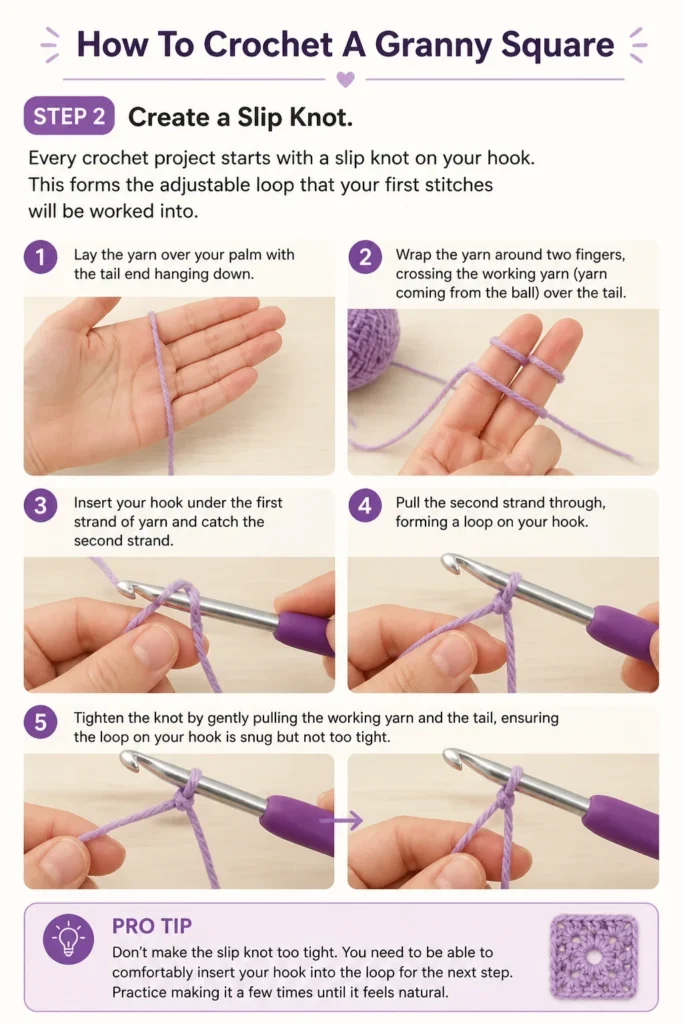
- Lay the yarn over your palm with the tail end hanging down.
- Wrap the yarn around two fingers, crossing the working yarn (yarn coming from the ball) over the tail.
- Insert your hook under the first strand of yarn and catch the second strand.
- Pull the second strand through, forming a loop on your hook.
- Tighten the knot by gently pulling the working yarn and the tail, ensuring the loop on your hook is snug but not too tight.
Pro Tip: Don’t make the slip knot too tight. You need to be able to comfortably insert your hook into the loop for the next step. Practice making it a few times until it feels natural.
Step 3: Chain Your Foundation Ring
The foundation ring is the center of your granny square. You will work all of your first round stitches into this ring.
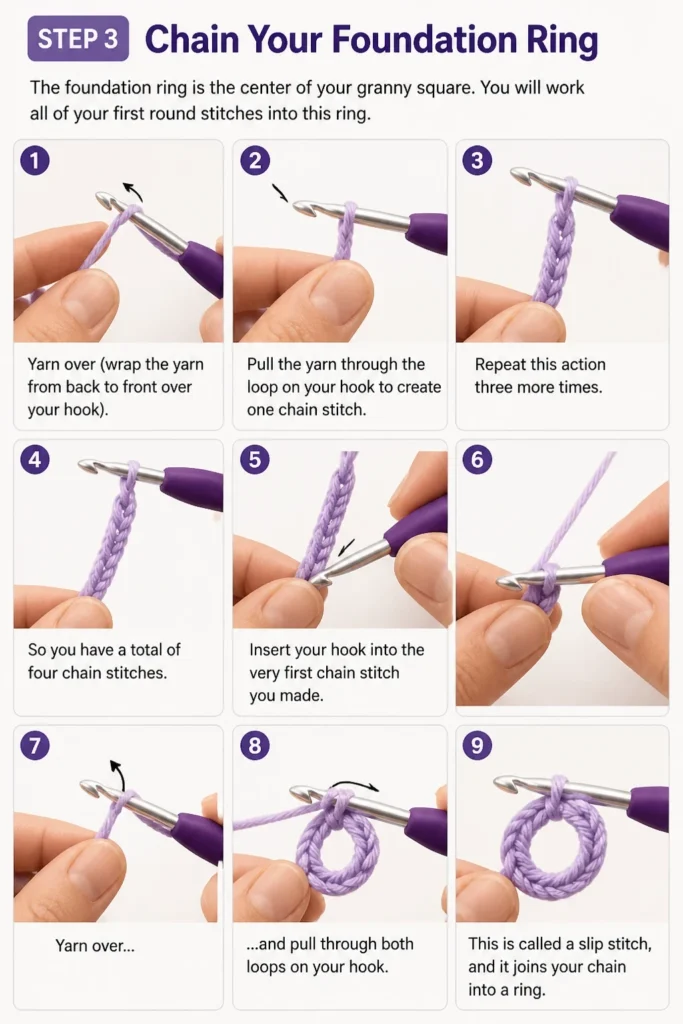
- Yarn over (wrap the yarn from back to front over your hook).
- Pull the yarn through the loop on your hook to create one chain stitch.
- Repeat this action three more times, so you have a total of four chain stitches.
- Insert your hook into the very first chain stitch you made.
- Yarn over and pull through both loops on your hook. This is called a slip stitch, and it joins your chain into a ring.
Step 4: Begin Your First Round
Now you’ll start building the first layer of your square, creating clusters of double crochet stitches and chain spaces for the corners.
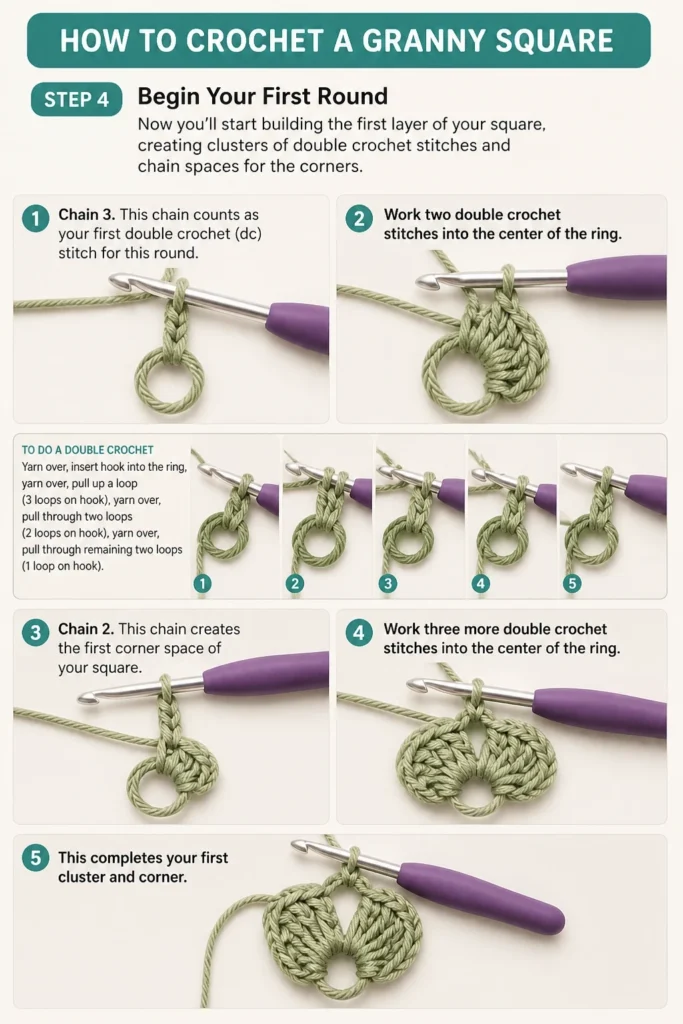
- Chain 3. This chain counts as your first double crochet (dc) stitch for this round.
- Work two double crochet stitches into the center of the ring. To do a double crochet: yarn over, insert hook into the ring, yarn over, pull up a loop (3 loops on hook), yarn over, pull through two loops (2 loops on hook), yarn over, pull through remaining two loops (1 loop on hook).
- Chain 2. This chain creates the first corner space of your square.
- Work three more double crochet stitches into the center of the ring. This completes your first “cluster” and corner.
Step 5: Complete the First Round
You will continue to create three more clusters, each separated by a chain-2 corner space, to form the square shape.
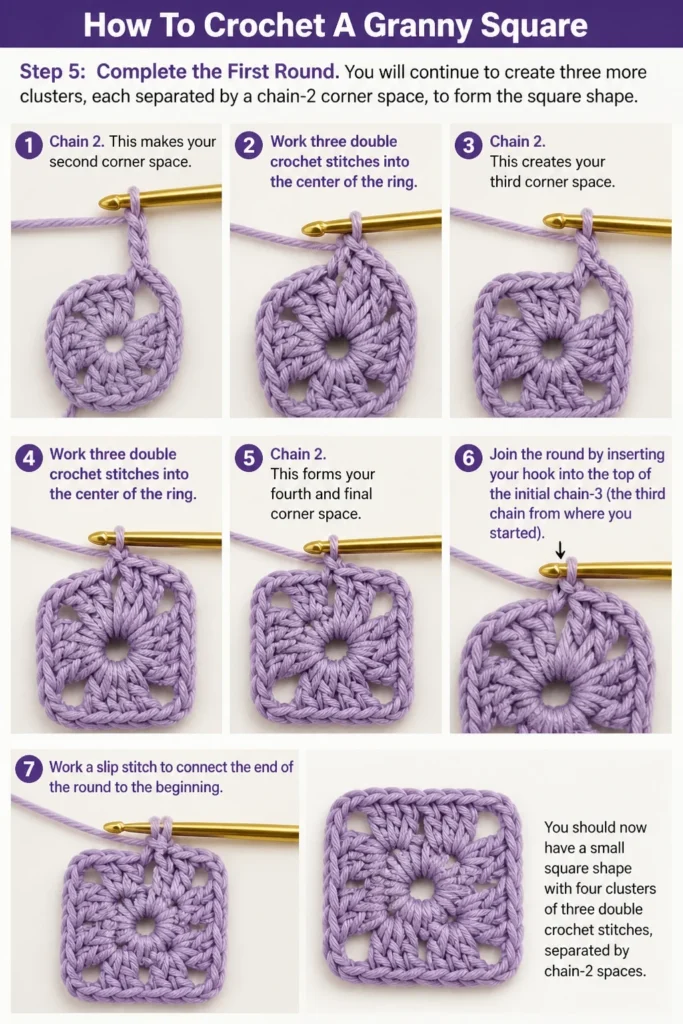
- Chain 2. This makes your second corner space.
- Work three double crochet stitches into the center of the ring.
- Chain 2. This creates your third corner space.
- Work three double crochet stitches into the center of the ring.
- Chain 2. This forms your fourth and final corner space.
- Join the round by inserting your hook into the top of the initial chain-3 (the third chain from where you started).
- Work a slip stitch to connect the end of the round to the beginning.
You should now have a small square shape with four clusters of three double crochet stitches, separated by chain-2 spaces.
Step 6: Start Your Second Round
Each subsequent round builds upon the previous one, expanding your square. You’ll work into the corner spaces and create side clusters.
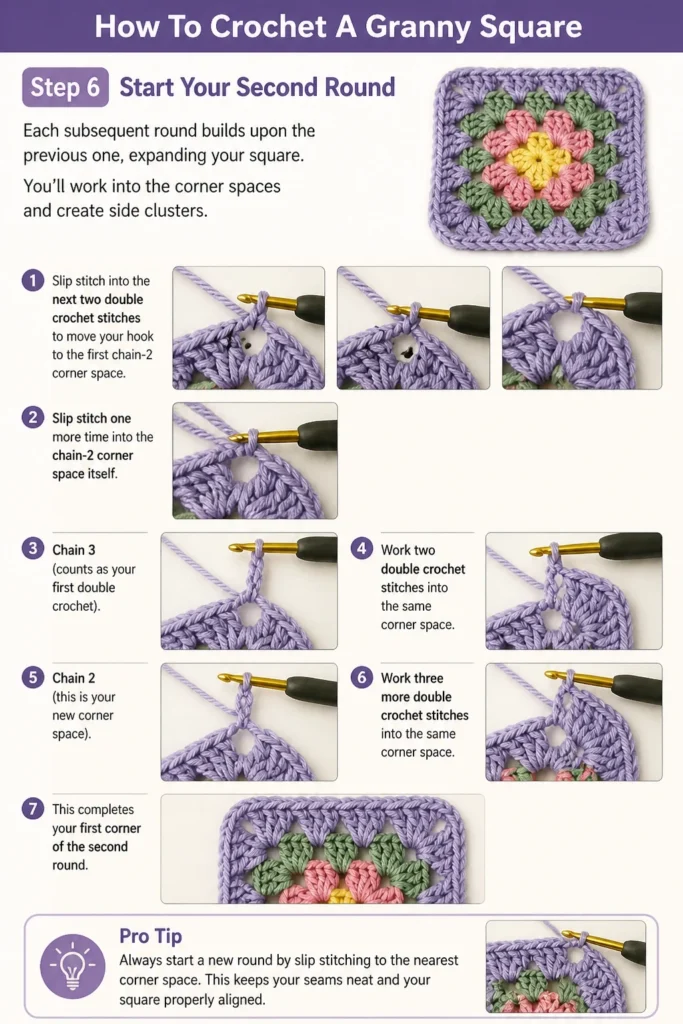
- Slip stitch into the next two double crochet stitches to move your hook to the first chain-2 corner space.
- Slip stitch one more time into the chain-2 corner space itself. Your hook is now positioned correctly to start the new corner.
- Chain 3 (counts as your first double crochet).
- Work two double crochet stitches into the same corner space.
- Chain 2 (this is your new corner space).
- Work three more double crochet stitches into the same corner space. This completes your first corner of the second round.
Pro Tip: Always start a new round by slip stitching to the nearest corner space. This keeps your seams neat and your square properly aligned.
Step 7: Continue Building Subsequent Rounds
You will repeat the pattern of corners and sides around the square. Each side will now have a cluster of three double crochet stitches.
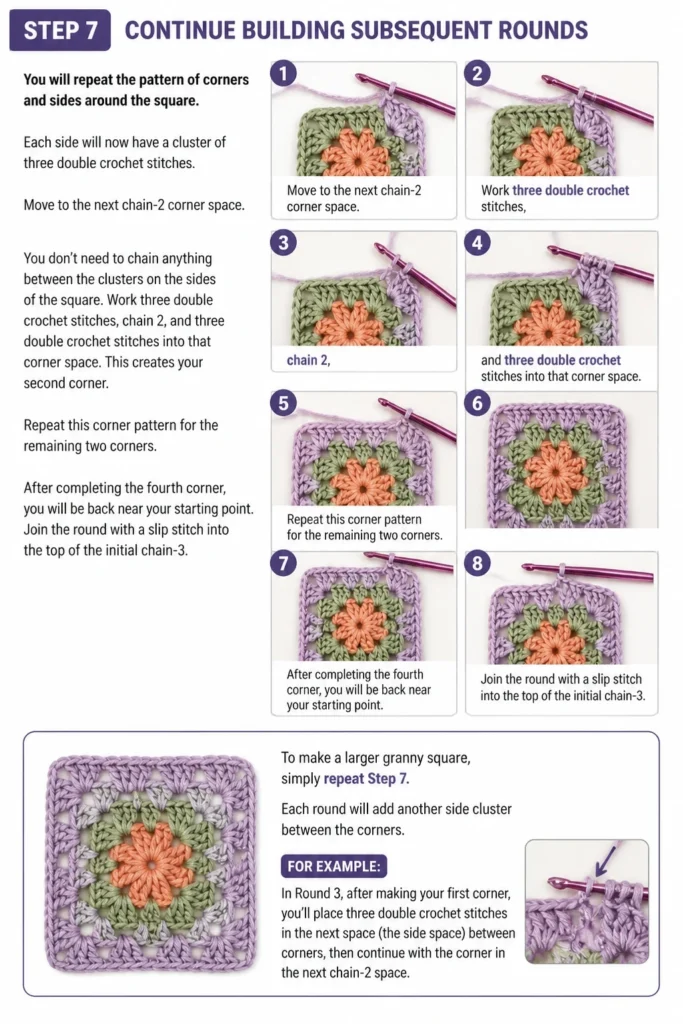
- Move to the next chain-2 corner space. You don’t need to chain anything between the clusters on the sides of the square.
- Work three double crochet stitches, chain 2, and three double crochet stitches into that corner space. This creates your second corner.
- Repeat this corner pattern for the remaining two corners.
- After completing the fourth corner, you will be back near your starting point.
- Join the round with a slip stitch into the top of the initial chain-3.
To make a larger granny square, simply repeat Step 7. Each round will add another “side” cluster between the corners. For example, in Round 3, after making your first corner, you’ll place three double crochets into the “side space” (the space created between the two 3-dc clusters from the previous round) before making your next corner.
Step 8: Finish and Weave in Ends
Once your granny square is the desired size, it’s time to secure your work and tidy it up.
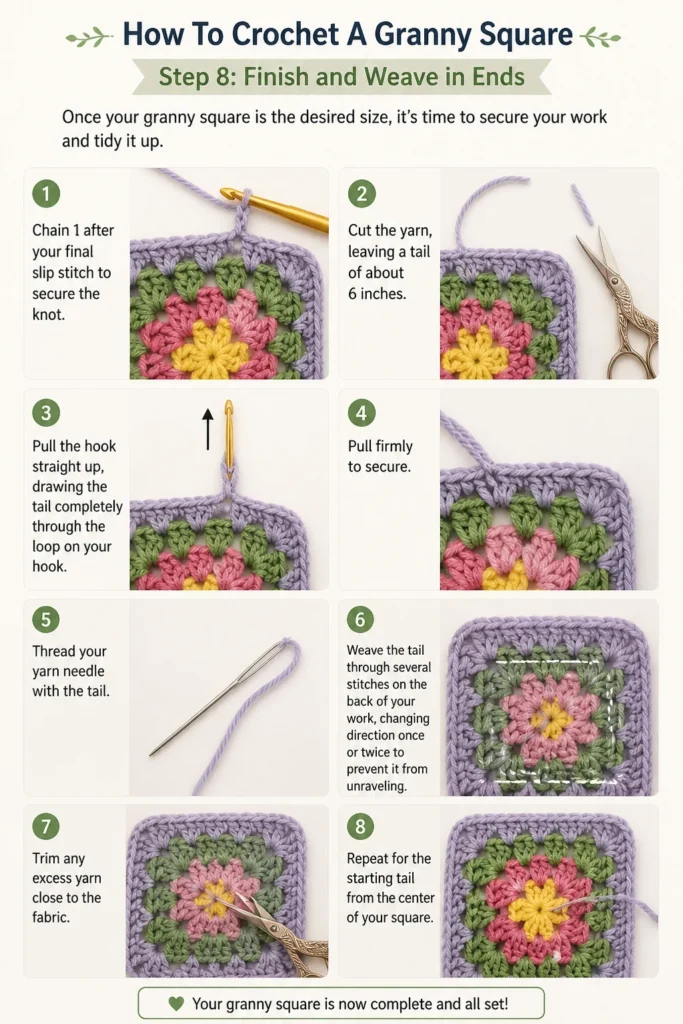
- Chain 1 after your final slip stitch to secure the knot.
- Cut the yarn, leaving a tail of about 6 inches.
- Pull the hook straight up, drawing the tail completely through the loop on your hook. Pull firmly to secure.
- Thread your yarn needle with the tail.
- Weave the tail through several stitches on the back of your work, changing direction once or twice to prevent it from unraveling.
- Trim any excess yarn close to the fabric.
- Repeat for the starting tail from the center of your square.
Common Mistakes to Avoid
Skipping Chain Spaces
A common error for beginners is forgetting to chain between clusters, especially in the corners. This results in a square that starts to curl or doesn’t lay flat.
Always remember the pattern: “3 dc, chain 2, 3 dc” for corners. The chain-2 creates the necessary space for the square shape to form correctly. Missing these chains will pull your work in too tightly.
Inconsistent Tension
If your granny square looks lumpy or uneven, your tension might be inconsistent. Some stitches might be too tight, others too loose.
Try to maintain a relaxed grip on your yarn and hook. Practice helps immensely here; your hands will learn the rhythm. Don’t pull the yarn too tightly after each stitch, but also don’t leave it too loose and baggy.
Incorrect Stitch Count
Forgetting to count your stitches, particularly the initial chain-3 that acts as a double crochet, can throw off your square’s symmetry.
Always count your chain-3 as a stitch. When joining, ensure you’re slip stitching into the top of that third chain, not the first double crochet next to it. Counting your clusters in each side and corner helps maintain the square shape.
Troubleshooting
My Square is Curling or Cupping
If your granny square is not lying flat and instead forms a bowl shape, it’s usually due to too few stitches or chain spaces.
Double-check that you are consistently making two chain stitches in each corner. Also, ensure you are not chaining too tightly. Sometimes simply relaxing your tension can flatten the square out.
My Square is Wavy or Ruffled
A wavy or ruffled granny square suggests you might have too many stitches or chain spaces, or your tension is too loose.
Verify that you are only making two chain stitches in each corner. If you’re adding extra chains or too many double crochets per cluster, the fabric will expand too much. Try using a slightly smaller hook size or tightening your tension slightly.
My Stitches Look Uneven
Uneven stitches are very common when you’re first learning. It’s a natural part of developing muscle memory.
The best solution is practice. The more you crochet, the more consistent your tension and stitch height will become. Don’t be afraid to unravel (frog) your work and restart a section if it looks particularly messy; this is how you learn.
Key Takeaways
- A granny square is built from the center outwards using double crochet clusters and chain spaces.
- The initial chain-3 at the start of each round counts as your first double crochet stitch.
- Corners are always made with “3 double crochet, chain 2, 3 double crochet” into the same space.
- Consistency in tension and stitch count is crucial for a well-shaped square.
- Don’t forget to weave in all your ends neatly for a professional finish.
Frequently Asked Questions
Can I use any type of yarn for a granny square?
Yes, you can use almost any yarn type. However, for beginners, a smooth, medium-weight acrylic or cotton yarn is recommended because it’s easy to see your stitches and doesn’t split easily. Different yarns will give your granny square different textures and drapes.
How do I change colors in a granny square?
To change colors, complete the last stitch of the previous color up until the very last yarn over. At that point, drop the old color, pick up the new color, and yarn over with the new color to complete the stitch. Then, continue crocheting with the new color, weaving in the ends as you go.
What can I make with granny squares?
Granny squares are incredibly versatile! You can join them together to make blankets, scarves, bags, sweaters, cardigans, pillow covers, and even clothes. They are perfect for using up small amounts of leftover yarn.
How do I make my granny square bigger?
To make your granny square bigger, simply continue crocheting additional rounds. Each round will add another layer of double crochet clusters and chain spaces, expanding the square outward. The pattern remains the same: corners get “3 dc, ch 2, 3 dc” and side spaces get “3 dc”.
Our Top Recommended Finds
- Worsted Weight Acrylic Yarn: Easy to work with, affordable, and comes in a vast array of colors. It’s perfect for practicing and making durable projects.
- Ergonomic Crochet Hook Set: Hooks with comfortable handles reduce hand fatigue, allowing you to crochet for longer periods without discomfort. A set offers various sizes for different yarn weights.
- Blunt-Tip Yarn Needles: Essential for weaving in ends without splitting the yarn. The blunt tip glides through stitches easily, making finishing your projects much simpler.
Your Crochet Journey Begins Now
You now possess the foundational knowledge to crochet your very first granny square. This little square is more than just yarn and stitches; it’s a testament to your growing skills.
Embrace the process, enjoy the rhythm of the hook, and don’t be afraid to experiment with colors. Your next step could be joining several squares for a vibrant blanket or exploring new stitch patterns.
Pick up your hook today and create something beautiful with your own hands.