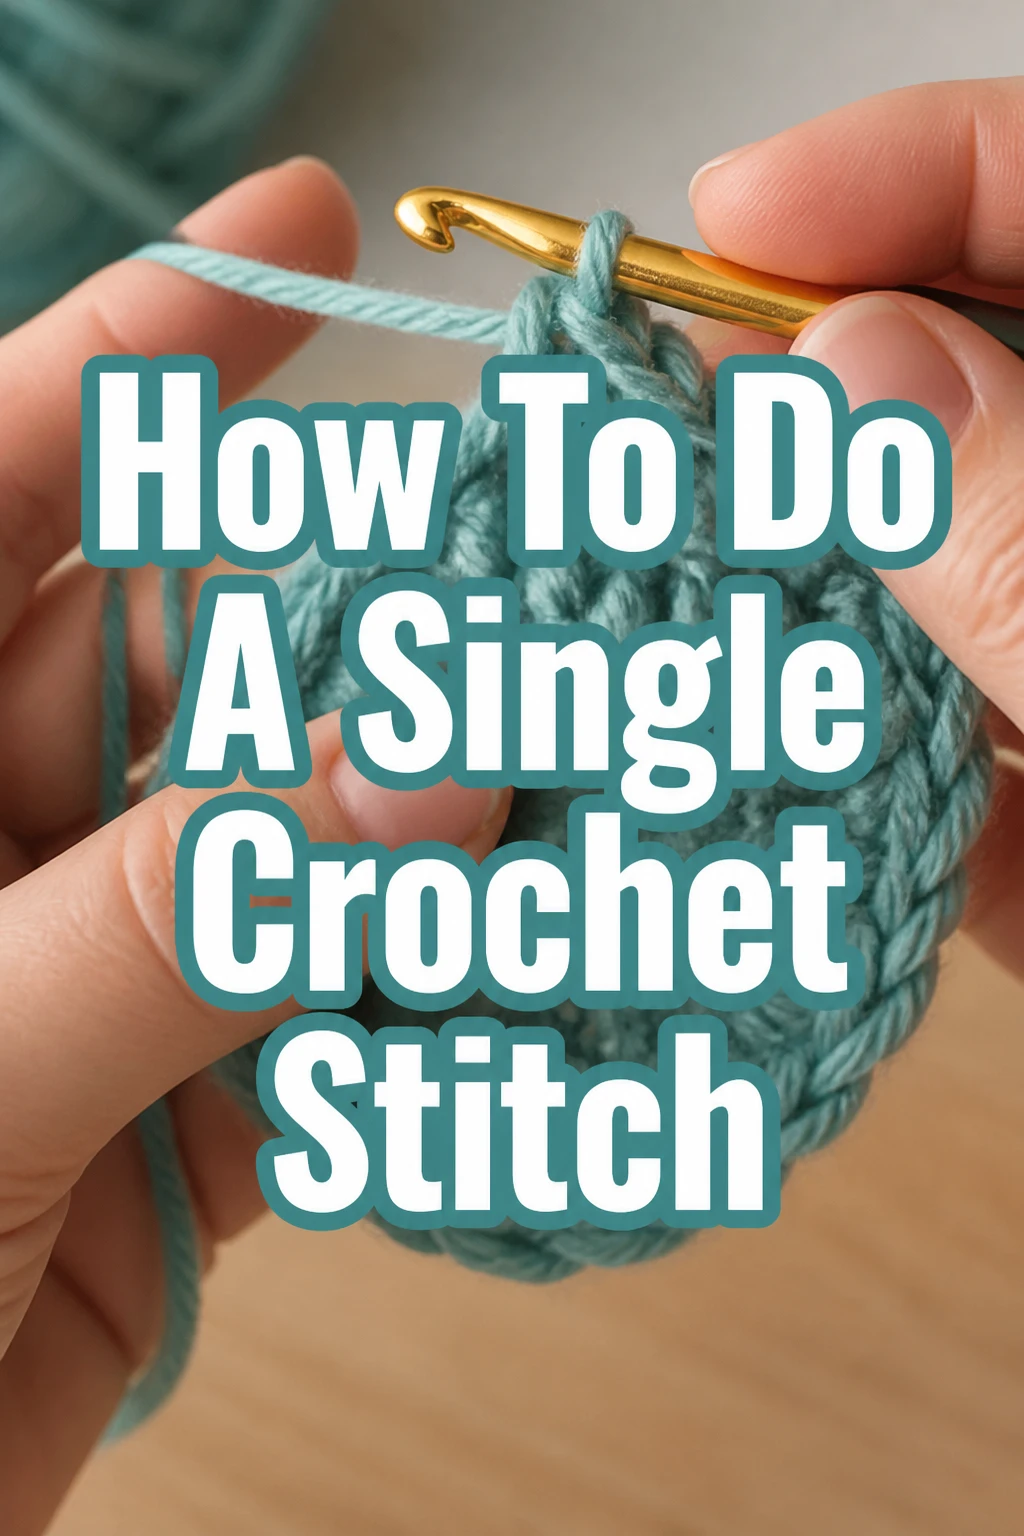
How To Do A Single Crochet Stitch
Learning to crochet opens up a world of creative possibilities.
The single crochet stitch is one of the most fundamental stitches, acting as a building block for countless projects.
I remember the satisfaction of my first perfectly formed single crochet, and with this guide, you’ll soon experience that same joy and confidence.
Quick Overview
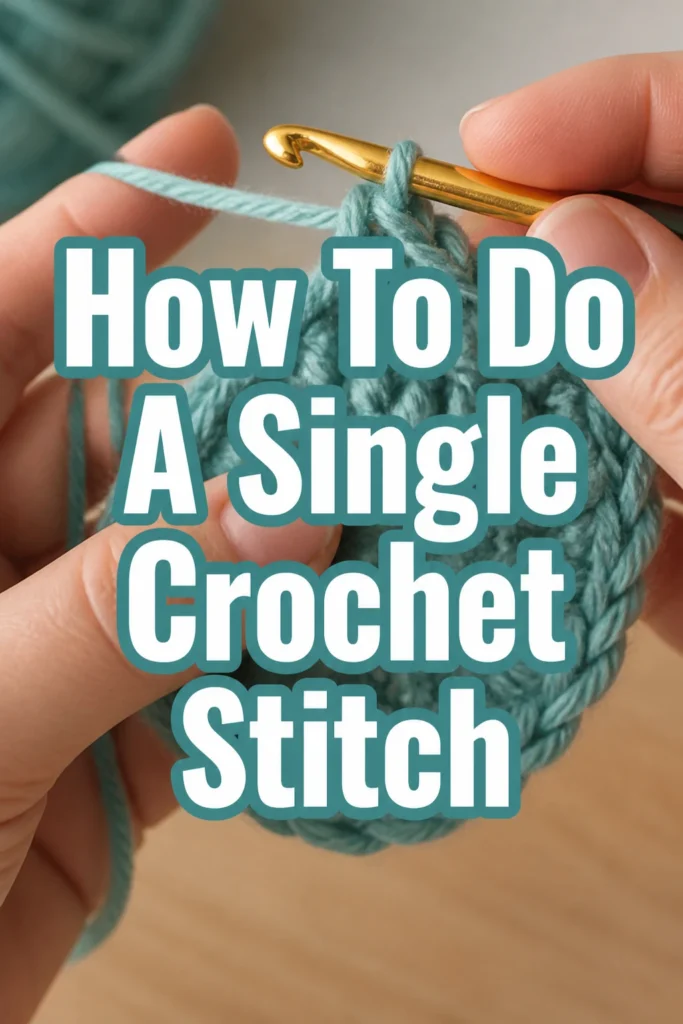
This guide will walk you through creating your very first single crochet stitch. You will learn how to hold your hook and yarn, form a foundation chain, and execute the single crochet stitch with clarity.
- Time needed: 15-30 minutes for initial learning
- Difficulty: Beginner
- What you’ll need: Yarn, a crochet hook, and a pair of scissors
Step-by-Step Instructions
Step 1: Gather Your Materials
Before you begin, ensure you have all the necessary tools within easy reach. Having everything organized helps maintain a smooth workflow.
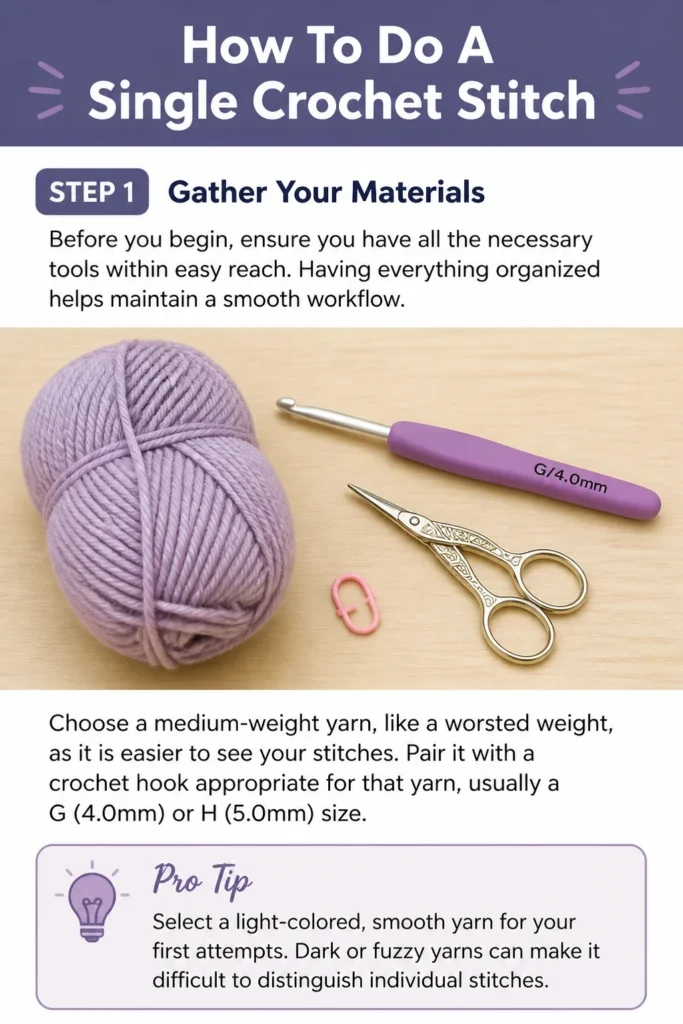
Choose a medium-weight yarn, like a worsted weight, as it is easier to see your stitches. Pair it with a crochet hook appropriate for that yarn, usually a G (4.0mm) or H (5.0mm) size.
Pro Tip: Select a light-colored, smooth yarn for your first attempts. Dark or fuzzy yarns can make it difficult to distinguish individual stitches.
Step 2: Create a Slip Knot
A slip knot forms the starting point for your work and secures the yarn to your hook. It is adjustable, which is helpful for beginners.
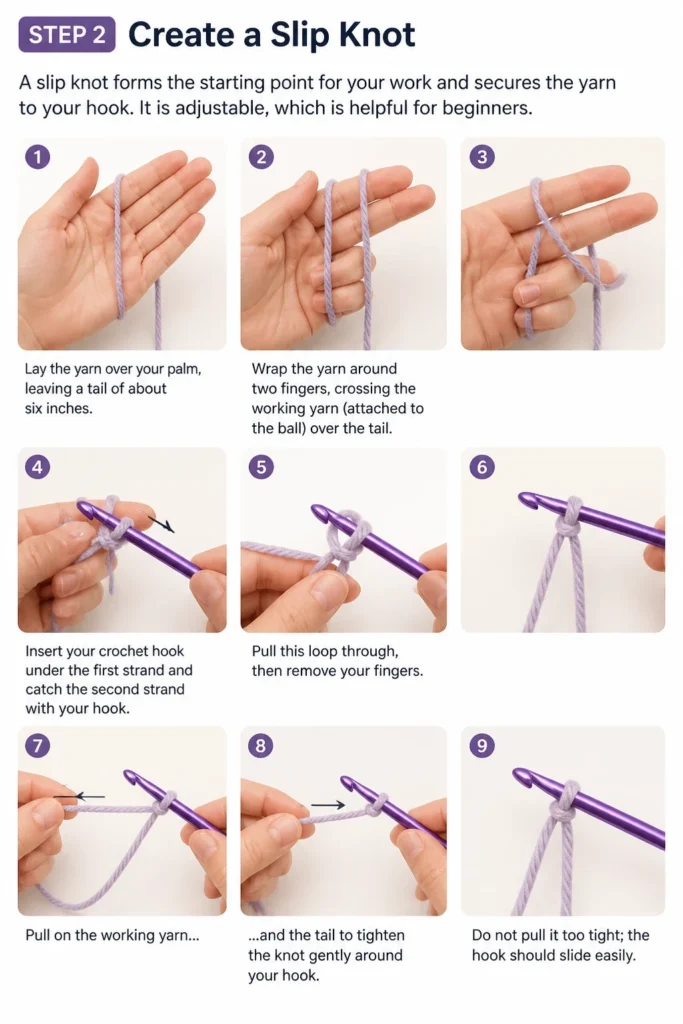
Lay the yarn over your palm, leaving a tail of about six inches. Wrap the yarn around two fingers, crossing the working yarn (attached to the ball) over the tail.
Insert your crochet hook under the first strand and catch the second strand with your hook. Pull this loop through, then remove your fingers.
Pull on the working yarn and the tail to tighten the knot gently around your hook. Do not pull it too tight; the hook should slide easily.
Step 3: Make a Foundation Chain
The foundation chain, also known as a chain stitch (ch), is the base row for almost all crochet projects. It provides the initial structure.
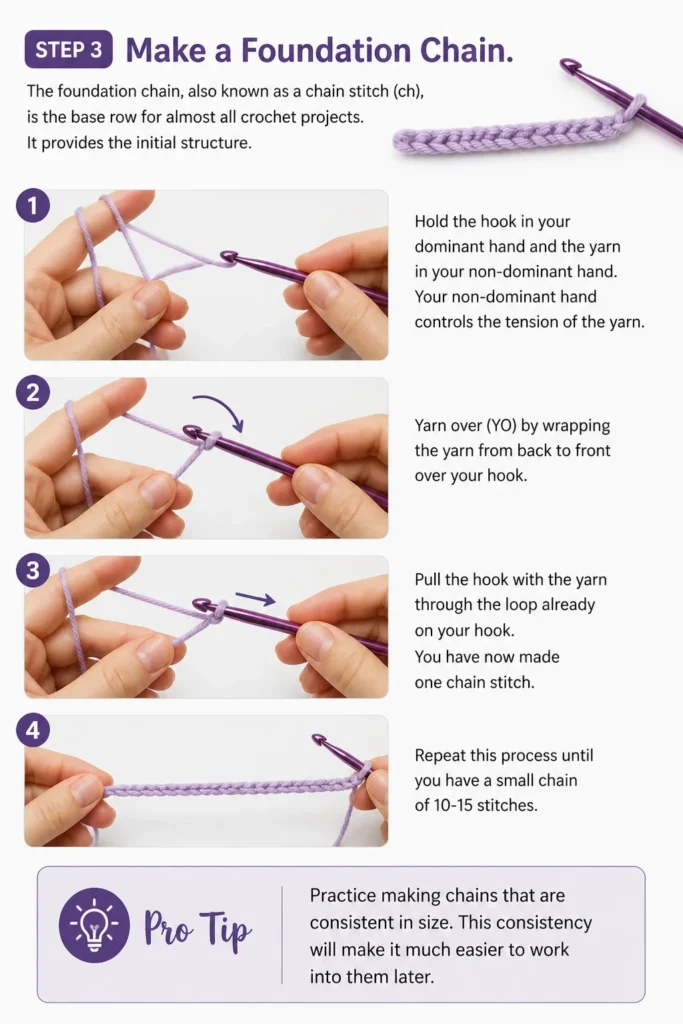
Hold the hook in your dominant hand and the yarn in your non-dominant hand. Your non-dominant hand controls the tension of the yarn.
Yarn over (YO) by wrapping the yarn from back to front over your hook. Pull the hook with the yarn through the loop already on your hook.
You have now made one chain stitch. Repeat this process until you have a small chain of 10-15 stitches.
Pro Tip: Practice making chains that are consistent in size. This consistency will make it much easier to work into them later.
Step 4: Identify the Second Chain from Hook
The single crochet stitch is typically worked into the second chain from your hook. This creates an even edge and prevents the first stitch from unraveling.
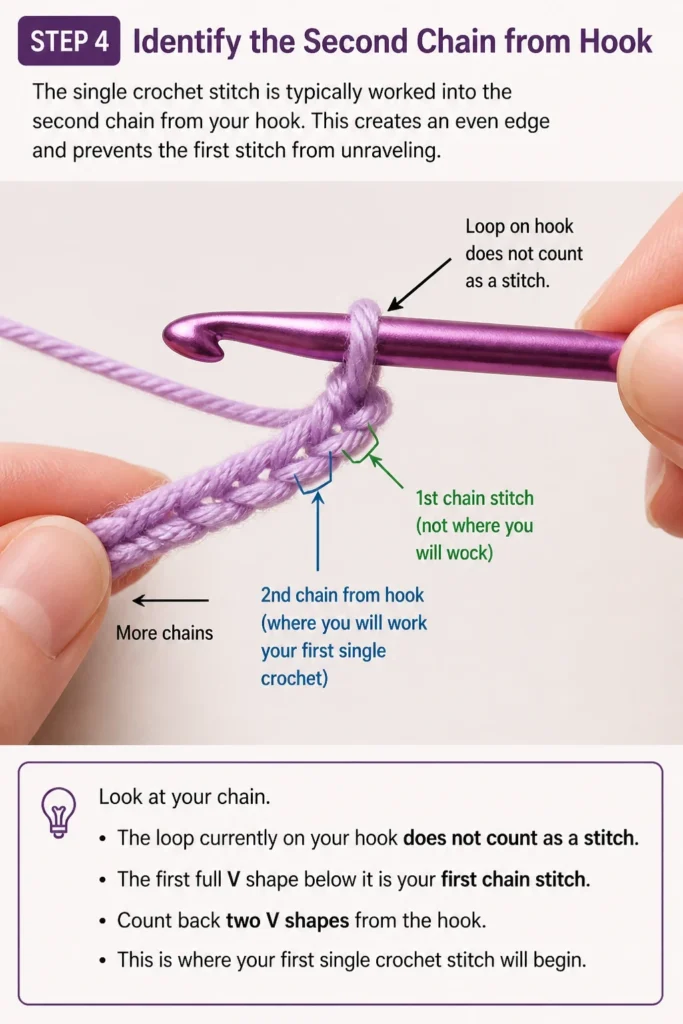
Look at your chain. The loop currently on your hook does not count as a stitch. The first full “V” shape below it is your first chain stitch.
Count back two “V” shapes from the hook. This is where your first single crochet stitch will begin.
Step 5: Insert Hook into Stitch
Correct hook placement is crucial for creating neat and even stitches. Pay attention to where your hook enters the chain.
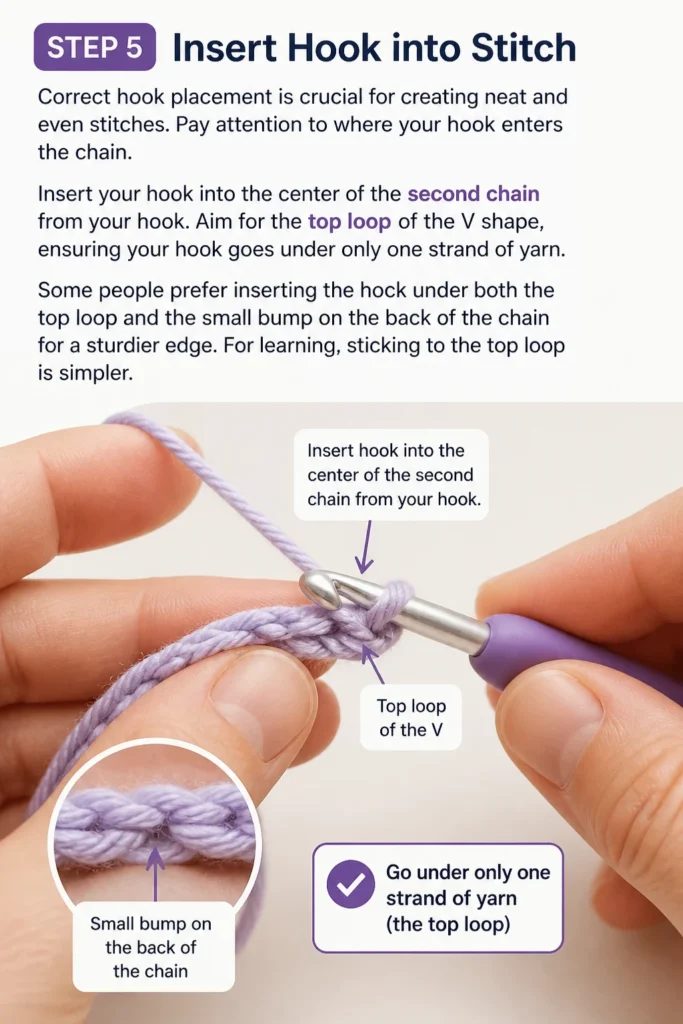
Insert your hook into the center of the second chain from your hook. Aim for the top loop of the “V” shape, ensuring your hook goes under only one strand of yarn.
Some people prefer inserting the hook under both the top loop and the small bump on the back of the chain for a sturdier edge. For learning, sticking to the top loop is simpler.
Step 6: Yarn Over (YO)
Yarning over is a repetitive motion in crochet that prepares the yarn for pulling through loops. It’s fundamental to every stitch.
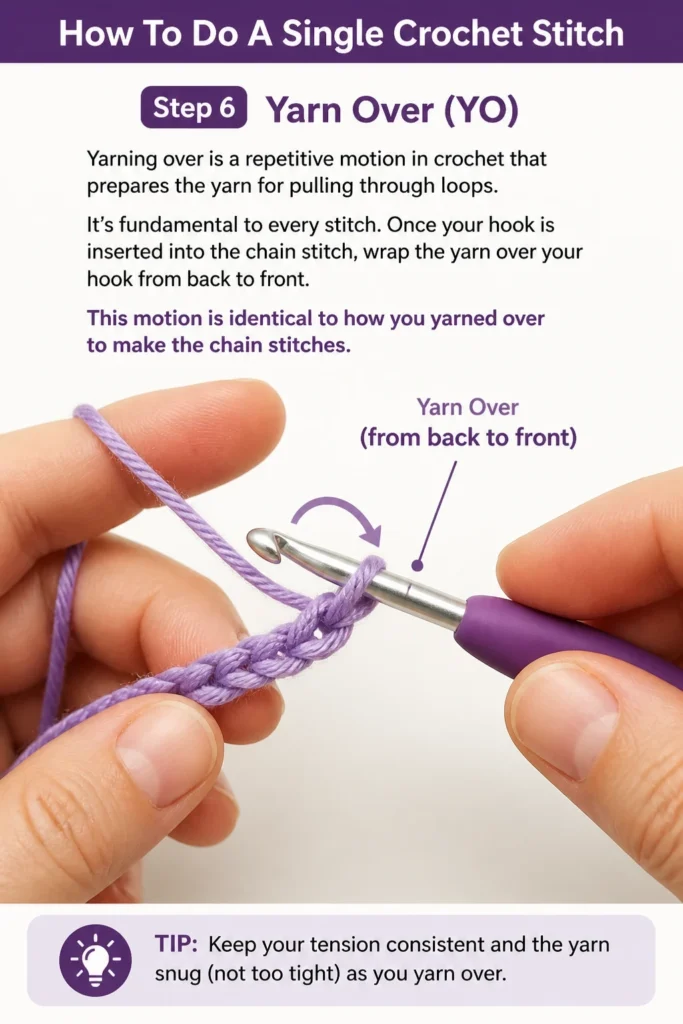
Once your hook is inserted into the chain stitch, wrap the yarn over your hook from back to front. This motion is identical to how you yarned over to make the chain stitches.
Step 7: Pull Up a Loop
After yarning over, the next step is to bring that yarn through the stitch. This creates a new loop on your hook.
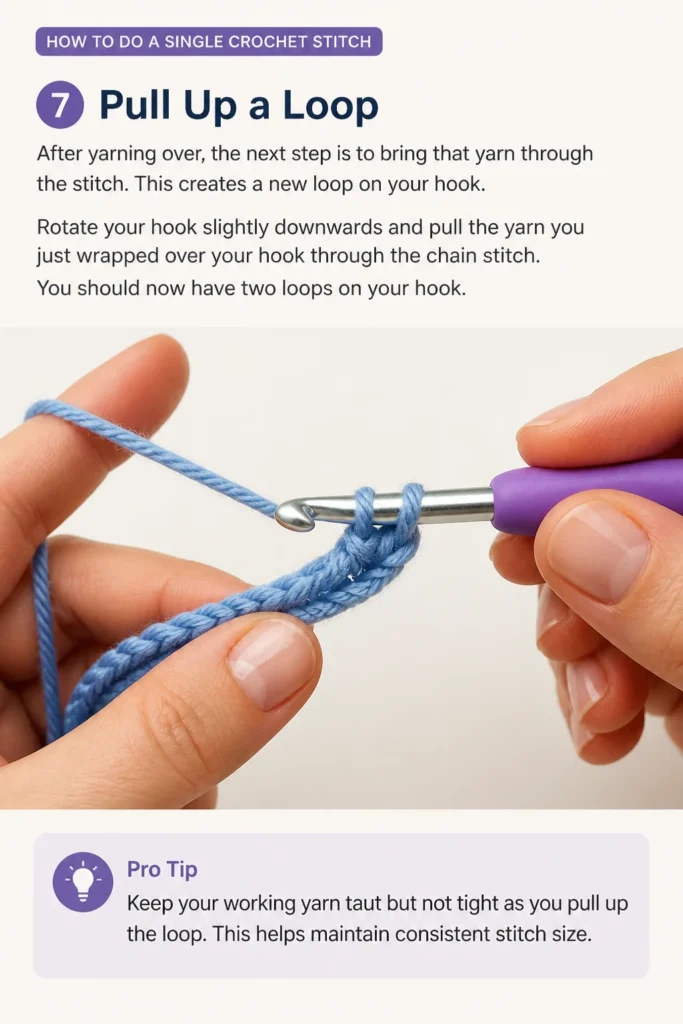
Rotate your hook slightly downwards and pull the yarn you just wrapped over your hook through the chain stitch. You should now have two loops on your hook.
Pro Tip: Keep your working yarn taut but not tight as you pull up the loop. This helps maintain consistent stitch size.
Step 8: Yarn Over Again
You are almost finished with your first single crochet stitch. This second yarn over prepares to close the stitch.
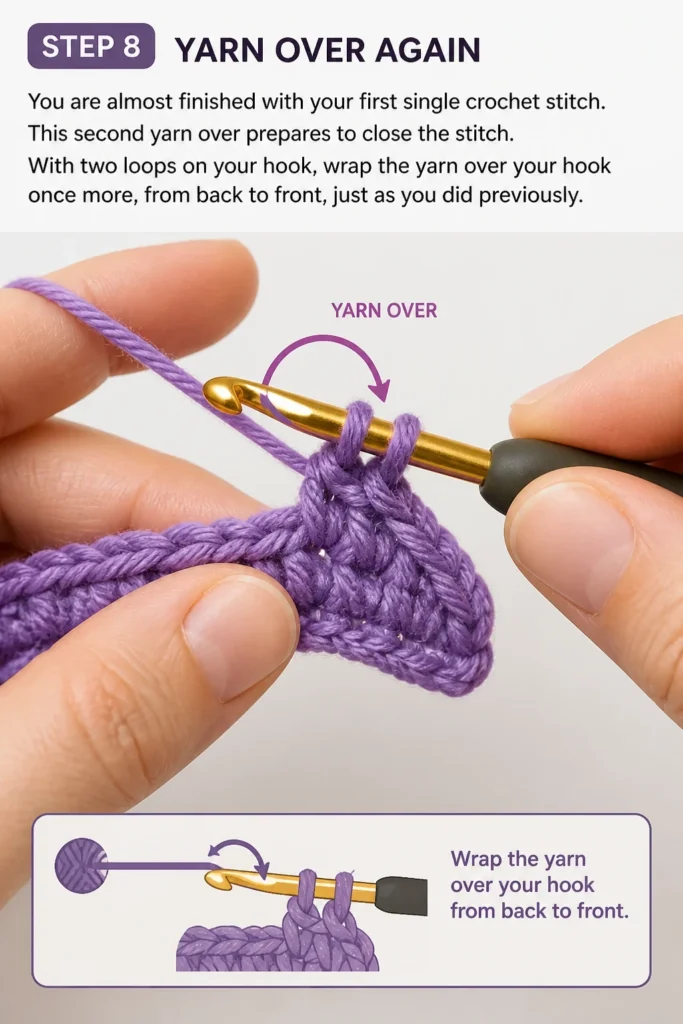
With two loops on your hook, wrap the yarn over your hook once more, from back to front, just as you did previously.
Step 9: Pull Through Both Loops
This is the final step in completing one single crochet stitch. It draws the yarn through the remaining loops on your hook.
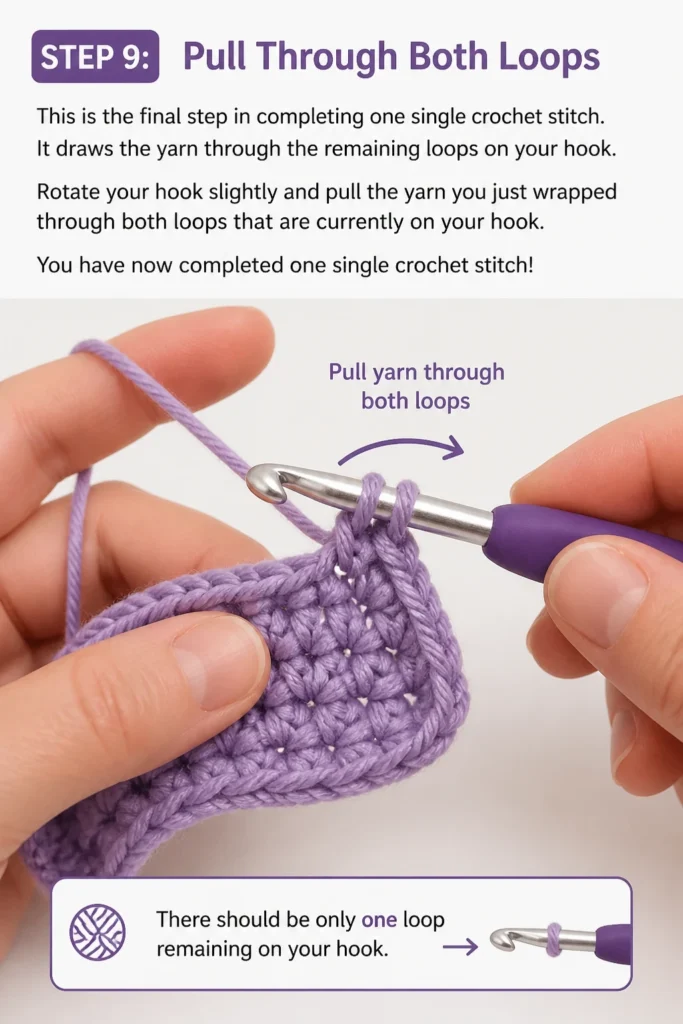
Rotate your hook slightly and pull the yarn you just wrapped through both loops that are currently on your hook.
You have now completed one single crochet stitch! There should be only one loop remaining on your hook.
Step 10: Repeat Across the Row
To create a fabric, you will continue making single crochet stitches into each remaining chain stitch. Consistency is key.
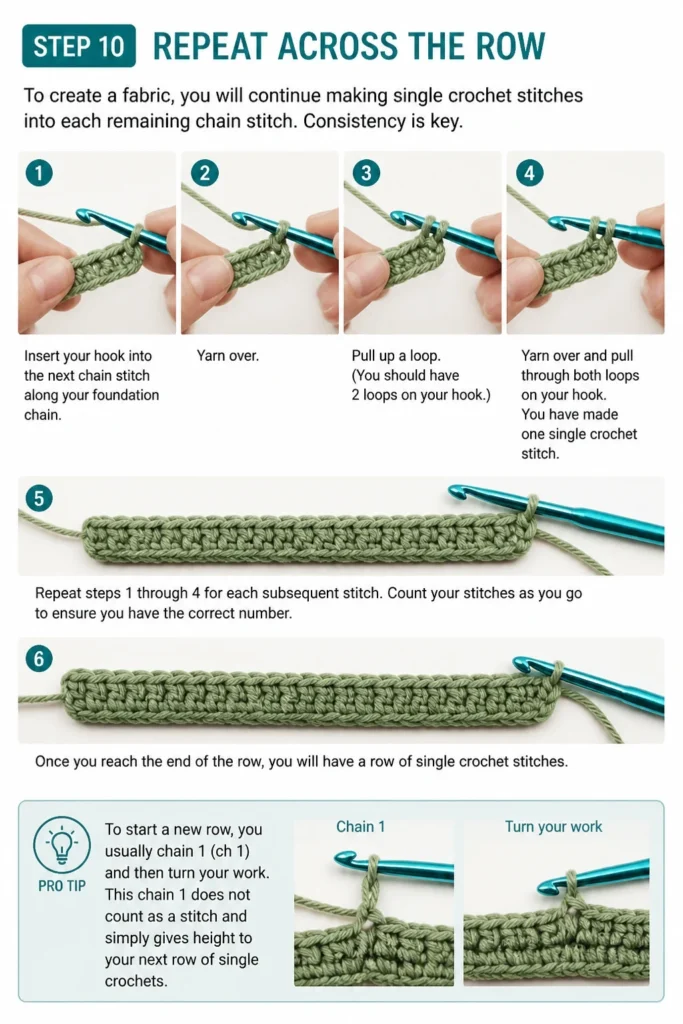
Insert your hook into the next chain stitch along your foundation chain. Repeat steps 6 through 9 for each subsequent stitch.
Count your stitches as you go to ensure you have the correct number. Once you reach the end of the row, you will have a row of single crochet stitches.
Pro Tip: To start a new row, you usually “chain 1” (ch 1) and then turn your work. This chain 1 does not count as a stitch and simply gives height to your next row of single crochets.
Common Mistakes to Avoid
Incorrect Hook Insertion
A common beginner mistake is inserting the hook into the wrong part of the previous stitch. This can lead to holes or an uneven fabric.
Always ensure you are inserting your hook under both loops of the “V” shape of the previous single crochet when working into a row. For the foundation chain, aim for the top loop unless otherwise instructed.
Too Tight or Too Loose Tension
Inconsistent tension is a frequent issue. If your stitches are too tight, they will be hard to work into, and your fabric will be stiff. If they are too loose, your fabric will be gappy and uneven.
Practice holding your yarn and hook in a way that feels comfortable and allows the yarn to flow smoothly. Aim for stitches that are firm enough to hold their shape but loose enough to be flexible.
Skipping Stitches or Adding Extra Stitches
It’s easy to accidentally skip a stitch or create an extra one, especially at the beginning and end of rows. This results in a project that gets wider or narrower than intended.
Always count your stitches at the end of each row. Use stitch markers to mark the first and last stitch of a row, which helps prevent these errors.
Not Turning Your Work Correctly
Forgetting to turn your work or turning it in an inconsistent manner can lead to strange edges and difficulty identifying where to place the next stitch.
After completing a row and making your turning chain (ch 1 for single crochet), always physically rotate your work so the back of the previous row faces you before starting the new row.
Troubleshooting
My Edges Are Uneven
Uneven edges are a common frustration for new crocheters. This usually happens when you skip the first or last stitch, or accidentally add an extra stitch at the beginning or end of a row.
To fix this, make sure to count your stitches at the end of every row. Use stitch markers in the first and last stitch of each row to clearly identify where to begin and end your next row.
My Fabric Is Curling
If your crocheted fabric is curling, it often means your tension is too tight. Single crochet is a dense stitch, and if worked too tightly, it can cause the fabric to pull inward.
Try using a slightly larger hook size. Consciously relax your grip on the yarn and hook. Practice making your stitches a little looser so they have more room to lay flat.
There Are Holes in My Work
Holes in your crochet fabric usually indicate that you’ve missed a stitch somewhere in the row. This leaves a gap where a stitch should have been.
Carefully retrace your steps and count your stitches. Ensure you are working into every stitch from the previous row and not accidentally skipping any.
Key Takeaways
- The slip knot is your adjustable starting point for all crochet projects.
- A consistent foundation chain is essential for a straight and even first row.
- Always work into the second chain from the hook for your first single crochet.
- Maintain even tension throughout your work for consistent stitch size and fabric appearance.
- Counting stitches at the end of each row helps prevent uneven edges and shape distortion.
- Practice is key to mastering the single crochet stitch and building muscle memory.
Frequently Asked Questions
What can I make with just a single crochet stitch?
The single crochet stitch is incredibly versatile. You can create dishcloths, placemats, scarves, blankets, sturdy bags, and even amigurumi (crocheted stuffed toys) using only this stitch.
Is single crochet hard to learn?
Single crochet is considered one of the easiest stitches for beginners to learn. It involves a simple, repetitive motion that quickly becomes intuitive with practice. Don’t be discouraged if it feels awkward at first.
How do I count single crochet stitches?
Each single crochet stitch looks like a small “V” shape or a horizontal bar on top. Count these “V”s across the top edge of your row. The turning chain does not count as a stitch.
What does “yarn over” mean?
Yarn over (YO) means to wrap your working yarn over your crochet hook from the back to the front. This action is fundamental to forming new loops and stitches.
Our Top Recommended Finds
- Ergonomic Crochet Hook Set: Comfortable handles reduce hand fatigue, making long crochet sessions more enjoyable.
- Beginner-Friendly Worsted Weight Yarn: Smooth acrylic or cotton yarn in a light color is perfect for seeing your stitches clearly.
- Locking Stitch Markers: These small plastic clips help you keep track of your first and last stitches, preventing common mistakes.
Your Crochet Journey Starts Now
You now have the knowledge to successfully create a single crochet stitch. This fundamental technique is the gateway to countless beautiful creations.
Don’t be afraid to unravel and start again if your first attempts aren’t perfect. Every stitch is a learning opportunity.
Grab your hook and yarn, follow these steps, and begin building your confidence in the wonderful world of crochet today. What will you make first?